
Recently, we’ve had a couple of potential customers mention their preference for using Supabase in their tech stack and how easy it makes it to build on top of PostgreSQL. They asked us if DoltHub had any similar product to Supabase, and we explained that we currently do not. In fact, most of our engineering team was unfamiliar with Supabase. I personally had never used it before, but I was curious why it was getting such strong reviews from those we spoke to.
So, to understand first-hand what made people like this product, I decided to try out Supabase and get a sense of what it does, how it works, and why it’s valuable. Today’s blog is an overview of Supabase’s core features based on my experience using the product for the first time. This is not a comprehensive overview of Supabase by any means. But, if you’re brand new to the product, as I was, I hope this blog will give you more information and encourage you to try it yourself. I think it’s worth it.
What is Supabase?#
I’d describe Supabase as a “backend in a box”. It packages a Postgres database with extensible backend services, including a REST API, that make it easy to build applications quickly. If you have experience building new applications from scratch, you know there is a lot of boilerplate code to write and infrastructure to set up in order to make the application functional and secure, but Supabase takes care of a lot of this boilerplate code for you. It also makes extending and managing this backend ergonomic and flexible.
Supabase offers a number of deployment options, but to try it out for the first time, I used the local development stack setup, which involves running the Supabase CLI and spinning up its services via Docker.
I find this approach helps me get a sense of new tools quickly and understand how Supabase’s features and services work together.
The CLI starts several services that work together around Postgres. In my local setup, the stack consists of the following:
-
Postgres, the application database. It stores application data, user accounts, and file metadata, runs SQL functions, and enforces access policies.
-
Kong, the API gateway. This service routes requests from the project’s API URL to the appropriate service.
-
PostgREST, the REST API service. This exposes database tables, views, and functions over standard HTTP.
-
Auth (formerly GoTrue), the authentication service. It handles signups, logins, and sessions, and issues authentication tokens.
-
Storage, an S3-compatible object storage service. This handles file uploads and downloads, with metadata and access policies stored in the Postgres service.
-
Realtime, the event coordination service. This delivers database changes, broadcast messages, and presence updates over WebSockets.
-
Edge Runtime, the service that executes Edge Functions. This runs custom JavaScript and TypeScript Edge Functions using a Deno-based runtime.
-
Studio, the admin UI service. This provides the browser dashboard for managing the database and other Supabase services.
-
postgres-meta, an internal service that provides a database management API used by Studio to inspect tables and run SQL queries.
-
Mailpit, an email testing service. It captures local test emails so they can be inspected in the browser.
-
Vector and Logflare, which collect and process service logs for viewing in Studio.
I didn’t experiment with every service listed above, just the ones that seemed most immediately useful to me. You can find a complete guide and architecture overview here if you’re curious.
To jump right into using Supabase, I decided to build a small browser-based todo list application and use this as a mechanism for trying some interesting features.
I used an AI agent to make building this app fast work. We went with React in TypeScript, built with Vite for the frontend, and left the backend all Supabase. Interestingly, this meant that the backend was essentially just SQL, since Supabase uses so many of Postgres’ features that it almost serves as the complete backend layer, encompassing the data, domain, and service layers altogether.
The Supabase CLI#
To start, I initialized a new Git repository where my application code and Supabase configuration would live.
Like Git, Supabase can be initialized in the repository root. I ran:
$ supabase initinit creates a supabase directory in the project root and writes the project’s configuration to supabase/config.toml. In the generated file you’ll see configuration options with defaults and clear comments explaining what each setting controls.
Expand to view supabase/config.toml
# For detailed configuration reference documentation, visit:
# https://supabase.com/docs/guides/local-development/cli/config
# A string used to distinguish different Supabase projects on the same host. Defaults to the
# working directory name when running `supabase init`.
project_id = "supa_todo"

[api]
enabled = true
# Port to use for the API URL.
port = 54321
# Schemas to expose in your API. Tables, views and stored procedures in this schema will get API
# endpoints. `public` and `graphql_public` schemas are included by default.
schemas = ["public", "graphql_public"]
# Extra schemas to add to the search_path of every request.
extra_search_path = ["public", "extensions"]
# The maximum number of rows returns from a view, table, or stored procedure. Limits payload size
# for accidental or malicious requests.
max_rows = 1000
# Controls whether new tables, views, sequences and functions created in the `public` schema by
# `postgres` are reachable through the Data API roles (`anon`, `authenticated`, `service_role`)
# without explicit GRANTs, matching the cloud default. Set to `false` to require explicit GRANTs
# instead. Left unset, a fresh project falls back to `true`.
# auto_expose_new_tables = true

[api.tls]
# Enable HTTPS endpoints locally using a self-signed certificate.
enabled = false
# Paths to self-signed certificate pair.
# cert_path = "../certs/my-cert.pem"
# key_path = "../certs/my-key.pem"

[db]
# Port to use for the local database URL.
port = 54322
# Port used by db diff command to initialize the shadow database.
shadow_port = 54320
# Maximum amount of time to wait for health check when starting the local database.
health_timeout = "2m"
# The database major version to use. This has to be the same as your remote database's. Run `SHOW
# server_version;` on the remote database to check.
major_version = 17

[db.pooler]
enabled = false
# Port to use for the local connection pooler.
port = 54329
# Specifies when a server connection can be reused by other clients.
# Configure one of the supported pooler modes: `transaction`, `session`.
pool_mode = "transaction"
# How many server connections to allow per user/database pair.
default_pool_size = 20
# Maximum number of client connections allowed.
max_client_conn = 100

# [db.vault]
# secret_key = "env(SECRET_VALUE)"

[db.migrations]
# If disabled, migrations will be skipped during a db push or reset.
enabled = true
# Specifies an ordered list of schema files, directories, or glob patterns that describe your database.
# Supports paths relative to supabase directory: "./schemas/*.sql", "./database".
schema_paths = []

[db.seed]
# If enabled, seeds the database after migrations during a db reset.
enabled = true
# Specifies an ordered list of seed files to load during db reset.
# Supports glob patterns relative to supabase directory: "./seeds/*.sql"
sql_paths = ["./seed.sql"]

[db.network_restrictions]
# Enable management of network restrictions.
enabled = false
# List of IPv4 CIDR blocks allowed to connect to the database.
# Defaults to allow all IPv4 connections. Set empty array to block all IPs.
allowed_cidrs = ["0.0.0.0/0"]
# List of IPv6 CIDR blocks allowed to connect to the database.
# Defaults to allow all IPv6 connections. Set empty array to block all IPs.
allowed_cidrs_v6 = ["::/0"]

# Uncomment to reject non-secure connections to the database.
# [db.ssl_enforcement]
# enabled = true

[realtime]
enabled = true
# Bind realtime via either IPv4 or IPv6. (default: IPv4)
# ip_version = "IPv6"
# The maximum length in bytes of HTTP request headers. (default: 4096)
# max_header_length = 4096

[studio]
enabled = true
# Port to use for Supabase Studio.
port = 54323
# External URL of the API server that frontend connects to.
api_url = "http://127.0.0.1"
# OpenAI API Key to use for Supabase AI in the Supabase Studio.
openai_api_key = "env(OPENAI_API_KEY)"

# Email testing server. Emails sent with the local dev setup are not actually sent - rather, they
# are monitored, and you can view the emails that would have been sent from the web interface.
[local_smtp]
enabled = true
# Port to use for the email testing server web interface.
port = 54324
# Uncomment to expose additional ports for testing user applications that send emails.
# smtp_port = 54325
# pop3_port = 54326
# admin_email = "admin@email.com"
# sender_name = "Admin"

[storage]
enabled = true
# The maximum file size allowed (e.g. "5MB", "500KB").
file_size_limit = "50MiB"

# Uncomment to configure local storage buckets
# [storage.buckets.images]
# public = false
# file_size_limit = "50MiB"
# allowed_mime_types = ["image/png", "image/jpeg"]
# objects_path = "./images"

# Allow connections via S3 compatible clients
[storage.s3_protocol]
enabled = true

# Image transformation API is available to Supabase Pro plan.
# [storage.image_transformation]
# enabled = true

# Store analytical data in S3 for running ETL jobs over Iceberg Catalog
# This feature is only available on the hosted platform.
[storage.analytics]
enabled = false
max_namespaces = 5
max_tables = 10
max_catalogs = 2

# Analytics Buckets is available to Supabase Pro plan.
# [storage.analytics.buckets.my-warehouse]

# Store vector embeddings in S3 for large and durable datasets
[storage.vector]
enabled = true
max_buckets = 10
max_indexes = 5

# Vector Buckets is available to Supabase Pro plan.
# [storage.vector.buckets.documents-openai]

[auth]
enabled = true
# The base URL of your website. Used as an allow-list for redirects and for constructing URLs used
# in emails.
site_url = "http://127.0.0.1:3000"
# The public URL that Auth serves on. Defaults to the API external URL with `/auth/v1` appended.
# external_url = ""
# A list of *exact* URLs that auth providers are permitted to redirect to post authentication.
additional_redirect_urls = ["https://127.0.0.1:3000"]
# How long tokens are valid for, in seconds. Defaults to 3600 (1 hour), maximum 604,800 (1 week).
jwt_expiry = 3600
# JWT issuer URL. If not set, defaults to auth.external_url.
# jwt_issuer = ""
# Path to JWT signing key. DO NOT commit your signing keys file to git.
# signing_keys_path = "./signing_keys.json"
# If disabled, the refresh token will never expire.
enable_refresh_token_rotation = true
# Allows refresh tokens to be reused after expiry, up to the specified interval in seconds.
# Requires enable_refresh_token_rotation = true.
refresh_token_reuse_interval = 10
# Allow/disallow new user signups to your project.
enable_signup = true
# Allow/disallow anonymous sign-ins to your project.
enable_anonymous_sign_ins = false
# Allow/disallow testing manual linking of accounts
enable_manual_linking = false
# Passwords shorter than this value will be rejected as weak. Minimum 6, recommended 8 or more.
minimum_password_length = 6
# Passwords that do not meet the following requirements will be rejected as weak. Supported values
# are: `letters_digits`, `lower_upper_letters_digits`, `lower_upper_letters_digits_symbols`
password_requirements = ""

# Configure passkey sign-ins.
# [auth.passkey]
# enabled = false

# Configure WebAuthn relying party settings (required when passkey is enabled).
# [auth.webauthn]
# rp_display_name = "Supabase"
# rp_id = "localhost"
# rp_origins = ["http://127.0.0.1:3000"]

[auth.rate_limit]
# Number of emails that can be sent per hour. Requires auth.email.smtp to be enabled.
email_sent = 2
# Number of SMS messages that can be sent per hour. Requires auth.sms to be enabled.
sms_sent = 30
# Number of anonymous sign-ins that can be made per hour per IP address. Requires enable_anonymous_sign_ins = true.
anonymous_users = 30
# Number of sessions that can be refreshed in a 5 minute interval per IP address.
token_refresh = 150
# Number of sign up and sign-in requests that can be made in a 5 minute interval per IP address (excludes anonymous users).
sign_in_sign_ups = 30
# Number of OTP / Magic link verifications that can be made in a 5 minute interval per IP address.
token_verifications = 30
# Number of Web3 logins that can be made in a 5 minute interval per IP address.
web3 = 30

# Configure one of the supported captcha providers: `hcaptcha`, `turnstile`.
# [auth.captcha]
# enabled = true
# provider = "hcaptcha"
# secret = ""

[auth.email]
# Allow/disallow new user signups via email to your project.
enable_signup = true
# If enabled, a user will be required to confirm any email change on both the old, and new email
# addresses. If disabled, only the new email is required to confirm.
double_confirm_changes = true
# If enabled, users need to confirm their email address before signing in.
enable_confirmations = false
# If enabled, users will need to reauthenticate or have logged in recently to change their password.
secure_password_change = false
# Controls the minimum amount of time that must pass before sending another signup confirmation or password reset email.
max_frequency = "1s"
# Number of characters used in the email OTP.
otp_length = 6
# Number of seconds before the email OTP expires (defaults to 1 hour).
otp_expiry = 3600

# Use a production-ready SMTP server
# [auth.email.smtp]
# enabled = true
# host = "smtp.sendgrid.net"
# port = 587
# user = "apikey"
# pass = "env(SENDGRID_API_KEY)"
# admin_email = "admin@email.com"
# sender_name = "Admin"

# Uncomment to customize email template
# [auth.email.template.invite]
# subject = "You have been invited"
# content_path = "./supabase/templates/invite.html"

# Uncomment to customize notification email template
# [auth.email.notification.password_changed]
# enabled = true
# subject = "Your password has been changed"
# content_path = "./supabase/templates/password_changed_notification.html"

[auth.sms]
# Allow/disallow new user signups via SMS to your project.
enable_signup = false
# If enabled, users need to confirm their phone number before signing in.
enable_confirmations = false
# Template for sending OTP to users
template = "Your code is {{ .Code }}"
# Controls the minimum amount of time that must pass before sending another sms otp.
max_frequency = "5s"

# Use pre-defined map of phone number to OTP for testing.
# [auth.sms.test_otp]
# 4152127777 = "123456"

# Configure logged in session timeouts.
# [auth.sessions]
# Force log out after the specified duration.
# timebox = "24h"
# Force log out if the user has been inactive longer than the specified duration.
# inactivity_timeout = "8h"

# This hook runs before a new user is created and allows developers to reject the request based on the incoming user object.
# [auth.hook.before_user_created]
# enabled = true
# uri = "pg-functions://postgres/auth/before-user-created-hook"

# This hook runs before a token is issued and allows you to add additional claims based on the authentication method used.
# [auth.hook.custom_access_token]
# enabled = true
# uri = "pg-functions://<database>/<schema>/<hook_name>"

# Configure one of the supported SMS providers: `twilio`, `twilio_verify`, `messagebird`, `textlocal`, `vonage`.
[auth.sms.twilio]
enabled = false
account_sid = ""
message_service_sid = ""
# DO NOT commit your Twilio auth token to git. Use environment variable substitution instead:
auth_token = "env(SUPABASE_AUTH_SMS_TWILIO_AUTH_TOKEN)"

# Multi-factor-authentication is available to Supabase Pro plan.
[auth.mfa]
# Control how many MFA factors can be enrolled at once per user.
max_enrolled_factors = 10

# Control MFA via App Authenticator (TOTP)
[auth.mfa.totp]
enroll_enabled = false
verify_enabled = false

# Configure MFA via Phone Messaging
[auth.mfa.phone]
enroll_enabled = false
verify_enabled = false
otp_length = 6
template = "Your code is {{ .Code }}"
max_frequency = "5s"

# Configure MFA via WebAuthn
# [auth.mfa.web_authn]
# enroll_enabled = true
# verify_enabled = true

# Use an external OAuth provider. The full list of providers are: `apple`, `azure`, `bitbucket`,
# `discord`, `facebook`, `github`, `gitlab`, `google`, `keycloak`, `linkedin_oidc`, `notion`, `twitch`,
# `twitter`, `x`, `slack`, `spotify`, `workos`, `zoom`.
[auth.external.apple]
enabled = false
client_id = ""
# DO NOT commit your OAuth provider secret to git. Use environment variable substitution instead:
secret = "env(SUPABASE_AUTH_EXTERNAL_APPLE_SECRET)"
# Overrides the default auth callback URL derived from auth.external_url.
redirect_uri = ""
# Overrides the default auth provider URL. Used to support self-hosted gitlab, single-tenant Azure,
# or any other third-party OIDC providers.
url = ""
# If enabled, the nonce check will be skipped. Required for local sign in with Google auth.
skip_nonce_check = false
# If enabled, it will allow the user to successfully authenticate when the provider does not return an email address.
email_optional = false

# Allow Solana wallet holders to sign in to your project via the Sign in with Solana (SIWS, EIP-4361) standard.
# You can configure "web3" rate limit in the [auth.rate_limit] section and set up [auth.captcha] if self-hosting.
[auth.web3.solana]
enabled = false

# Use Firebase Auth as a third-party provider alongside Supabase Auth.
[auth.third_party.firebase]
enabled = false
# project_id = "my-firebase-project"

# Use Auth0 as a third-party provider alongside Supabase Auth.
[auth.third_party.auth0]
enabled = false
# tenant = "my-auth0-tenant"
# tenant_region = "us"

# Use AWS Cognito (Amplify) as a third-party provider alongside Supabase Auth.
[auth.third_party.aws_cognito]
enabled = false
# user_pool_id = "my-user-pool-id"
# user_pool_region = "us-east-1"

# Use Clerk as a third-party provider alongside Supabase Auth.
[auth.third_party.clerk]
enabled = false
# Obtain from https://clerk.com/setup/supabase
# domain = "example.clerk.accounts.dev"

# OAuth server configuration
[auth.oauth_server]
# Enable OAuth server functionality
enabled = false
# Path for OAuth consent flow UI
authorization_url_path = "/oauth/consent"
# Allow dynamic client registration
allow_dynamic_registration = false

[edge_runtime]
enabled = true
# Supported request policies: `oneshot`, `per_worker`.
# `per_worker` (default) — enables hot reload during local development.
# `oneshot` — fallback mode if hot reload causes issues (e.g. in large repos or with symlinks).
policy = "per_worker"
# Port to attach the Chrome inspector for debugging edge functions.
inspector_port = 8083
# The Deno major version to use.
deno_version = 2

# [edge_runtime.secrets]
# secret_key = "env(SECRET_VALUE)"

[analytics]
enabled = true
port = 54327
# Configure one of the supported backends: `postgres`, `bigquery`.
backend = "postgres"

# Experimental features may be deprecated any time
[experimental]
# Configures Postgres storage engine to use OrioleDB (S3)
orioledb_version = ""
# Configures S3 bucket URL, eg. <bucket_name>.s3-<region>.amazonaws.com
s3_host = "env(S3_HOST)"
# Configures S3 bucket region, eg. us-east-1
s3_region = "env(S3_REGION)"
# Configures AWS_ACCESS_KEY_ID for S3 bucket
s3_access_key = "env(S3_ACCESS_KEY)"
# Configures AWS_SECRET_ACCESS_KEY for S3 bucket
s3_secret_key = "env(S3_SECRET_KEY)"

# pg-delta is the schema diff engine for db diff / db pull / db remote commit.
# Set enabled = false to fall back to the legacy migra engine.
[experimental.pgdelta]
enabled = true
# Directory under `supabase/` where declarative files are written.
# declarative_schema_path = "./schemas"
# JSON string passed through to pg-delta SQL formatting. When omitted, SQL is
# formatted with uppercase keywords, indent 2, max width 180, trailing commas,
# and column/key alignment. Set to "null" to emit raw, unformatted SQL.
# format_options = "{\"keywordCase\":\"upper\",\"indent\":2,\"maxWidth\":180,\"commaStyle\":\"trailing\"}"
I didn’t change any defaults. With Docker running, I ran start next.
$ supabase startThis does a bunch of initialization work in addition to downloading the required Docker images for all the services, then starts them. When everything is running, it finishes by printing the endpoints, URLs, and credentials I’d need as the admin to use my Supabase instance. Here’s the output, with the key values replaced by placeholders:
╭──────────────────────────────────────╮
│ 🔧 Development Tools                 │
├─────────┬────────────────────────────┤
│ Studio  │ http://127.0.0.1:54323     │
│ Mailpit │ http://127.0.0.1:54324     │
│ MCP     │ http://127.0.0.1:54321/mcp │
╰─────────┴────────────────────────────╯

╭─────────────────────────────────────────────────╮
│ 🌐 APIs                                         │
├─────────────┬───────────────────────────────────┤
│ Project URL │ http://127.0.0.1:54321            │
│ REST        │ http://127.0.0.1:54321/rest/v1    │
│ GraphQL     │ http://127.0.0.1:54321/graphql/v1 │
╰─────────────┴───────────────────────────────────╯

╭───────────────────────────────────────────────────────────────╮
│ ⛁ Database                                                    │
├─────┬─────────────────────────────────────────────────────────┤
│ URL │ postgresql://postgres:postgres@127.0.0.1:54322/postgres │
╰─────┴─────────────────────────────────────────────────────────╯

╭──────────────────────────────────────────────────────────────╮
│ 🔑 Authentication Keys                                       │
├─────────────┬────────────────────────────────────────────────┤
│ Publishable │ <local publishable key>                        │
│ Secret      │ <local secret key>                             │
╰─────────────┴────────────────────────────────────────────────╯

╭───────────────────────────────────────────────────────────────────────────────╮
│ 📦 Storage (S3)                                                               │
├────────────┬──────────────────────────────────────────────────────────────────┤
│ URL        │ http://127.0.0.1:54321/storage/v1/s3                             │
│ Access Key │ <local S3 access key>                                            │
│ Secret Key │ <local S3 secret key>                                            │
│ Region     │ local                                                            │
╰────────────┴──────────────────────────────────────────────────────────────────╯
The Studio URL opens the local Supabase admin dashboard. I opened it and clicked around a bit; it was very sleek and surprisingly comprehensive. Studio alone could likely be its own blog post.
MCP is the endpoint for connecting an AI agent to my local project through Supabase’s Model Context Protocol server.
Mailpit is a local email testing service that captures messages sent from this instance so I can inspect them in my browser instead of sending them to real recipients. I didn’t end up using Mailpit in my test application.
The Project APIs include both GraphQL and REST endpoints that my frontend client can access over HTTP. It’s pretty cool that these services were already running after supabase start, without me having to stand them up manually. The endpoints and data they expose are actually derived from the database schema and its permissions.
The Database URL is a connection string for accessing the Postgres instance that Supabase is running, using a SQL client.
The API keys identify the application component making a request to the API service. The publishable key is safe to use in the browser, while the secret key is only for trusted backend code. It also provides privileged access that bypasses Postgres’ row-level security.
Finally, the Storage section provides an S3-compatible endpoint and credentials for object storage clients. This service is not completely standalone as it keeps file metadata stored in Postgres and uses access policies defined there as well. However, the object bytes live outside the database. In this local deployment, they are stored somewhere on my disk through Docker.
Conveniently, if you need these details again, you can see them by simply running:
$ supabase statusA Postgres Foundation#
Once Supabase was initialized, the starting point for my todo list app was a schema definition that allowed me to store todo items and associate them with an application user.
create table public.todos (
  id uuid primary key default gen_random_uuid(),
  user_id uuid not null references auth.users(id) on delete cascade,
  title text not null check (char_length(trim(title)) > 0),
  is_complete boolean not null default false,
  created_at timestamptz not null default now()
);

create index todos_user_id_idx on public.todos (user_id);

alter table public.todos enable row level security;
Based on the definition above, each todo will have an owner, title, completion flag, and creation time. Its owner, an app user, will be managed by Supabase’s Auth service in the managed table auth.users.
One of the best things about Supabase, I’ve learned, is that you get users and auth out-of-the-box, which saves a bunch of time when you’re trying to launch an app quickly.
To do this, Supabase creates and manages an auth schema inside the same Postgres database as my application tables, which live in the public schema.
The auth schema contains the auth.users table, which stores account information, along with other tables for authentication.
When a user signs in, the running Auth service verifies their credentials by checking the database and creates a new session if they’re valid. Sessions live in the auth.sessions table and the authenticated client receives an access token in the form of a JSON Web Token (JWT), along with a refresh token it can use to obtain new tokens. All this is managed by Supabase, which you can read more about here.
The last statement in my schema SQL snippet is an alter table statement that enables row-level security, or RLS, for short. When this is enabled on a table, application users need both the required table privileges, usually granted through a database role, and matching RLS access policies defined in Postgres to be able to read or modify specific rows. Also note that enabling RLS on a table doesn’t create access policies automatically. I’ll show an example of how that is done a bit later.
Schema Migrations and Diffs#
To get my schema in the database, I used the supabase migration commands. These let me record database schema changes in local SQL files that are applied in order against the running Postgres instance.
The following command creates a new migration file for my table:
$ supabase migration new create_todosAt this stage, the file is empty, but it has a timestamped name and lives under the supabase/migrations directory. I edited the file to contain the schema definition I shared above:
$ cat supabase/migrations/20260918190557_create_todos.sql
create table public.todos (
  id uuid primary key default gen_random_uuid(),
  user_id uuid not null references auth.users(id) on delete cascade,
  title text not null check (char_length(trim(title)) > 0),
  is_complete boolean not null default false,
  created_at timestamptz not null default now()
);

create index todos_user_id_idx on public.todos (user_id);

alter table public.todos enable row level security;
After saving it, I applied the migration with the supabase migration up command:
$ supabase migration up --local
Connecting to local database...
Applying migration 20260918190557_create_todos.sql...
Local database is up to date.
Migrations are applied in timestamp order. Internally, Supabase records each applied migration in a migration history table so that later runs skip migrations already recorded as applied.
I really liked this Supabase feature, personally. I’ve written schema migration code many times before and it was pretty cool to discover I don’t always have to do that and can just have that standard code managed for me.
Turns out that Supabase also supports schema diffs. This enables comparing the actual state of my running database schema with the expected state captured in my local migration files.
For example, I can add a description column to public.todos through Studio’s SQL editor on the fly. This alters my schema without a migration file:
ALTER TABLE "public"."todos"
  ADD COLUMN "description" text;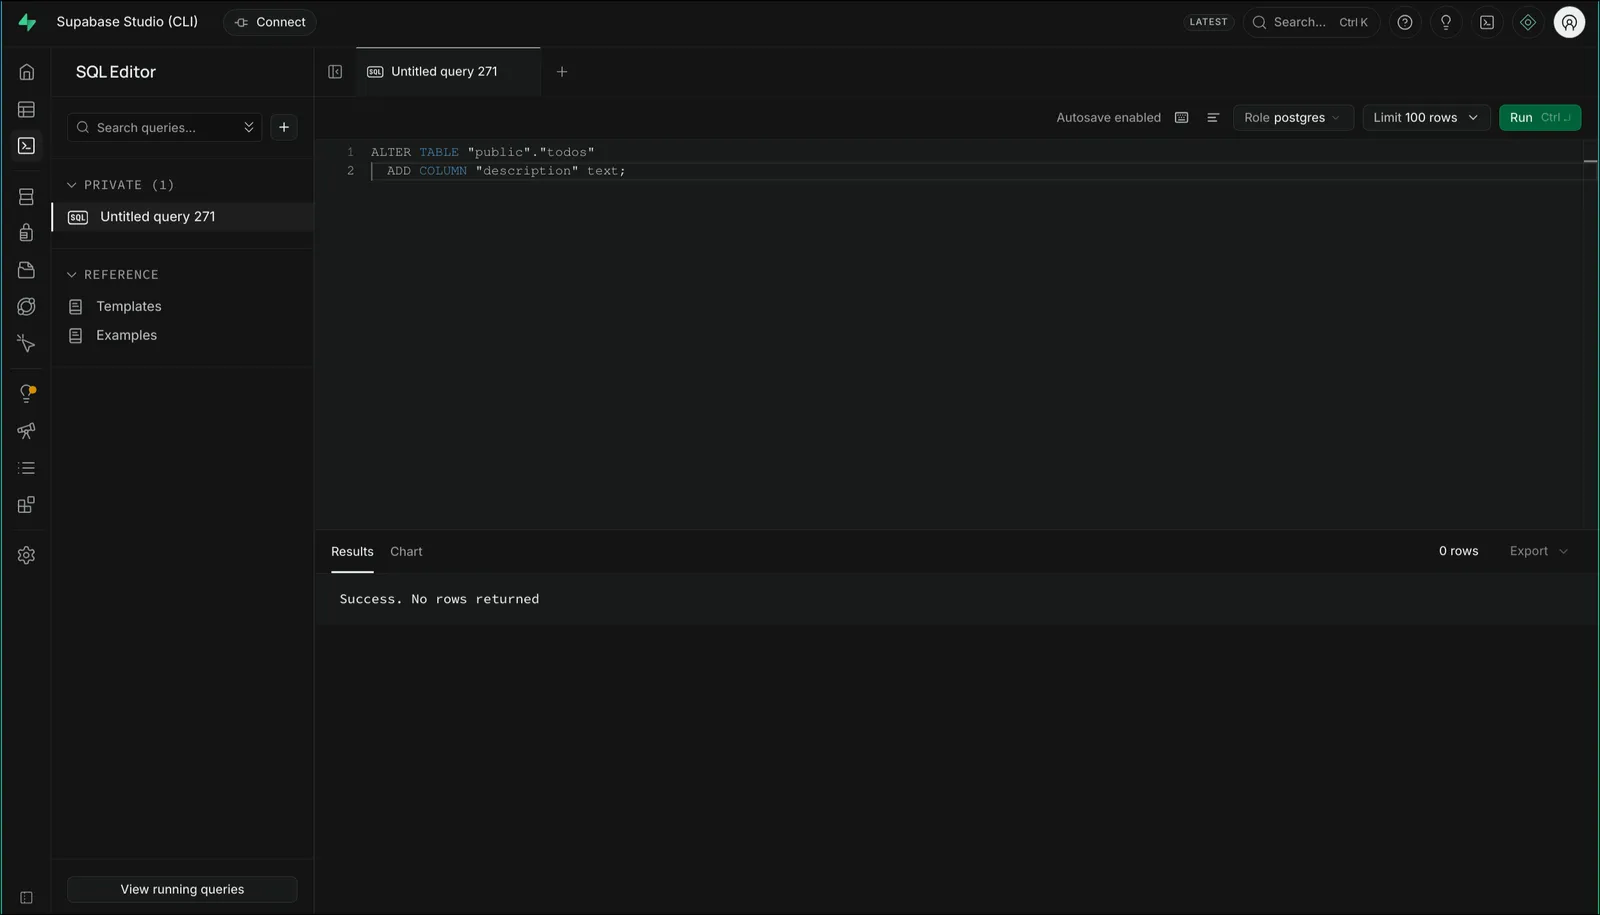
From my terminal, I can see that there is a schema diff I need to capture.
$ supabase db diff
Creating shadow database...
Applying migration 20260918190557_create_todos.sql...
Diffing schemas...
Finished supabase db diff on branch main.

ALTER TABLE "public"."todos"
  ADD COLUMN "description" text;
I can then do so by creating a new migration file:
$ supabase db diff -f add_todo_description
Creating shadow database...
Applying migration 20260918190557_create_todos.sql...
Diffing schemas...
Finished supabase db diff on branch main.
Their diff command works by comparing the local Postgres schema against a shadow Postgres database built from the existing migration files. By default, the diff command prints the SQL needed to account for the difference in state. With -f, it writes that SQL to a new migration file.
A Generated REST API#
Once a table exists in the exposed public schema, Supabase provides a REST endpoint for it through PostgREST immediately. That endpoint supports reading, inserting, updating, and deleting rows, subject to database table permissions and RLS policies. But this is one of the main reasons why I think of Supabase as a backend in a box: you don’t have to write any API handlers yourself. One is generated for you as you flesh out your database schema.
PostgREST, a third-party tool used by Supabase for this, is an HTTP server that turns a Postgres schema into a REST API. Supabase runs it as part of its standard stack, and in my local setup, requests to /rest/v1 go through Supabase’s API gateway to PostgREST, which then queries my running Postgres instance and returns the result as JSON.
PostgREST inspects the database schema to understand table definitions, columns, and relationships it can expose and serves endpoints that do so in a principled manner.
My table public.todos becomes available at /rest/v1/todos. A GET request to this endpoint reads rows in that table, whereas a POST inserts them, a PATCH updates them, and a DELETE removes them. These are all subject to the caller’s database privileges and RLS policies. Additionally, PostgREST lets the client select columns, filter rows, and specify ordering through query parameters that correspond to SQL operations.
It was very easy to hit my REST endpoint directly, even before having frontend application code in place.
First, I put the local publishable key from supabase status into a shell variable:
$ export SUPABASE_PUBLISHABLE_KEY='<your local publishable key>'Then I hit the endpoint with curl:
$ curl -sS --get 'http://127.0.0.1:54321/rest/v1/todos' \
    --header "apikey: $SUPABASE_PUBLISHABLE_KEY" \
    --data-urlencode 'select=id,title,is_complete,description' \
    --data-urlencode 'order=created_at.desc' \
    --write-out '\nHTTP status: %{http_code}\n'
[]
HTTP status: 200
Notice that I included some SQL-like query parameters in my request. The select parameter asks for four columns, including the description column I added in the previous section, and the order parameter requests newest todos first. PostgREST translates those parameters into a SQL query that it executes in Postgres.
At this point, I have a database schema and a working HTTP endpoint, all before connecting the React app.
Connecting the Frontend#
Next, my agent helped me put together a simple todo list frontend using the Supabase JavaScript client, which supports TypeScript.
To connect it to my Supabase backend, I set two environment variables in web/.env.local, using the publishable key from my CLI output:
VITE_SUPABASE_URL=http://127.0.0.1:54321
VITE_SUPABASE_PUBLISHABLE_KEY=<your local publishable key>
Those initialize a shared Supabase client which I could use throughout the app:
import { createClient } from '@supabase/supabase-js'
import type { Database } from './database.types'

export const supabase = createClient<Database>(
  import.meta.env.VITE_SUPABASE_URL,
  import.meta.env.VITE_SUPABASE_PUBLISHABLE_KEY,
)
The first version of the app simply queried the todos table and displayed the results.
const { data, error, status } = await supabase
  .from('todos')
  .select('id, title, is_complete, description')
  .order('created_at', { ascending: false })
In this code snippet, the client is making an HTTP request that hits the public.todos table REST endpoint, and I have a basic HTML page to show the retrieved todos.
But at this point, the app isn’t very interesting since the todos table is empty, and I haven’t registered any users through Supabase Auth. Even if I added a few todo rows directly in SQL, my frontend client query would not actually return any rows anyway, since RLS is enabled on my table and I haven’t added any access policies.
The policies I add will manage access for a couple of users I’m going to create in my app, Alice and Bob. When I make those policies, my goal is to ensure that Alice can only read and write to her list and Bob can only read and write to his.
Authorization with Row-Level Security#
When experimenting with this feature, I first created user accounts for Alice and Bob.
In Supabase Studio, I was able to create them directly in the Authentication tab, using alice@example.com and bob@example.com for their respective email addresses and setting a password for each account.
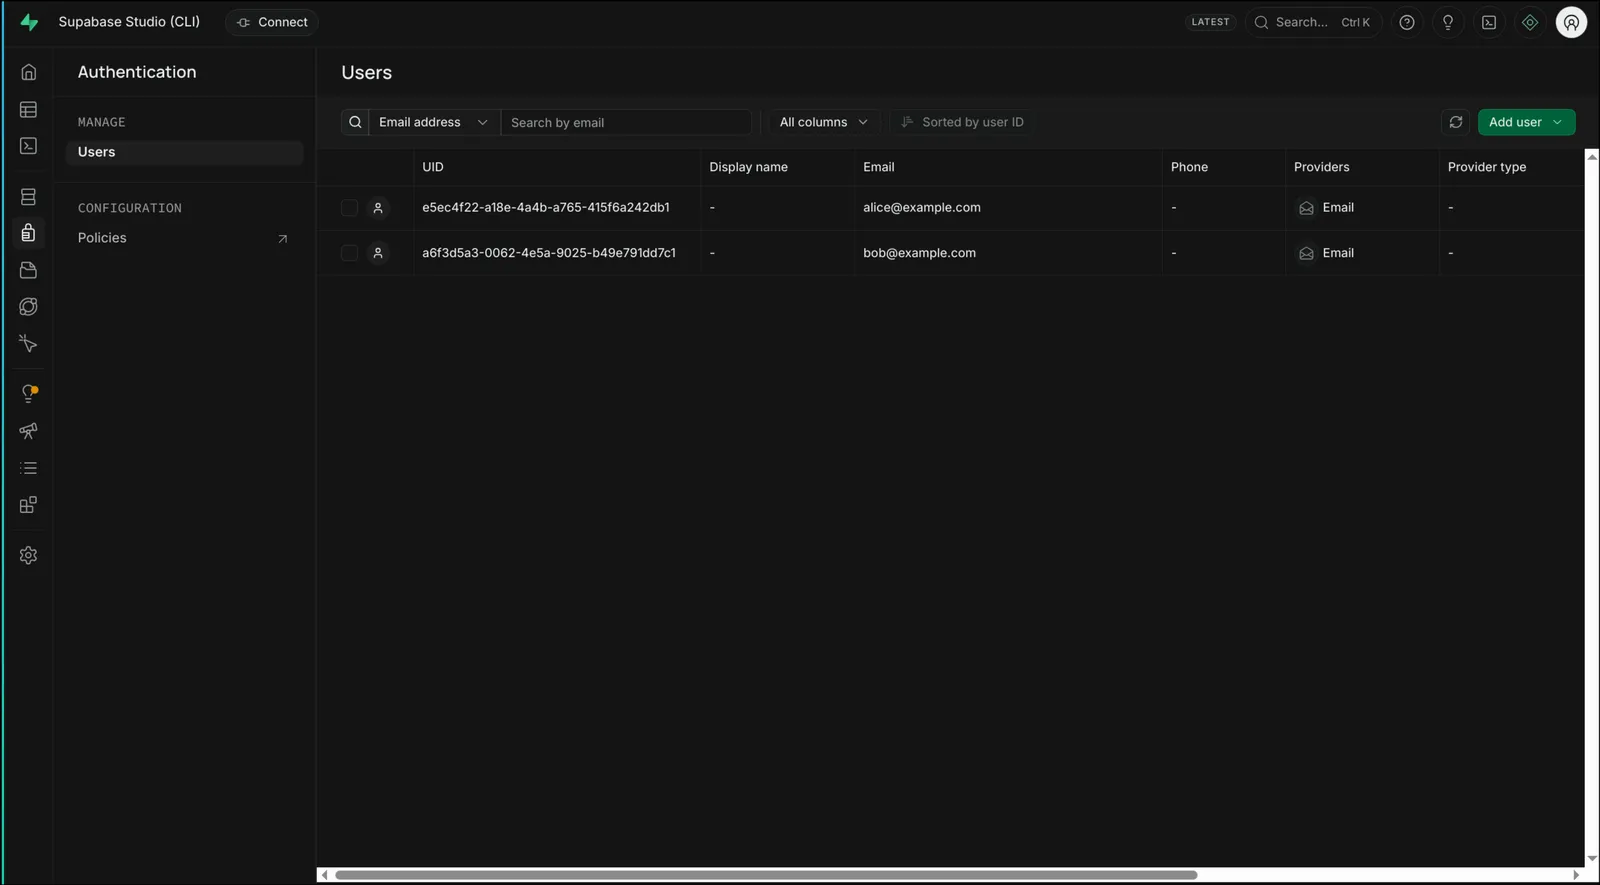
For each account, the Auth service automatically created the corresponding records in the auth.users table and generated a UUID for each user’s primary key, id.
Next, my agent added a super simple login form to my app so that Alice or Bob could sign in with their email and password. The client then sends their session access token with subsequent API requests.
Once login was working, I then defined my first RLS policy that would allow Alice or Bob to read their own todo rows from the todos table:
create policy "Users can read their own todos"
on public.todos
for select
to authenticated
using ((select auth.uid()) = user_id);
My understanding of the statement above is that the to authenticated clause makes this policy apply to requests using the authenticated database role, which Supabase uses for signed-in users. The using condition allows those requests to read rows where auth.uid(), the caller’s user ID, matches the row’s user_id. This ensures Alice only sees her rows and Bob only sees his. Note that they both end up using the same authenticated database role, but their different user IDs keep their lists separate.
I ended up putting these policy definitions in new migration files and applying them.
Since the policy above is just for reads, I added a policy for updates as well, following a similar pattern:
create policy "Users can update their own todos"
on public.todos
for update
to authenticated
using ((select auth.uid()) = user_id)
with check ((select auth.uid()) = user_id);
One difference in this statement is that using restricts the existing rows that can be updated, while with check requires the updated row to still belong to the caller. This means that Alice can change her todo’s completion state, for example, which is a valid change, but she can’t transfer her todo to Bob through this policy, which is invalid.
This is substantially less code than I would have needed to write to implement identity and authorization myself, so this alone makes Supabase a great option for getting an application off the ground quickly.
Storage for File Uploads#
I also wanted to try out the storage endpoint Supabase provided me. I told my agent to allow attachments to todos using Supabase Storage.
The first step to doing this was creating a bucket to hold the attachments, which is done by making an HTTP request to the /storage/v1/bucket endpoint.
Since creating the bucket is an administrative operation, I had to use the key labeled “Secret” under “Authentication Keys” in the supabase status output.
$ export SUPABASE_SECRET_KEY='sb_secret_...'
$ curl -sS --request POST 'http://127.0.0.1:54321/storage/v1/bucket' \
    --header "apikey: $SUPABASE_SECRET_KEY" \
    --header 'Content-Type: application/json' \
    --data '{
      "id": "todo-attachments",
      "name": "todo-attachments",
      "public": false,
      "file_size_limit": 5242880
    }'

{"name":"todo-attachments"}
This created the private todo-attachments bucket. The public: false setting makes it private, and file_size_limit: 5242880 limits each upload to 5 MiB. Like before, I still needed to define access policies in Postgres that would let Alice and Bob upload and retrieve their own todo attachments.
Storage’s access control uses RLS policies on the storage.objects table, which contains file metadata.
To allow signed-in users to work with their attachments, I added the following policies in a migration:
create policy "Users can read their own attachments"
on storage.objects for select to authenticated
using (
  bucket_id = 'todo-attachments'
  and (storage.foldername(name))[1] = (select auth.uid())::text
);

create policy "Users can upload attachments to their own todos"
on storage.objects for insert to authenticated
with check (
  bucket_id = 'todo-attachments'
  and (storage.foldername(name))[1] = (select auth.uid())::text
  and exists (
    select 1 from public.todos
    where todos.id::text = (storage.foldername(name))[2]
      and todos.user_id = (select auth.uid())
  )
);

create policy "Users can remove their own attachments"
on storage.objects for delete to authenticated
using (
  bucket_id = 'todo-attachments'
  and (storage.foldername(name))[1] = (select auth.uid())::text
);
The storage pattern I used for attachments was <user UUID>/<todo UUID>/<filename>.
Each policy above is scoped to the todo-attachments bucket and the authenticated database role. storage.foldername(name) returns the folder components of the object’s path: [1] is the user UUID and [2] is the todo UUID. Comparing the first component with auth.uid() keeps Alice’s files separate from Bob’s.
The upload policy also requires that the second component identify an existing todo owned by the caller. The read and delete policies only check the user’s folder, so users can still retrieve or remove their files after the associated todo has been deleted.
After saving these policies as new migrations and applying them, uploading a file from the browser is a client call like:
const bucket = supabase.storage.from('todo-attachments')

const { error } = await bucket.upload(path, file, {
  upsert: false,
})
And then to download an attachment, the app creates a link for download that is valid for 60 seconds:
const { data, error } = await bucket.createSignedUrl(path, 60)Anyone with this link can download the file until it expires.
Postgres Functions to Extend the API#
At this point, I had a pretty good understanding of Supabase and why it enabled my simple app to work so quickly and effortlessly. It did so by keeping everything as close to Postgres as possible so that it only required a few services on the side to get minimal backend functionality.
My agent then suggested I try extending the REST API with a custom Postgres function.
Essentially, PostgREST will expose a custom database function through an HTTP endpoint, which my frontend can call using supabase.rpc(). So, I used this to add an operation that marks all of the current user’s incomplete todos as complete.
Here was the Postgres function I defined:
create function public.complete_all_todos()
returns integer
language sql
security invoker
set search_path = ''
as $$
  with completed as (
    update public.todos
    set is_complete = true
    where is_complete = false
    returning id
  )
  select count(*)::integer from completed;
$$;

revoke execute on function public.complete_all_todos() from public, anon;
grant execute on function public.complete_all_todos() to authenticated;
This function updates incomplete todos and returns the number updated.
I applied this to my running Postgres instance, and Supabase exposed it through its RPC interface. This allows the frontend code to call it with:
const { data, error } = await supabase.rpc('complete_all_todos')Notice that there’s no user ID argument and no explicit ownership condition in the function body. This is because the function runs as security invoker, which means the caller’s permissions and the existing todo RLS policies still apply to it. For a normal authenticated app user, “all” means the incomplete todos that they are allowed to update, the ones associated with their user_id.
Edge Functions#
Finally, my experimentation led me to Edge Functions. These are server-side functions that run in a separate runtime. I think of them as similar to AWS Lambda functions.
To test one, I added an Edge Function called todo-summary.
$ supabase functions new todo-summaryRunning the command above creates an Edge Function file under the supabase/functions directory with template code already in place.
I just needed to replace the template code with what I wanted my Edge Function to do.
For my app, the implementation was at supabase/functions/todo-summary/index.ts, and it simply counts completed and incomplete todos and returns those counts with the caller’s email address.
import { withSupabase } from 'npm:@supabase/server@^1'

export default {
  fetch: withSupabase({ auth: 'user' }, async (_req, ctx) => {
    const { count: completed, error: completedError } = await ctx.supabase
      .from('todos')
      .select('*', { count: 'exact', head: true })
      .eq('is_complete', true)

    const { count: incomplete, error: incompleteError } = await ctx.supabase
      .from('todos')
      .select('*', { count: 'exact', head: true })
      .eq('is_complete', false)

    if (completedError || incompleteError) {
      console.error(completedError ?? incompleteError)
      return Response.json(
        { error: 'Could not load todo summary' },
        { status: 500 },
      )
    }

    return Response.json({
      email: ctx.userClaims?.email,
      completed,
      incomplete,
    })
  }),
}
Once I saved the edits, I used the CLI to serve the new function locally:
$ supabase functions serve todo-summaryThen, to call this function, a signed-in client can invoke it with:
const { data, error } = await supabase.functions.invoke('todo-summary')Conclusion#
Taking the time to explore Supabase was well worth the effort, and I must admit I’ve become a fan. I definitely plan to use the product when I set out to build my next application, since it makes it so fast and easy to do so.
One of our main motivations for diving into this tool was also to determine if there were product takeaways we could apply to Dolt and Doltgres. We think that packaging a product for users that makes it easier and simpler to build on our database technologies could be well worth the effort, so stay tuned for updates on that front (SupaDolt).
If you’re using Supabase, I’d be curious to hear which parts of this experience match your own, especially as your application has grown beyond the initial prototype. I’d also like to know if you’d want a SupaDolt if we built one. Come by our Discord and let us know.