In my last blog I talked about a lot of aspects of taking your Dolt database to production. One of the things I mentioned was the importance of securing your database, but didn’t cover the acquisition and deployment of SSL certificates. In this blog I’ll cover how to get free SSL certs using “Lets Encrypt”, and how to deploy them to your Dolt server.
Getting Certificates with Lets Encrypt using Certbot#
Let’s Encrypt is a free, automated, and open Certificate Authority. They provide free SSL certificates to anyone who can prove they own a domain. Certbot is a tool that allows you to automate the process of getting and renewing certificates using the command line. Certbot is available for most operating systems, and you can find installation instructions on their website however their instructions are geared towards web servers, so follow their installation instructions but then come back here for directions on how to create a cert for Dolt.
Generating a Cert#
Once Certbot is installed, the first thing you will want to do is create some directories used by Certbot that it uses to write files.
~>mkdir certs
~>mkdir certs/config
~>mkdir certs/working
~>mkdir certs/logs
Now once the directories are created we’ll want to register our email address and accept the terms of service using the Certbot register command.
certbot --config-dir certs/config --work-dir certs/work --logs-dir certs/logs registerOnce you have responded to the prompts you can now request a certificate for your domain. Let’s Encrypt works by having you prove you own the domain by creating a file on the server that they can access, or by creating a DNS record. Because we don’t necessarily have a web server running, we’ll use the DNS method.
~>certbot --config-dir certs/config --work-dir certs/work --logs-dir certs/logs certonly --manual --preferred-challenge dns
Saving debug log to /Users/brian/certs/logs/letsencrypt.log
Please enter the domain name(s) you would like on your certificate (comma and/or
space separated) (Enter 'c' to cancel): hosted.doltdb.com
Requesting a certificate for hosted.doltdb.com

- - - - - - - - - - - - - - - - - - - - - - - - - - - - - - - - - - - - - - - -
Please deploy a DNS TXT record under the name:

_acme-challenge.hosted.doltdb.com.

with the following value:

fnsN4cYGFJiZKTgGyL2N65DWbq0Rn6-ugbMRHWAsxtg

Before continuing, verify the TXT record has been deployed. Depending on the DNS
provider, this may take some time, from a few seconds to multiple minutes. You can
check if it has finished deploying with aid of online tools, such as the Google
Admin Toolbox: https://toolbox.googleapps.com/apps/dig/#TXT/_acme-challenge.hosted.doltdb.com.
Look for one or more bolded line(s) below the line ';ANSWER'. It should show the
value(s) you've just added.

- - - - - - - - - - - - - - - - - - - - - - - - - - - - - - - - - - - - - - - -
Press Enter to Continue
You will be prompted for the domain name for the cert, here I have used hosted.doltdb.com. Then I was given the specifics
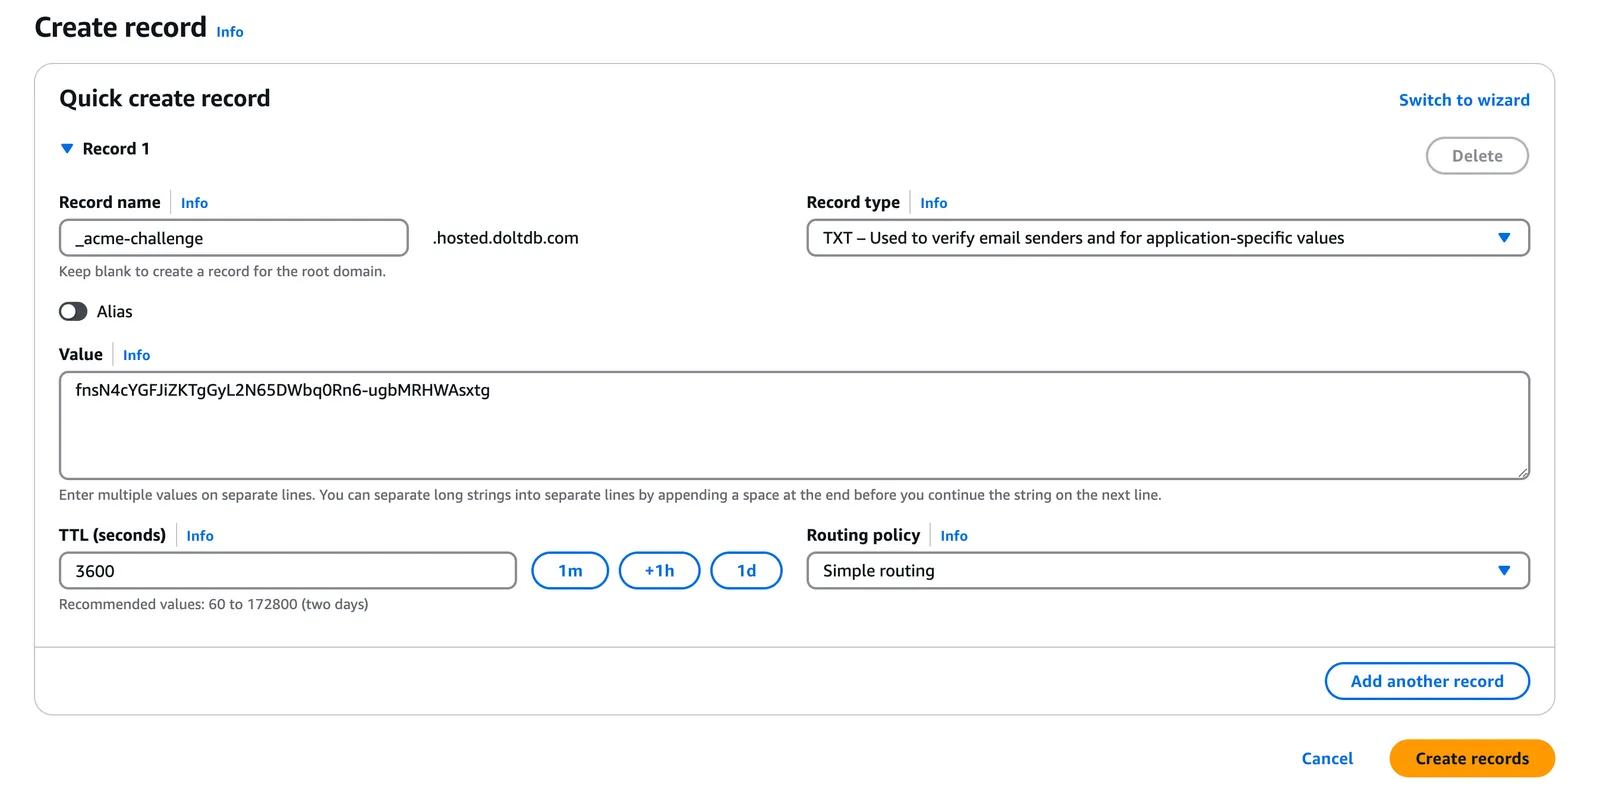
of the DNS record I needed to create. The actual creation of the DNS record is going to be specific to your DNS provider.
Usually, whichever service you have used to register your domain will have a way to create DNS records, or if you have
transferred your domain to a service like AWS’ Route 53, you can create the record there. In this case I was instructed
to create a TXT record for the subdomain _acme-challenge.hosted.doltdb.com with the value fnsN4cYGFJiZKTgGyL2N65DWbq0Rn6-ugbMRHWAsxtg.

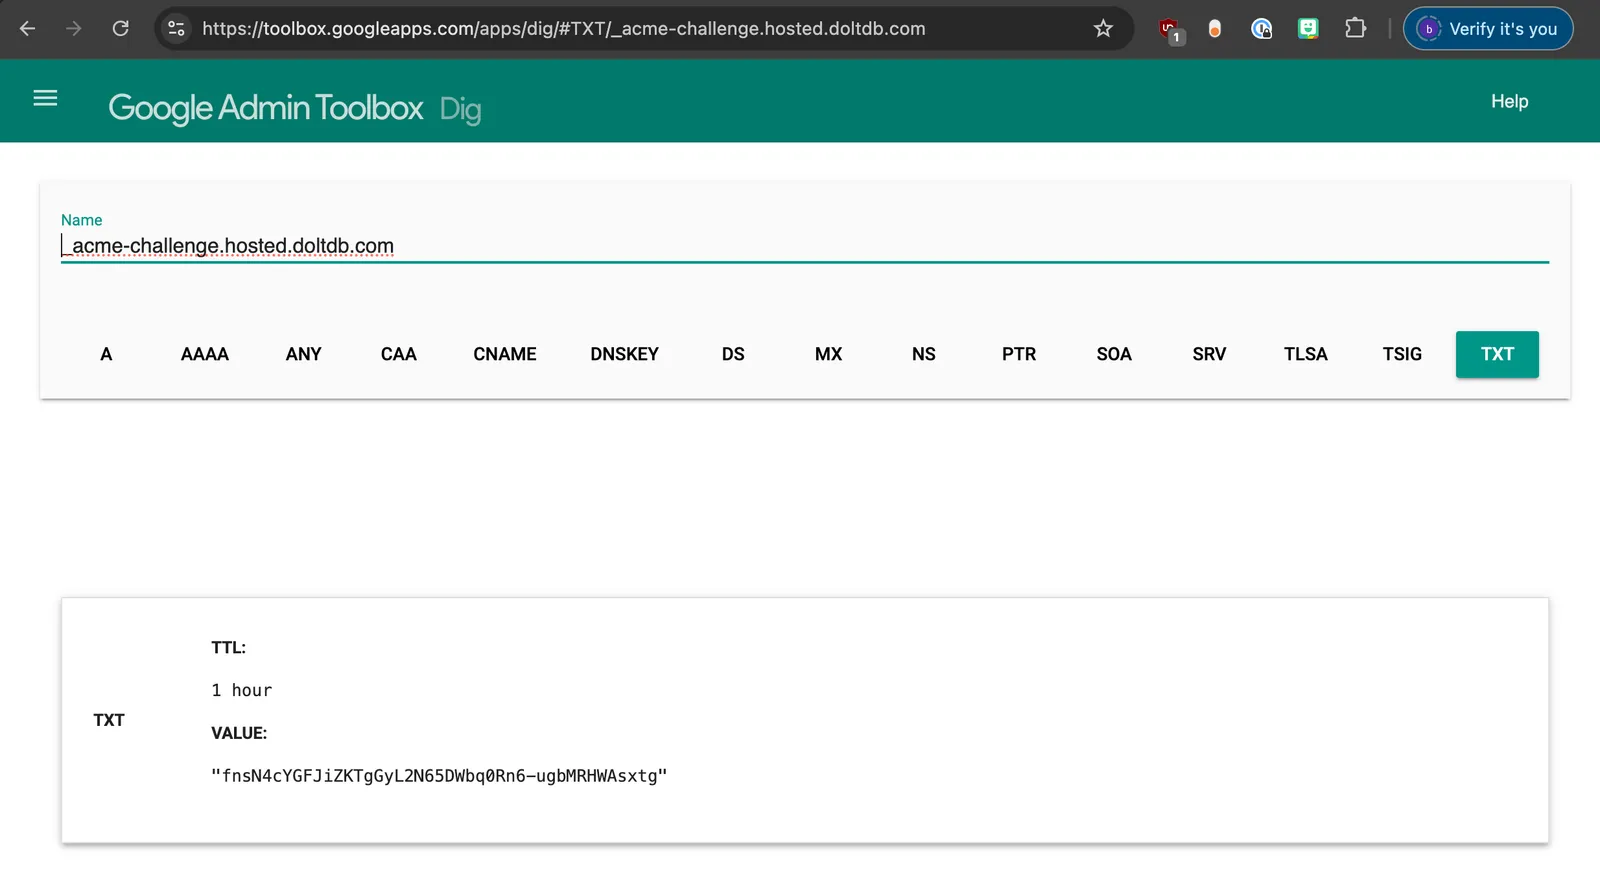
Once I created the record I used the tool recommended by the Certbot output to verify that the record was created.

Now that I have verified that the record was created I return to the CLI and press enter to continue. Certbot will then contact the Let’s Encrypt servers and verify that the record exists. If everything is correct you will see a message that the certificate was created and where it was saved.
Successfully received certificate.
Certificate is saved at: /Users/brian/certs/config/live/hosted.doltdb.com/fullchain.pem
Key is saved at:         /Users/brian/certs/config/live/hosted.doltdb.com/privkey.pem
This certificate expires on 2025-03-15.
These files will be updated when the certificate renews.

NEXT STEPS:
- This certificate will not be renewed automatically. Autorenewal of --manual certificates requires the use of an authentication hook script (--manual-auth-hook) but one was not provided. To renew this certificate, repeat this same certbot command before the certificate's expiry date.

- - - - - - - - - - - - - - - - - - - - - - - - - - - - - - - - - - - - - - - -
If you like Certbot, please consider supporting our work by:
 * Donating to ISRG / Let's Encrypt:   https://letsencrypt.org/donate
 * Donating to EFF:                    https://eff.org/donate-le
- - - - - - - - - - - - - - - - - - - - - - - - - - - - - - - - - - - - - - - -
Deploying our Cert to Dolt#
Now that our cert has been created successfully, we will copy it to the working directory of our Dolt server. This may
or may not be on the same machine where you generated the cert, but once fullchain.pem and privkey.pem are there
we update our server’s config.yaml file with the following lines:
listener:
  tls_key: privkey.pem
  tls_cert: fullchain.pem
In my case, for my blog my config.yaml file looks like this:
log_level: info
behavior:
  autocommit: true
user:
  name: dolt
  password: pass
listener:
  host: 0.0.0.0
  port: 3306
  tls_key: privkey.pem
  tls_cert: fullchain.pem
system_variables:
  secure_file_priv: /dev/null
Now we restart our server and make sure everything has come up correctly.
Testing Our Cert#
with our server running we can now test our cert using the mysql command line client. We can connect and then run status
and see check both the SSL and Connection fields to make sure that our cert is being used.
~>mysql -hhosted.doltdb.com -udolt -ppass
Welcome to the MariaDB monitor.  Commands end with ; or \g.
Your MySQL connection id is 6
Server version: 8.0.33 Dolt

Copyright (c) 2000, 2018, Oracle, MariaDB Corporation Ab and others.

Type 'help;' or '\h' for help. Type '\c' to clear the current input statement.

MySQL [(none)]> status
--------------
mysql from 11.6.2-MariaDB, client 15.2 for osx10.18 (x86_64) using  EditLine wrapper

Connection id:		6
Current database:
Current user:		dolt@%
SSL:			Cipher in use is TLS_AES_128_GCM_SHA256, cert is OK
Current pager:		stdout
Using outfile:		''
Using delimiter:	;
Server:			MySQL
Server version:		8.0.33 Dolt
Protocol version:	10
Connection:		hosted.doltdb.com via TCP/IP
Server characterset:	utf8mb4
Db     characterset:	utf8mb4
Client characterset:	utf8mb4
Conn.  characterset:	utf8mb4
TCP port:		3306
--------------
Here we see we are using the TLS_AES_128_GCM_SHA256 cipher and that the cert is OK. And that the domain used for
the connection is correct.
Conclusion#
Congratulations you now have a cert that is valid for the next 90 days. After that you’ll need to rotate the cert using this process, or you can dive into the Certbot documentation to see how to automate the process. Alternatively you can use Hosted Dolt which will handle all of this for you. I hope this blog has been helpful. If you have any questions or comments please feel free to contact us on Discord
