Dolt is inspired by Git and MySQL, two deeply command-line oriented software programs. Thus, Dolt started as a command line utility, matching almost all of Git’s capabilities. We then added a MySQL-compatible server component so you could connect to Dolt with any MySQL-client, like the mysql command-line client. SQL, again, is a very command-line oriented language. Compose a query and run it. Inspect the results. Git functionality is exposed in SQL as custom system tables and procedures. All this makes for a command-line heavy Dolt experience.
All this command line could scare away happy graphical user interface (GUI) users. We aren’t you. My co-founder Aaron still codes in Emacs. But we know you exist and want you to try Dolt. We’ve come a long way since the early days of Dolt and now have a number of Graphical User Interfaces (GUIs) to chose from including Hosted Dolt, the Dolt Workbench, and DoltHub. This blog is a guide on how to use Dolt for people who prefer GUIs.
Hosted Dolt#
To use Dolt, you generally need a Dolt database. Dolt is free and open source. You can download it, run a few commands in a terminal, and have a database server running on your laptop. In this blog, there are no terminals allowed. Enter Hosted Dolt. We here at DoltHub will run a database server for you and all you have to do is click a few buttons on the Hosted Dolt website.
Create an Account#
First create an account. To do this, click the “Sign In” button in the top right corner. A Sign In form will appear.
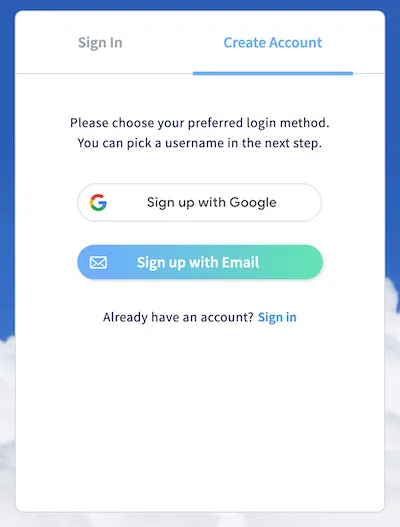
Click the “Create account” tab. Either use your Google account or use a valid email to create a Hosted Dolt account. Once you’ve chosen a username and clicked the Create Account button, use that account to Sign In. Once you sign in, your landing page will be an empty deployments page.
Create a Server#
Now, it’s time to create a database server deployment. Click the “Create Deployment” Button.
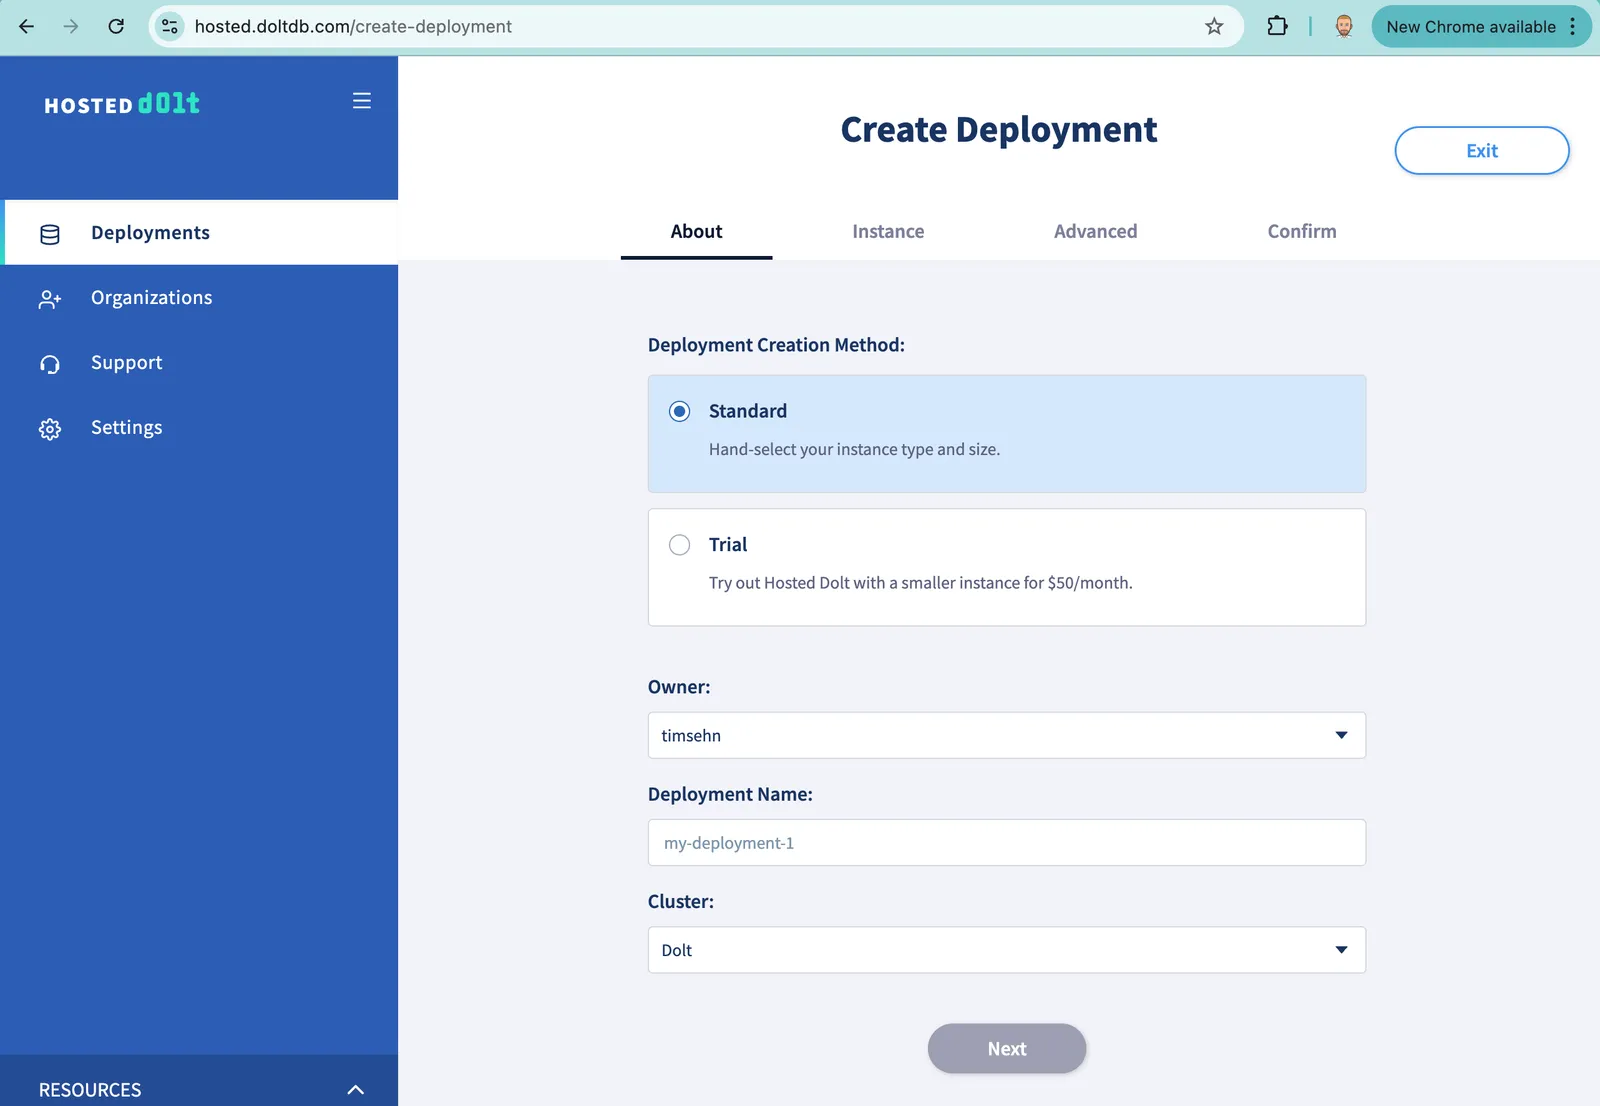
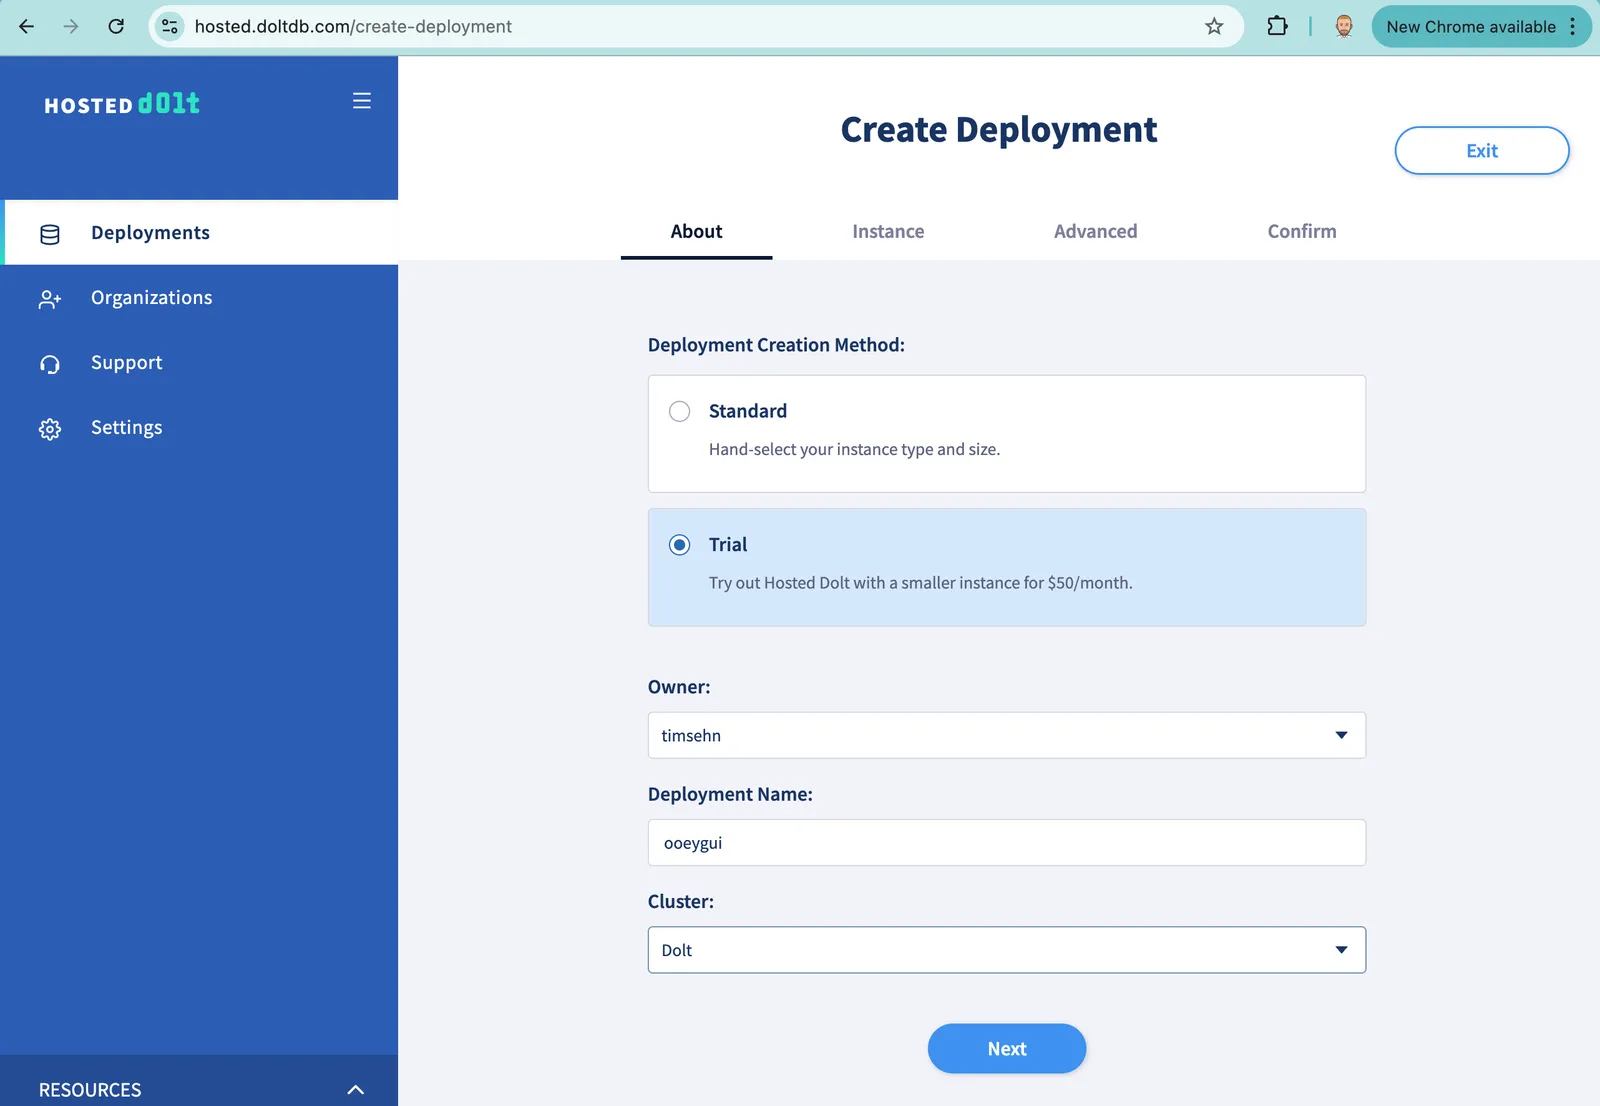
For the next few steps, you’ll be walking through a create deployment workflow. We’re going to create a trial instance which is $50/month billed hourly. You can shut it off once you’re done testing Dolt. It will cost less than $1. So, I select “Trial” as the instance type, name my deployment “ooeygui”, leave “Cluster” as Dolt, and click “Next”.
I’m greeted with a handy summary of the Dolt deployment I’m about to create.
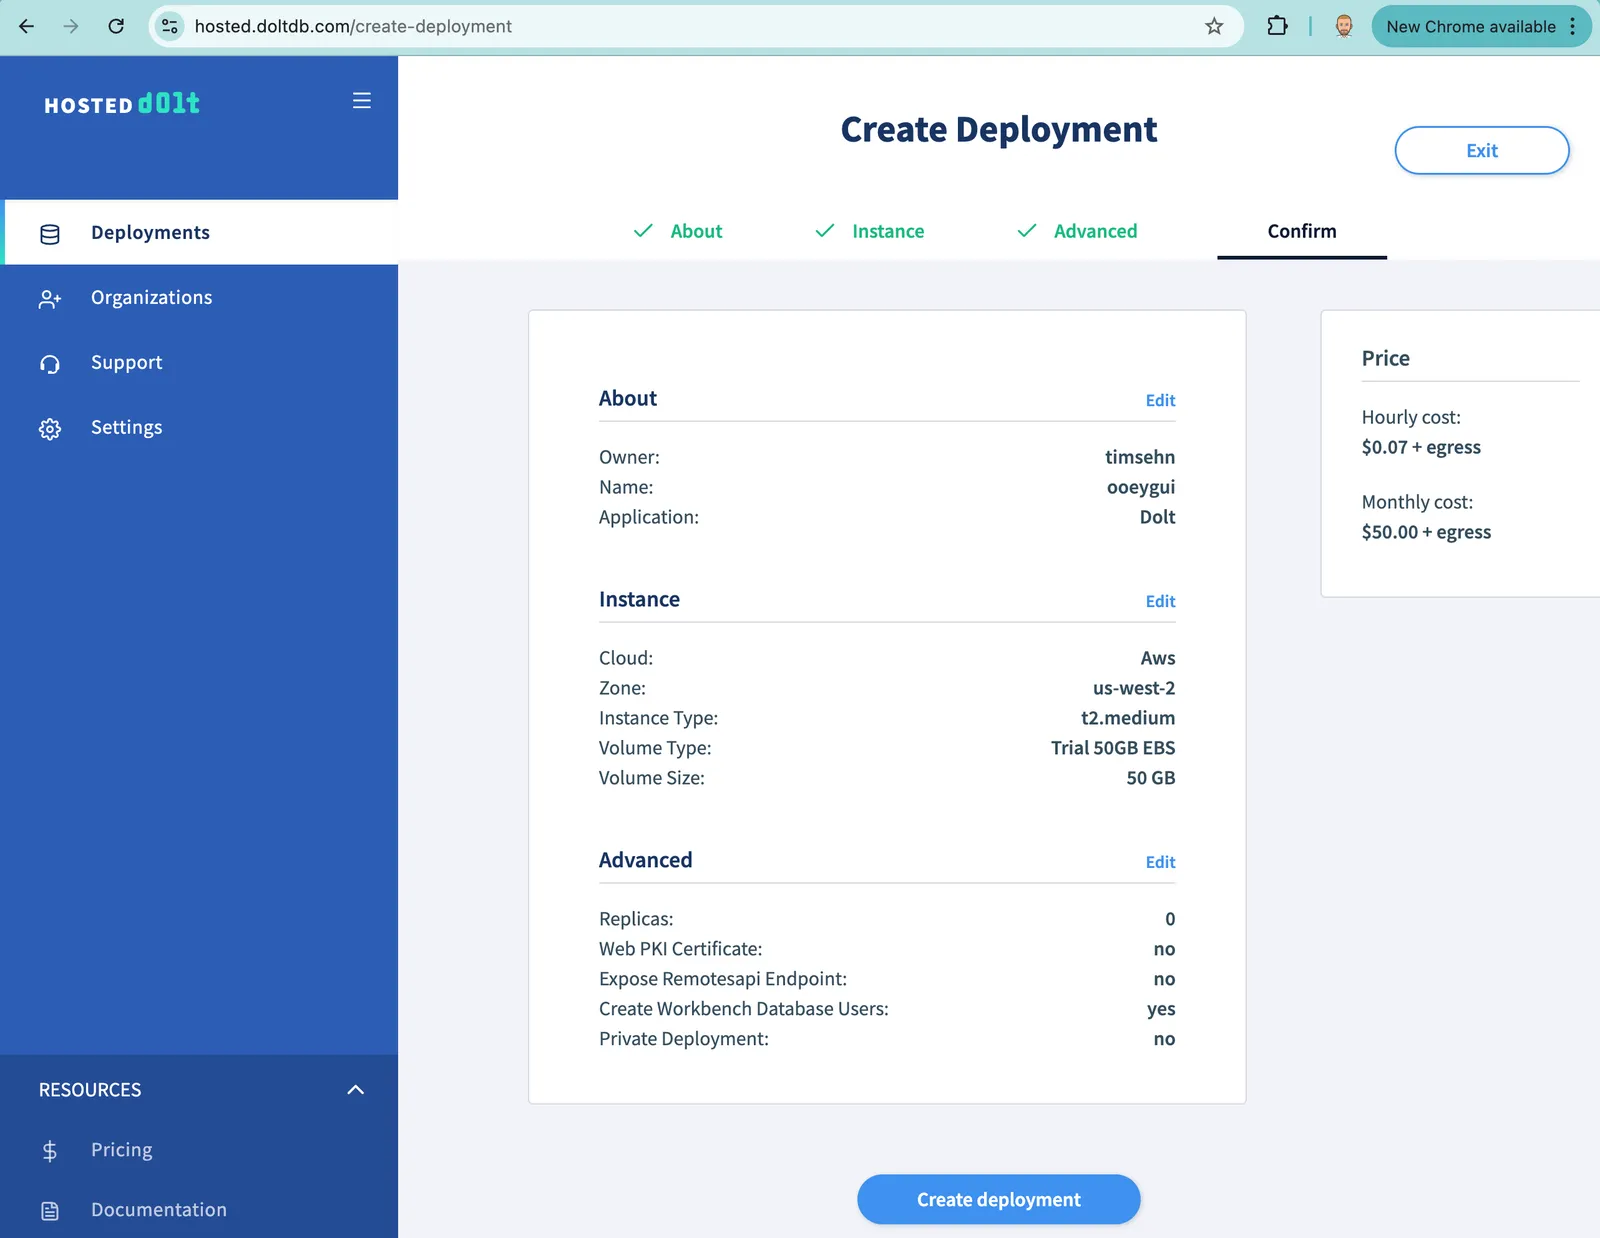
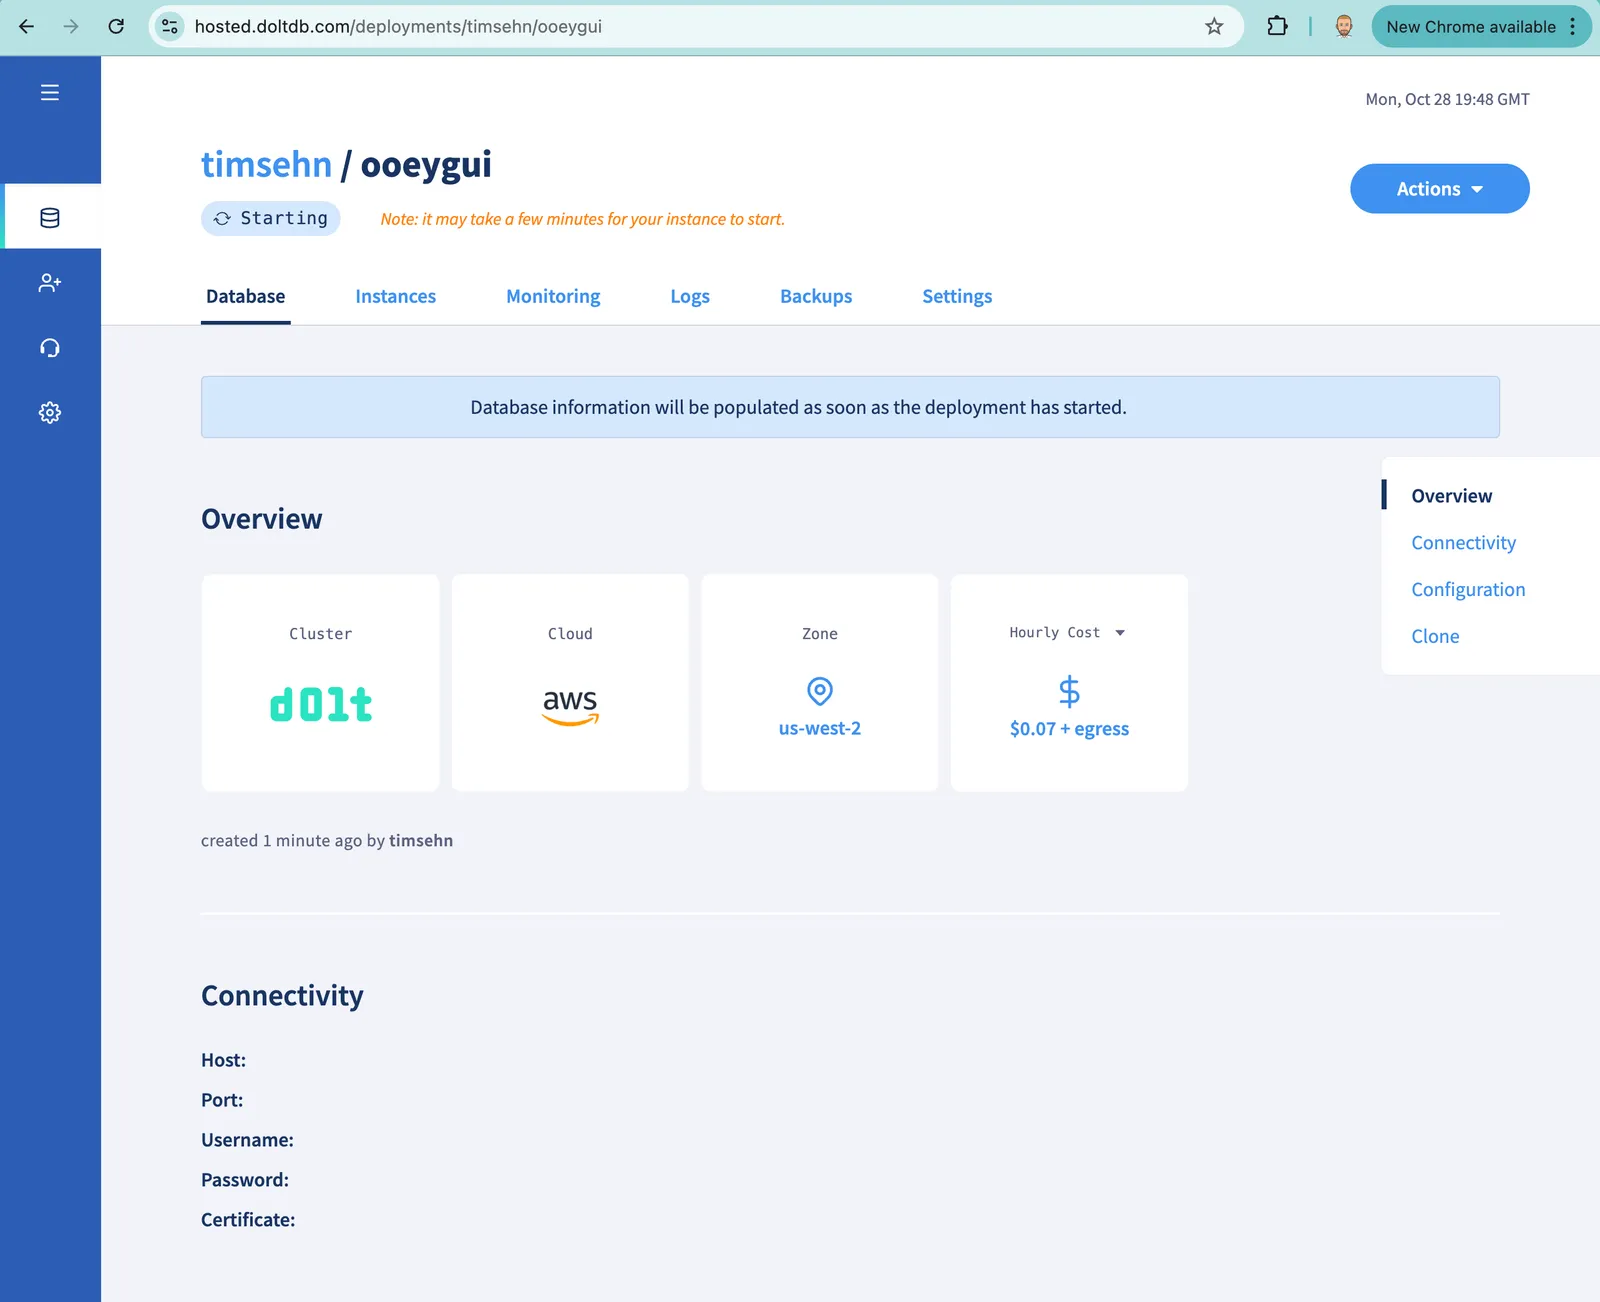
After a quick review, I click the “Create Deployment” button. This kicks off the Hosted instance creation process which will take a few minutes. I can follow progress on the Deployment page the website dropped me into.
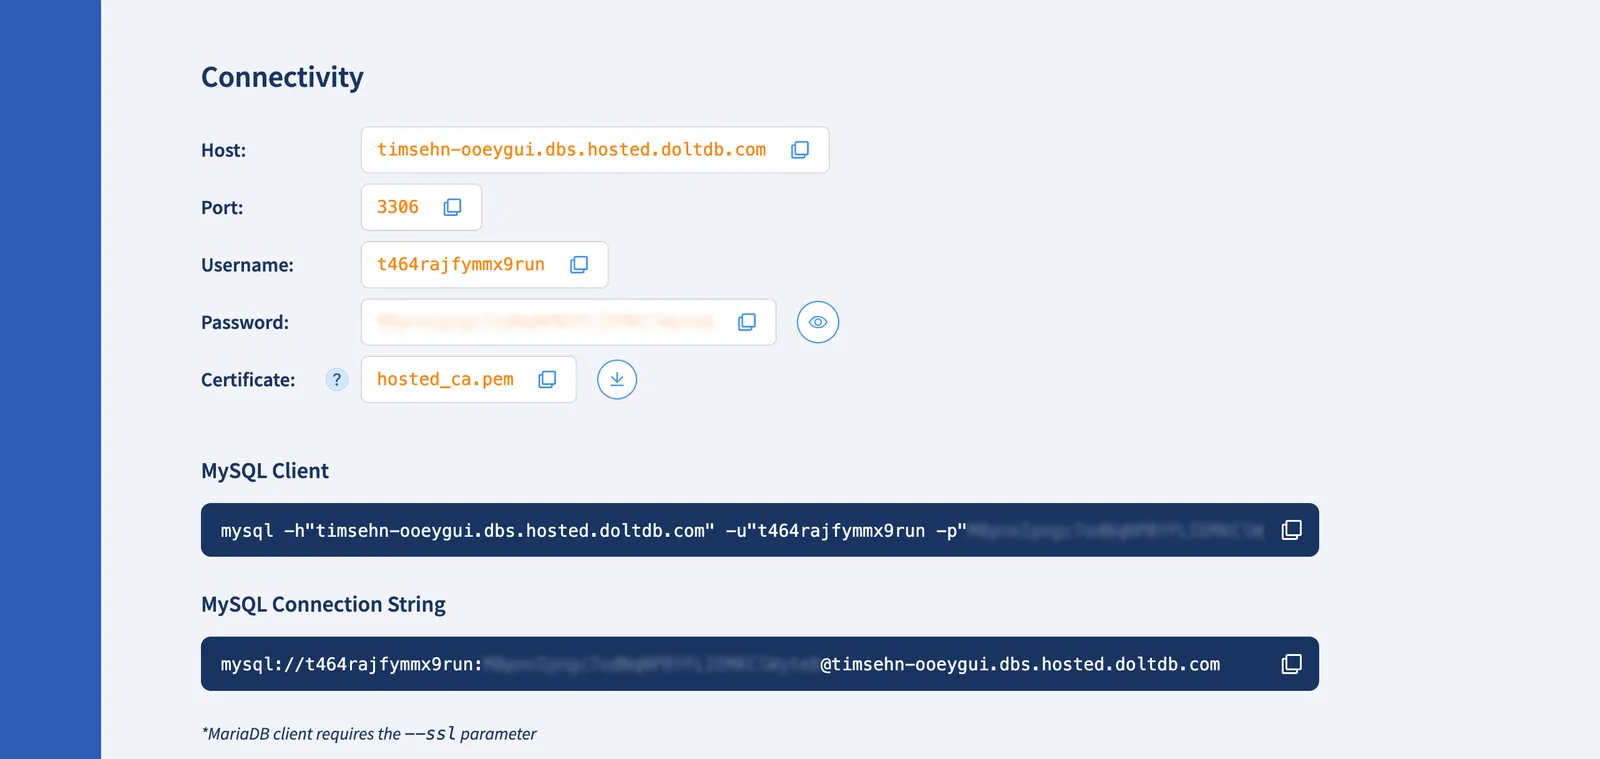
Once the deployment starts, I have populated connectivity information for the new Dolt database. This is all the information you need to connect other GUI clients to your new Hosted Dolt database. Dolt works with any tool that works with MySQL, including popular GUI tools like Excel, Google Sheets, Metabase, and Looker Studio, to name a few we’ve written about.
Built in Workbench#
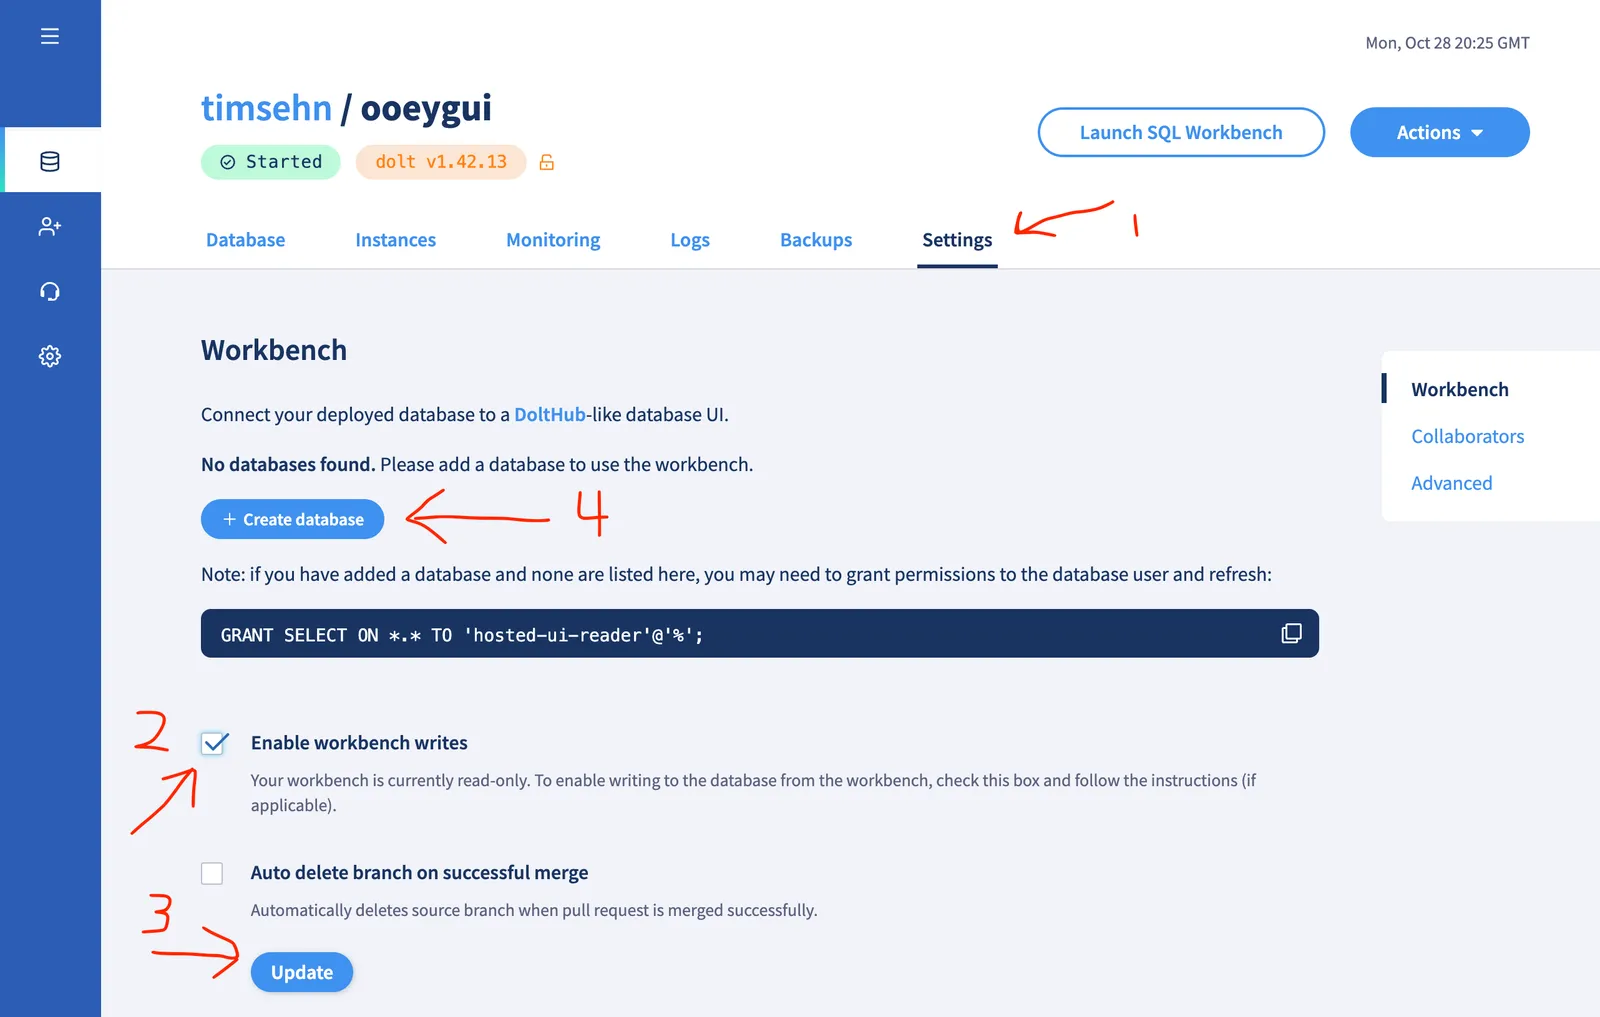
All that said, you never need to leave the Hosted Dolt website if you want to interact with your Dolt instance using a GUI. Hosted Dolt has a built-in Dolt Workbench to interact with your newly created Dolt database server. Before you use the Workbench you need to create a database for the workbench to connect to. All you have now is a server. Follow these steps to create a database:
- Click the “Settings” tab
- “Enable Workbench writes” using the Checkbox
- Click “Update”
- Click the ”+ Create Database” button.
After naming your database, I called mine “ooeygui”, the Workbench will launch.
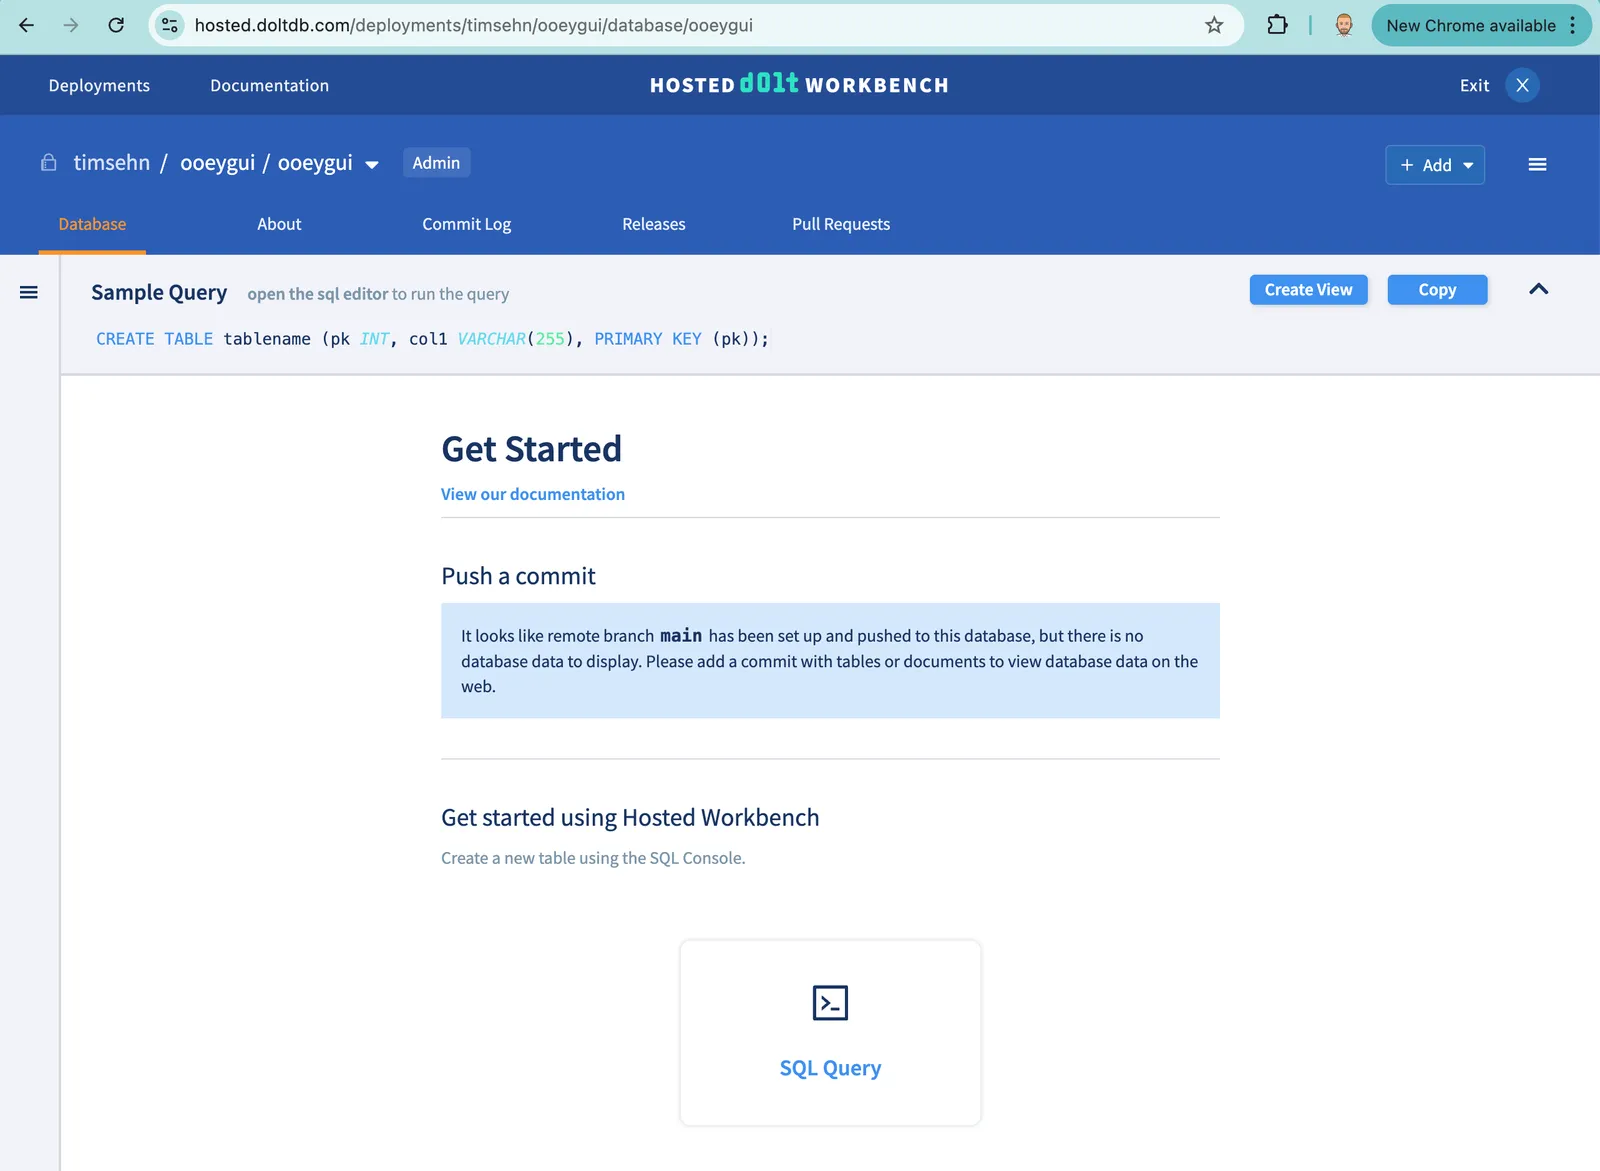
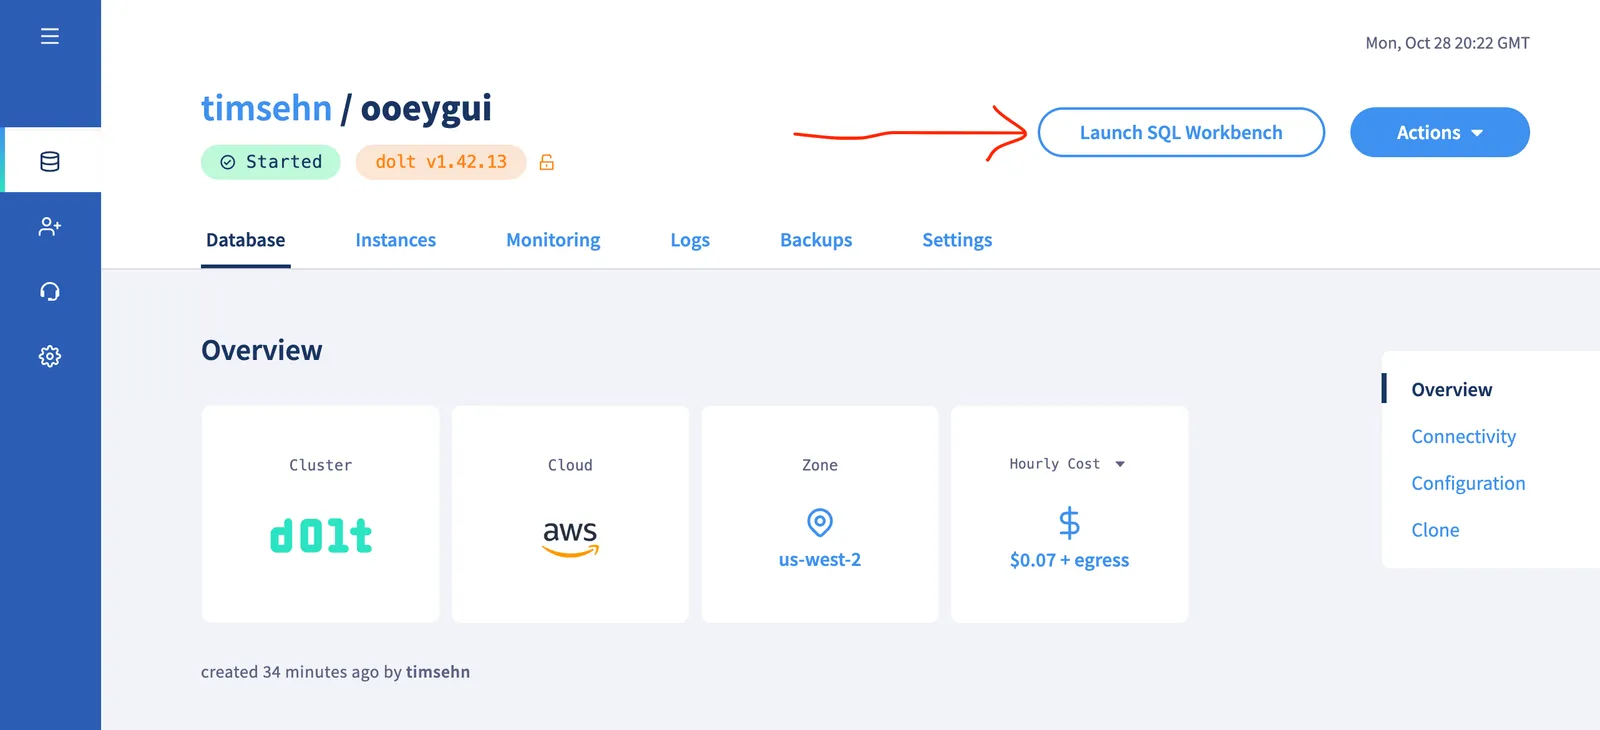
You can always get back here with the “Launch SQL Workbench” button on your deployment page.
Now, let’s make some tables.
Create a Table#
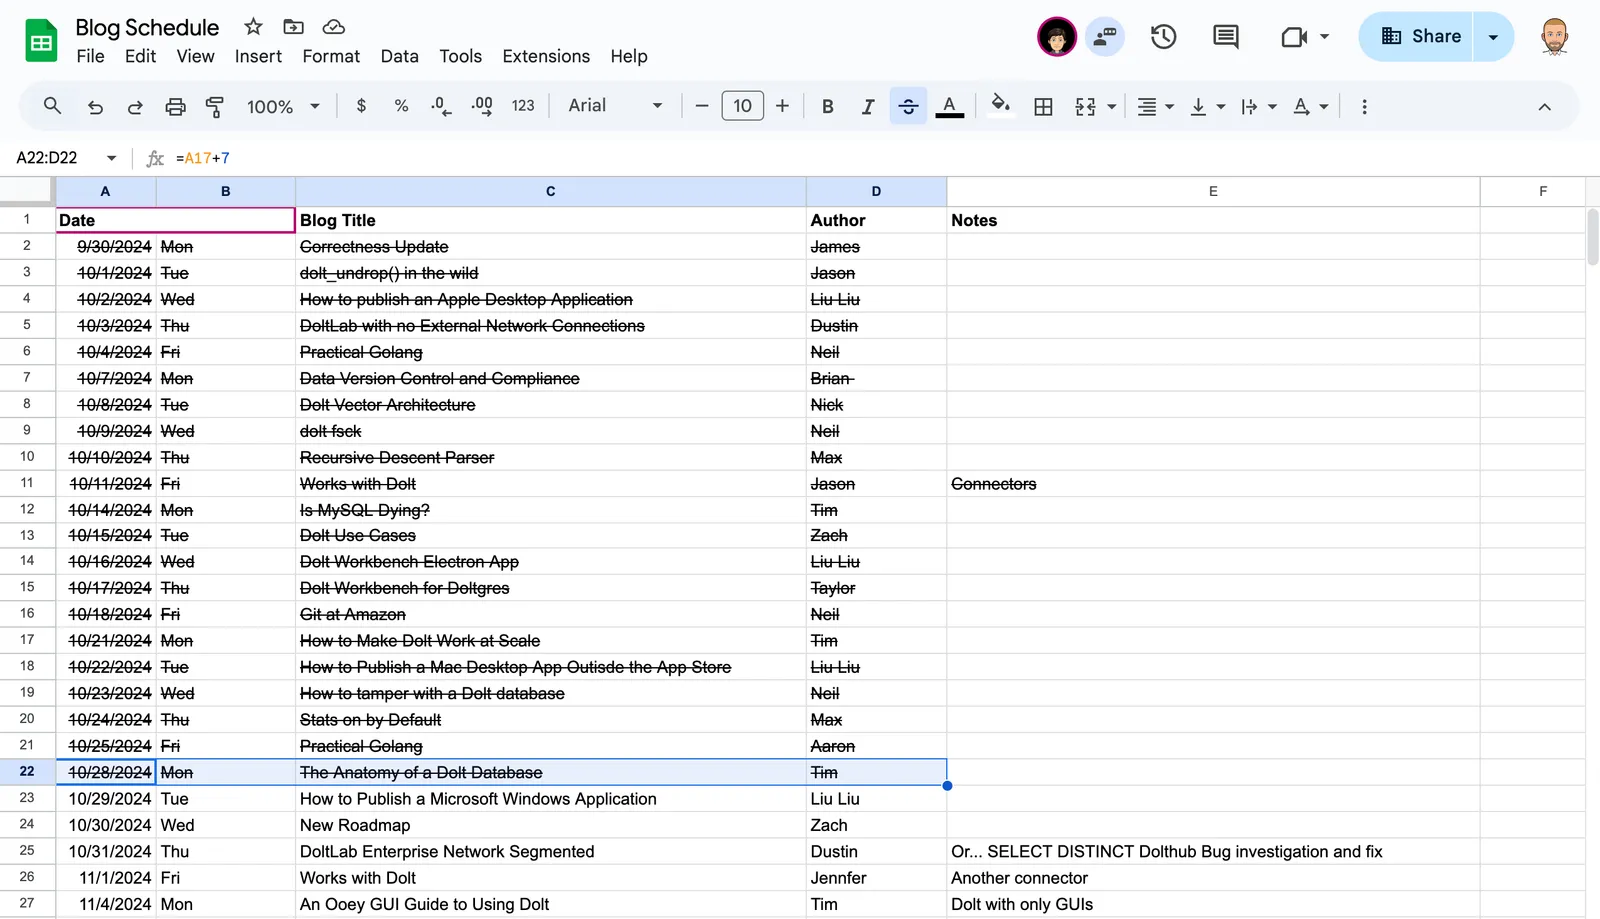
I’m going to create a table to match our DoltHub Blog schedule. We publish five articles per week and we use a Google Sheet to manage scheduling. Let’s make it a Dolt database. I downloaded this sheet as a CSV. There are other ways to get data into your Dolt database, like a MySQL dump or a series of insert queries, but importing a spreadsheet seems most GUI.
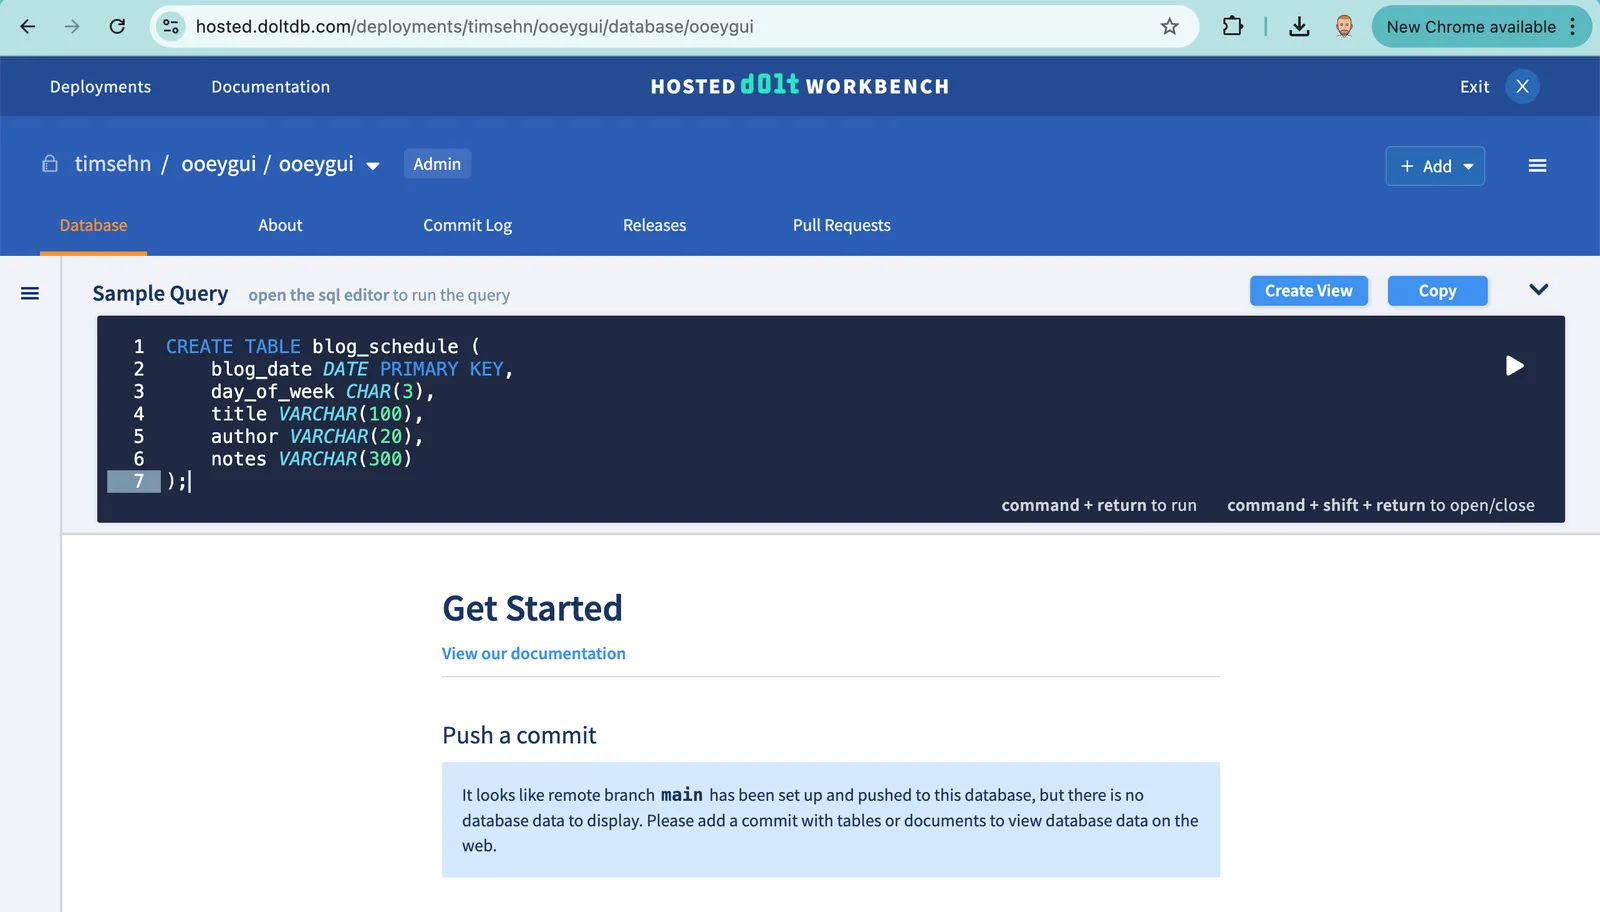
First, we must create a table using SQL. This table is pretty simple. It has five columns with the date column as the primary key.
create table blog_schedule (
    blog_date date primary key,
    day_of_week char(3),
    title varchar(100),
    author varchar(20),
    notes varchar(300)
);
I enter this SQL into the query box and press the run button. It’s the button with the “Play” icon.
Diffs!#
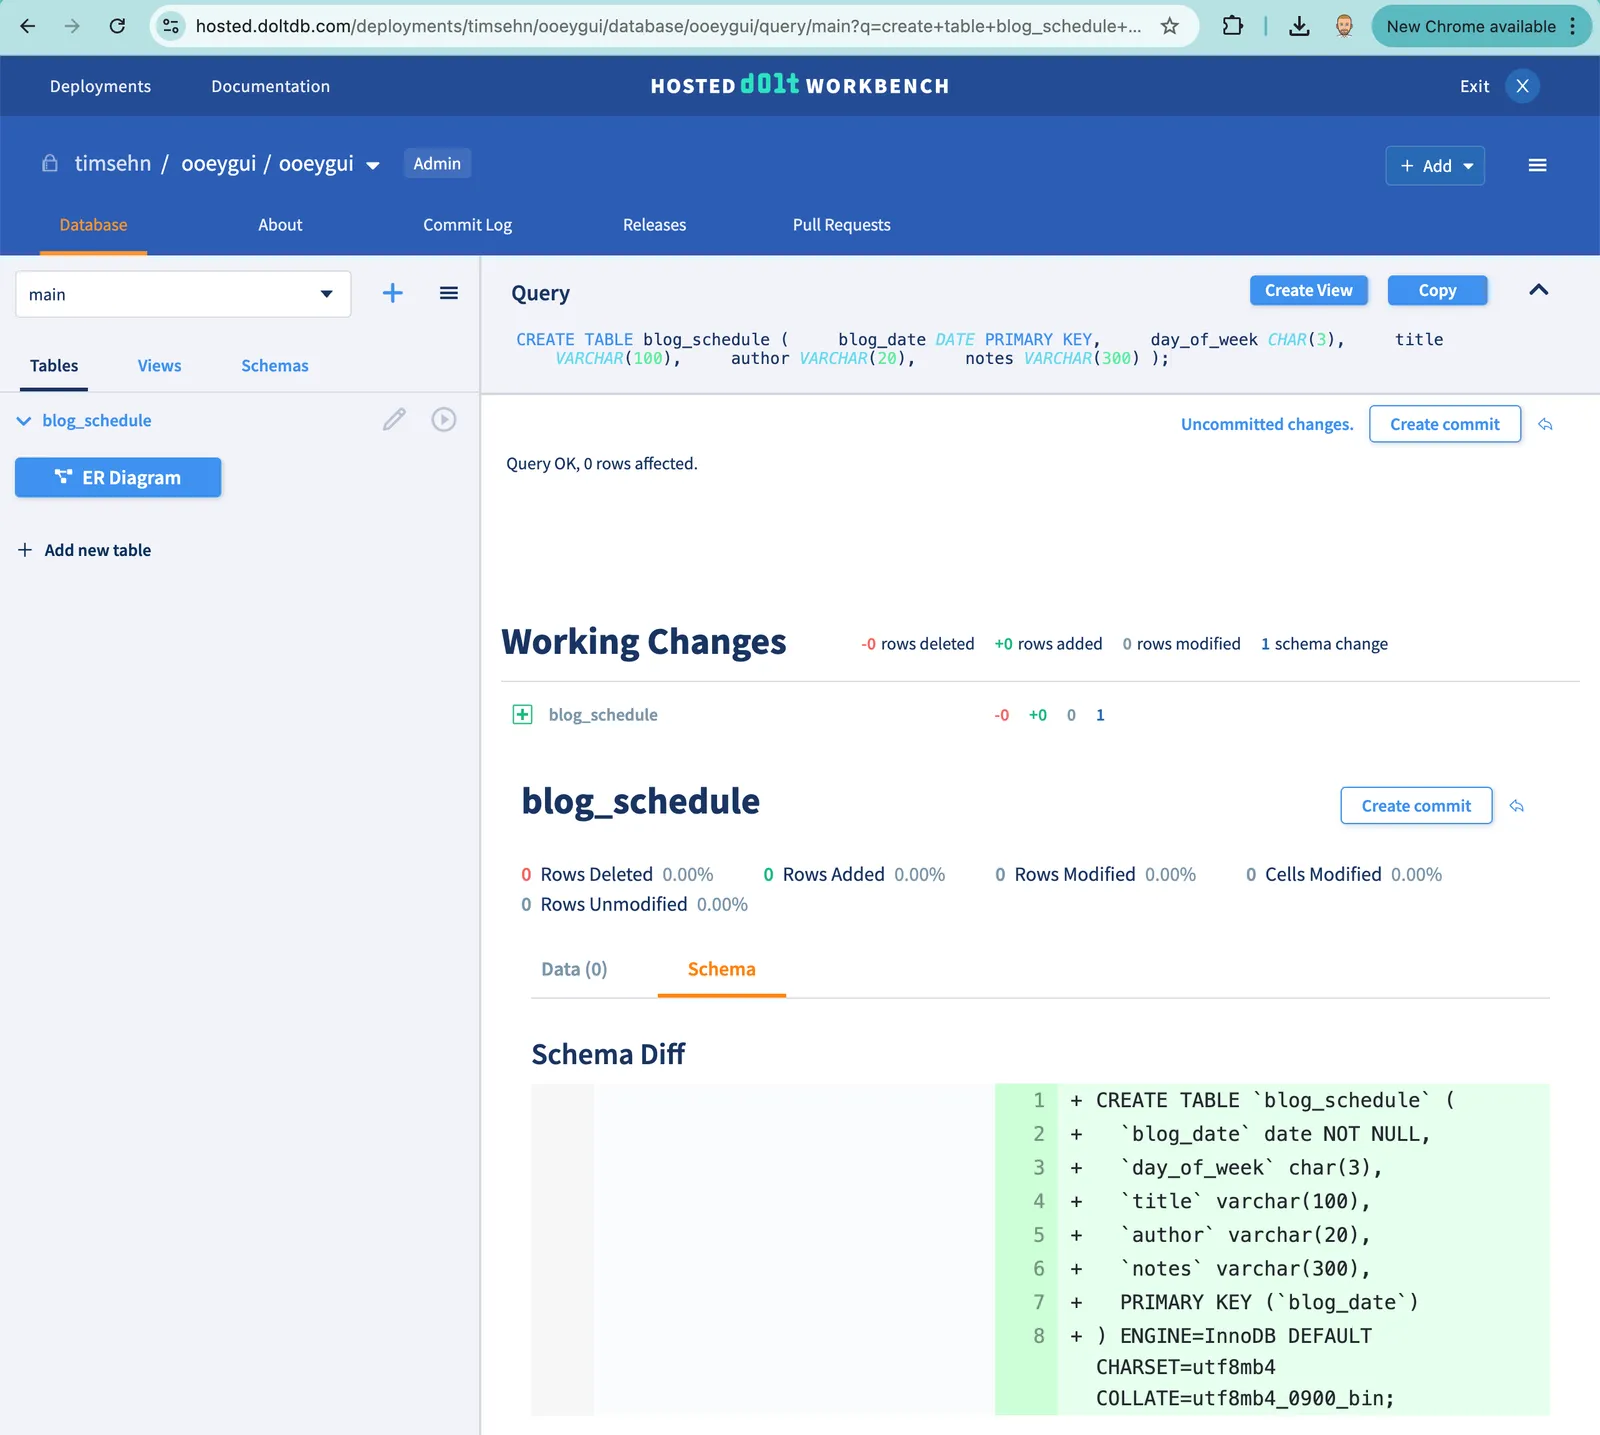
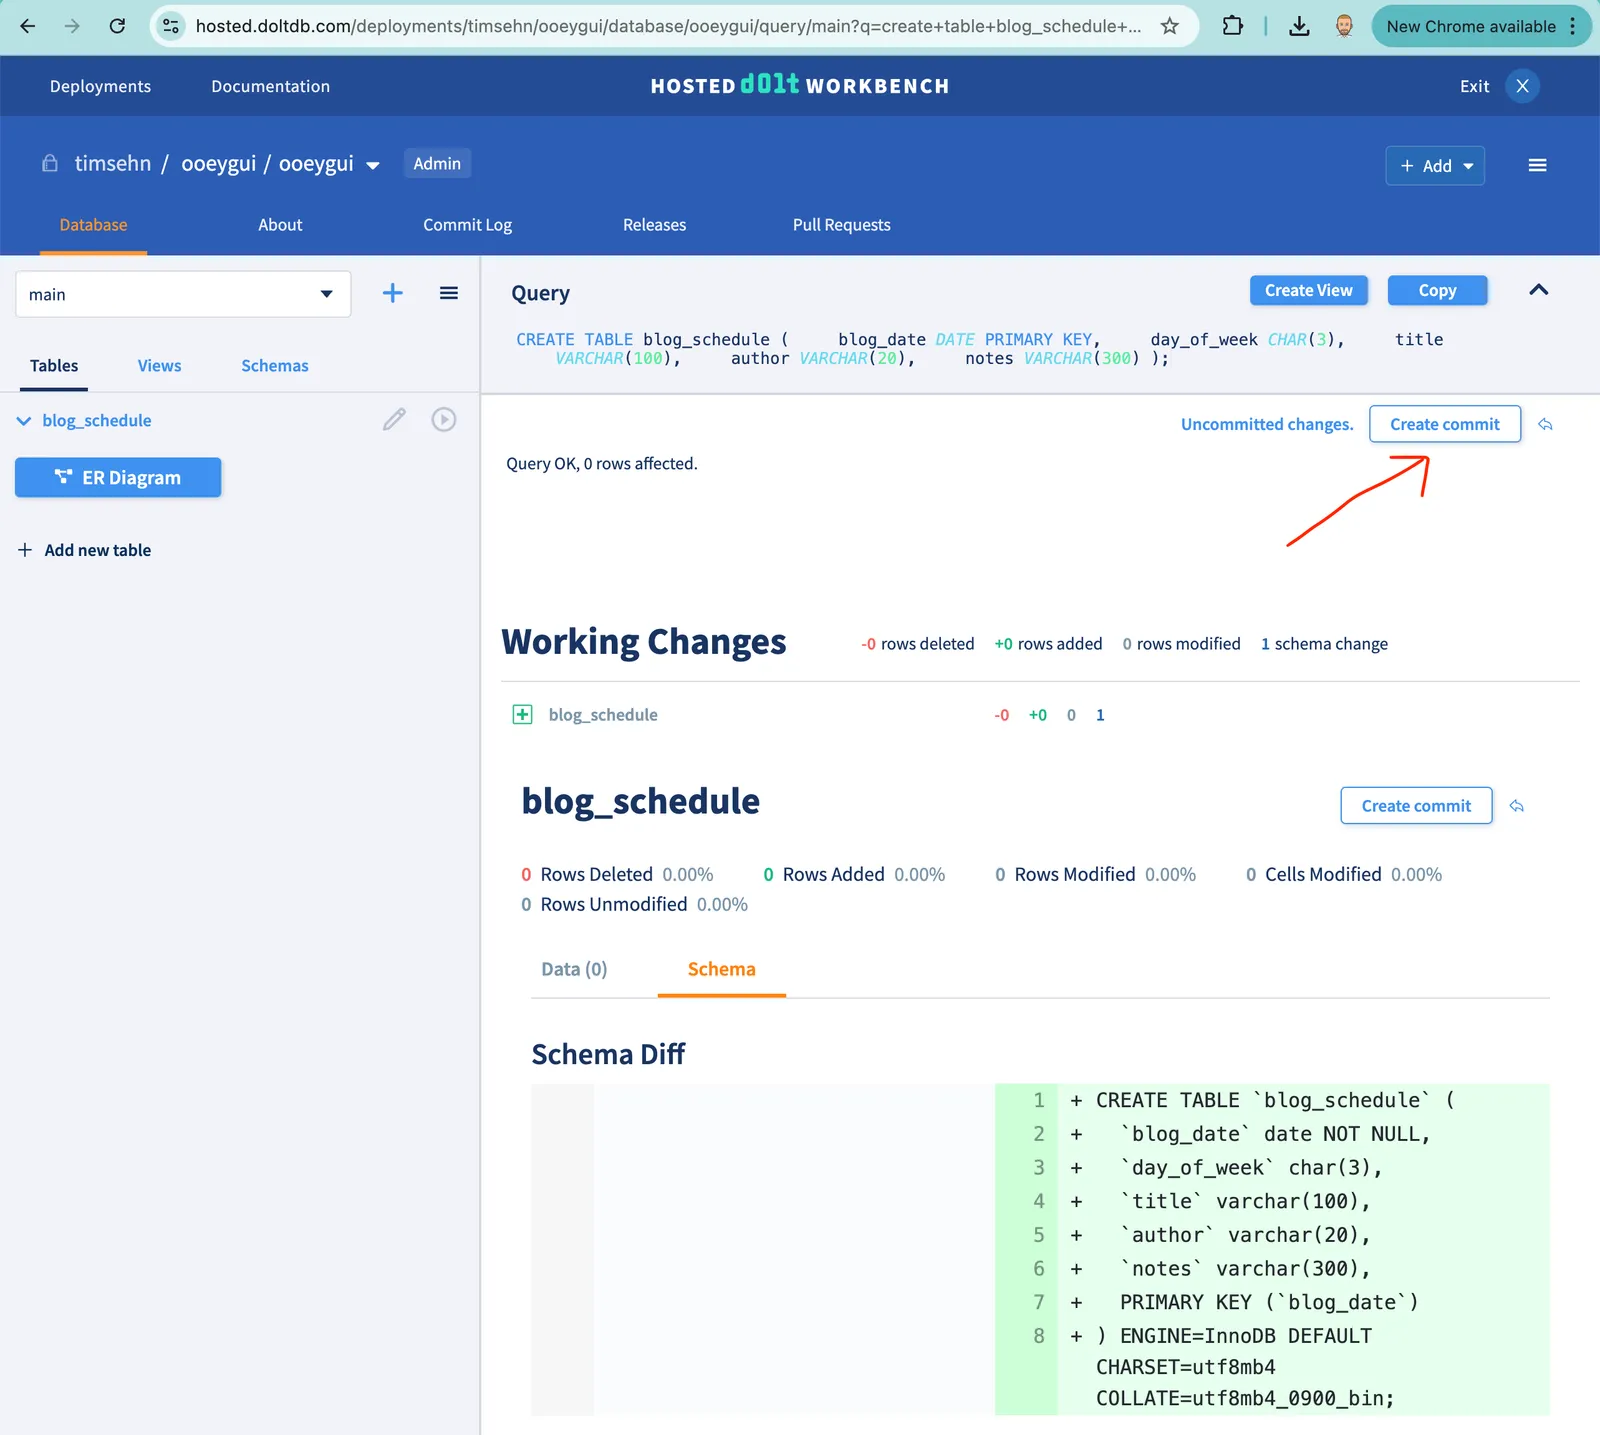
After I run the query, unlike traditional databases, I can see what I’ve done with a diff. This is usually the first “Wow!” moment for Dolt users. I can use this diff to make sure the SQL I wrote did what I thought it did. The diff is human readable and very easy to parse. In this case, I’m satisfied.
Make a Dolt Commit#
Like Git, Dolt has the concept of a commit. Dolt commits are different then SQL commits. A Dolt commit makes a permanent marker in your Dolt history that you can always return to. Depending on your application, you may want to make commits very frequently or only every once in a while. After you make a schema change, like creating a table, it is a good time to make a Dolt commit. To do this I click the “Create Commit” button.
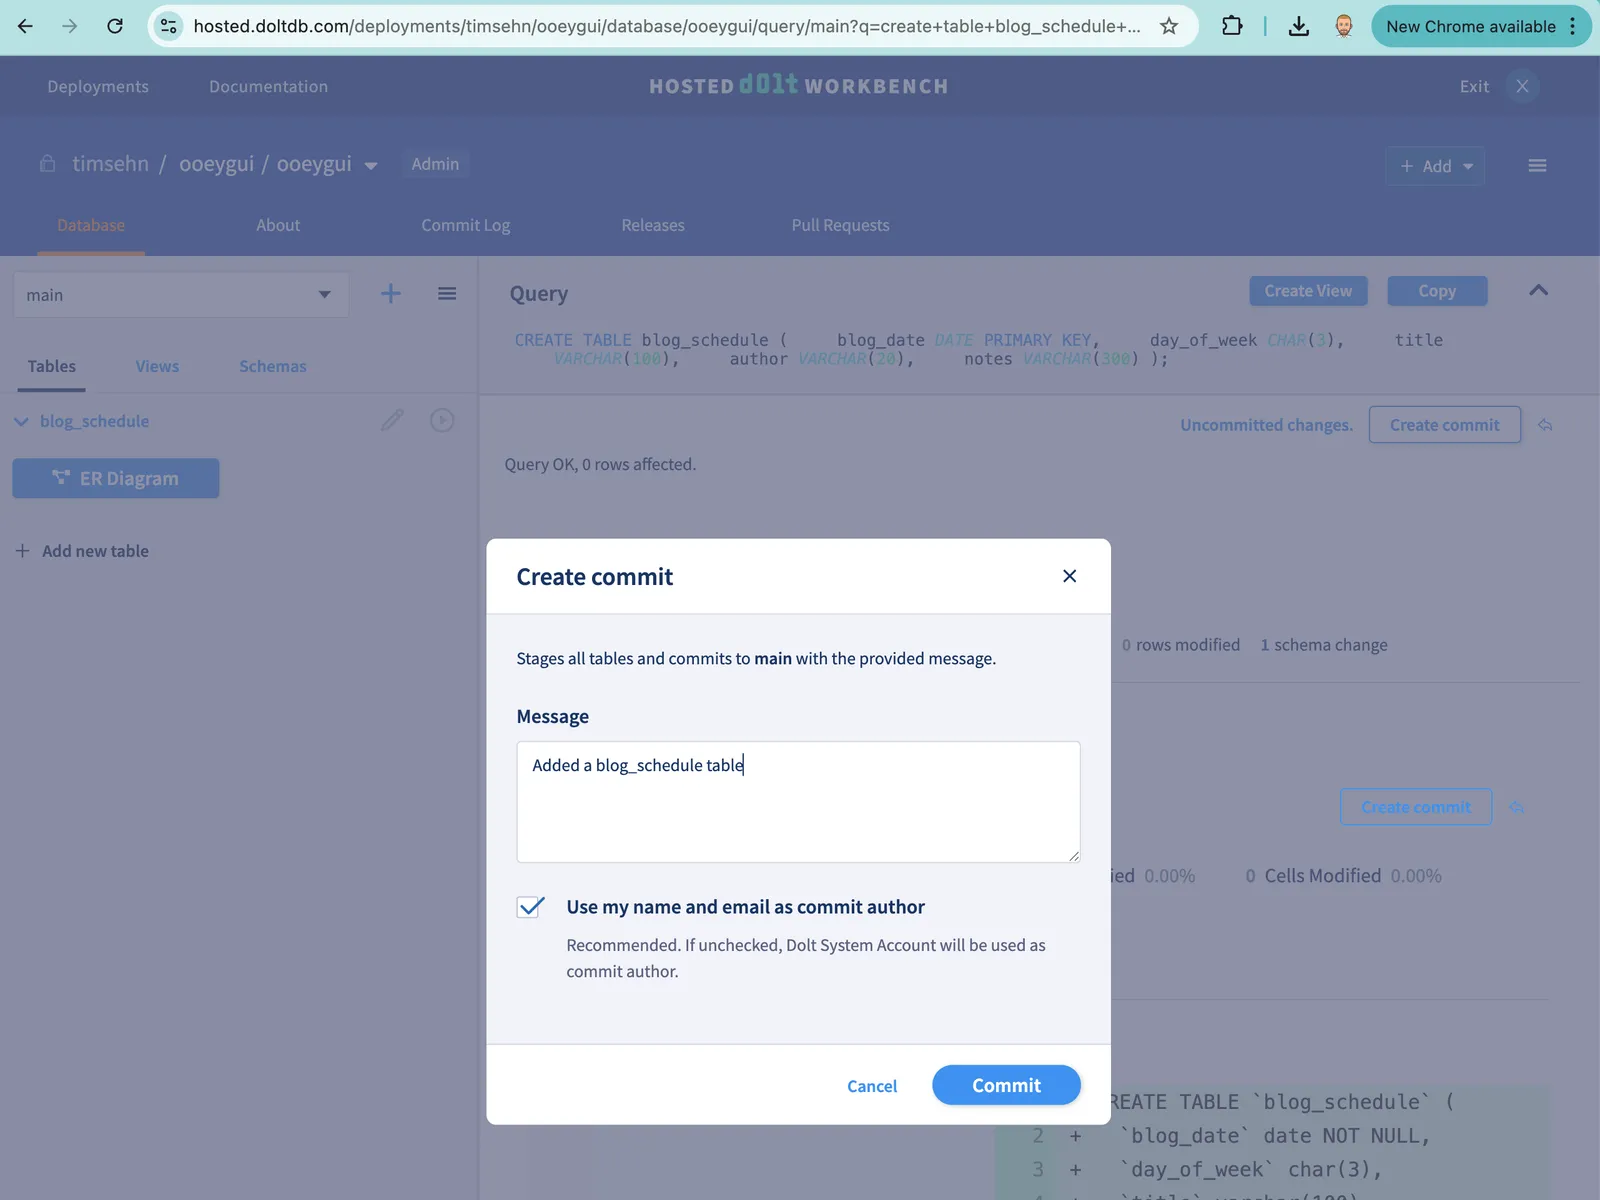
After clicking this button, I am prompted to enter a commit message. This message is viewable in the Commit log so make it a suggestive description of the change you made.
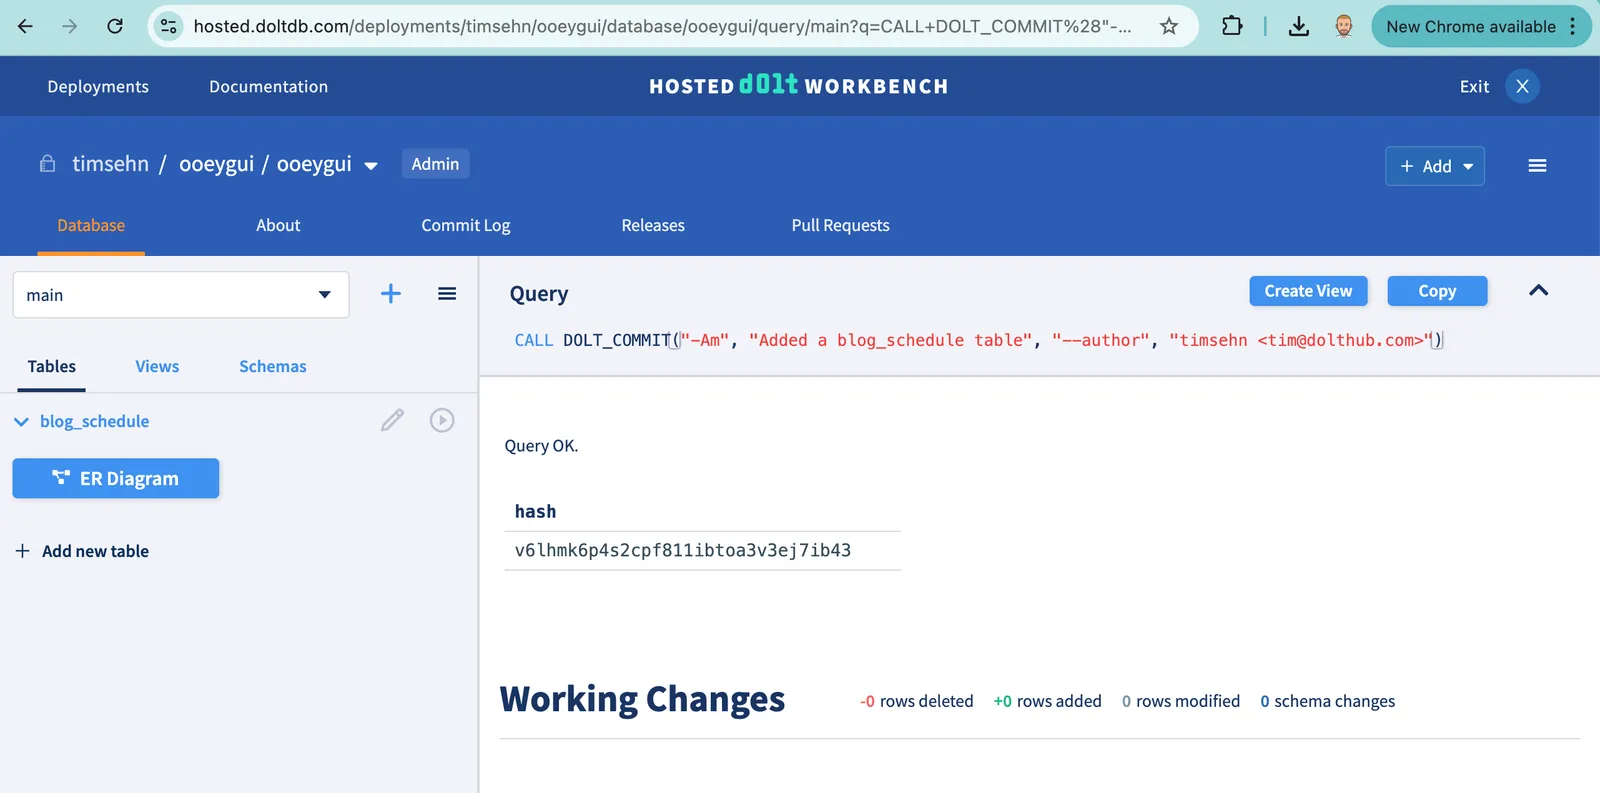
When I’m done, I click “Commit”. I now have a Commit hash and no working changes.
Inspect the Log#
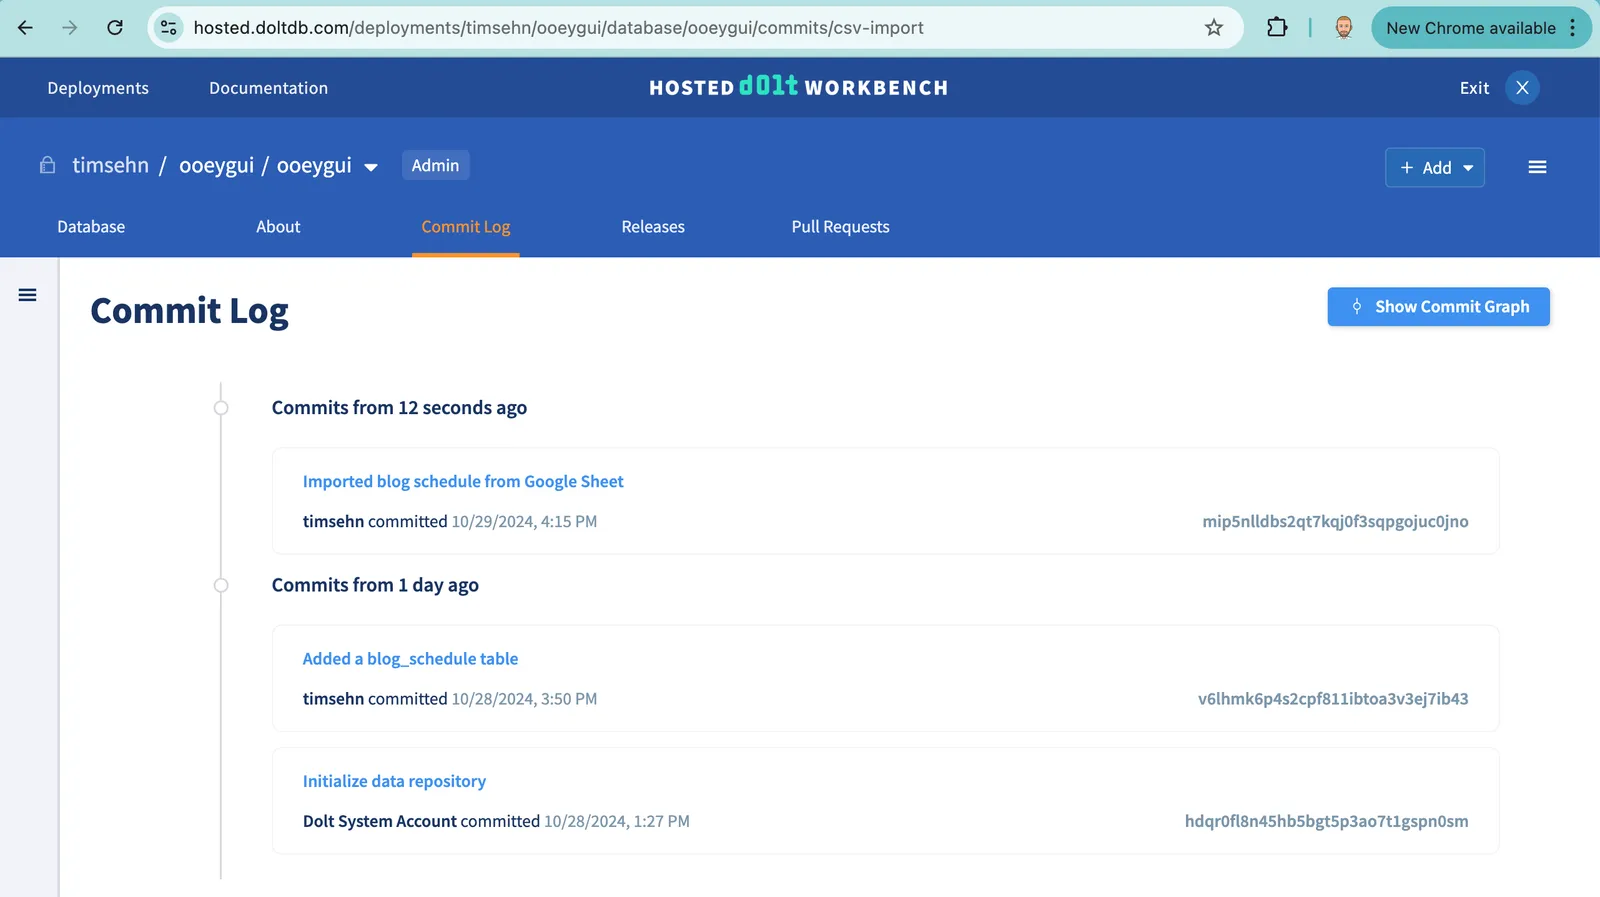
I can now see my new commit in the log, another unique Dolt feature, by clicking on the “Commit Log” tab.
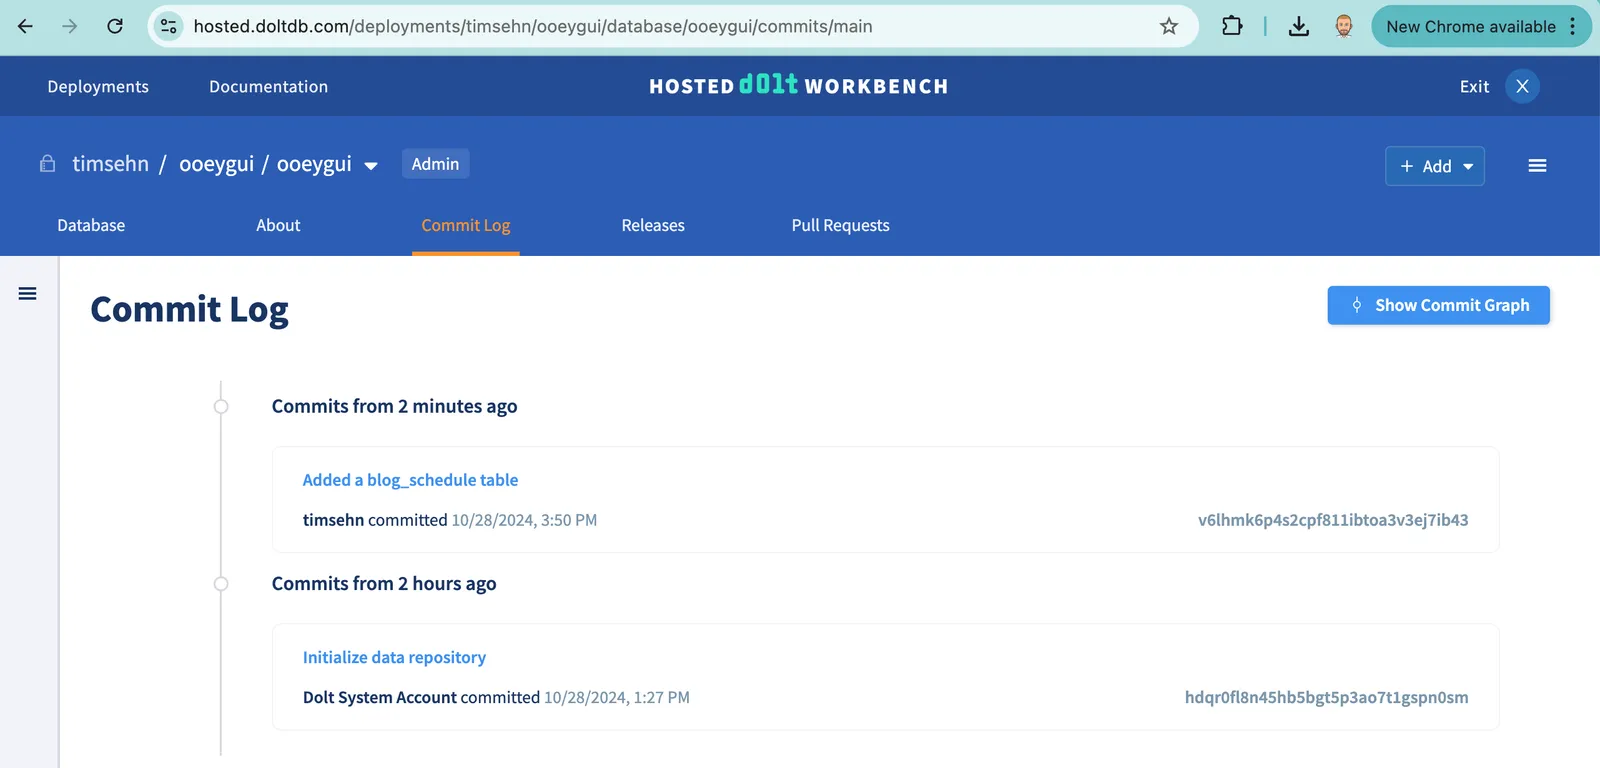
Clicking on any commit in the log will show you a diff of what changed in that commit. It’s pretty powerful. This is an audit log of every change to your database going back to inception. Who changed what, when, and why.
Make a branch#
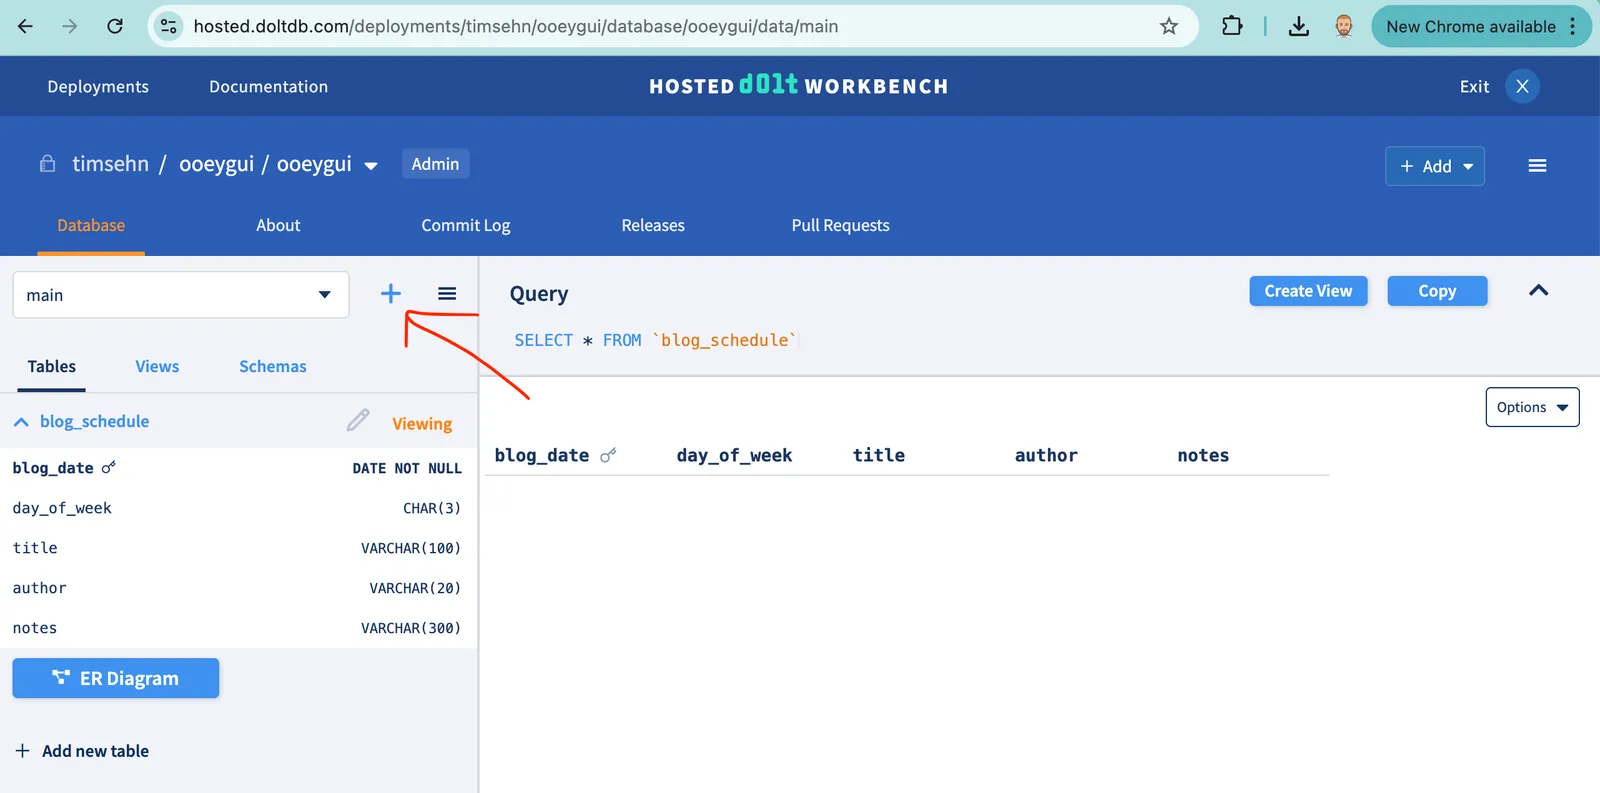
Now, let’s import the CSV I created on a branch. First, I need to create a new branch. I’ll call it csv-import. I navigate to the Database tab and click the ”+” button next to the branch selector, the dropdown that says main. main is the default branch that every Dolt database starts with.
Now, on the create branch page, I select main as my base branch and I enter the name of my new branch, csv-import.
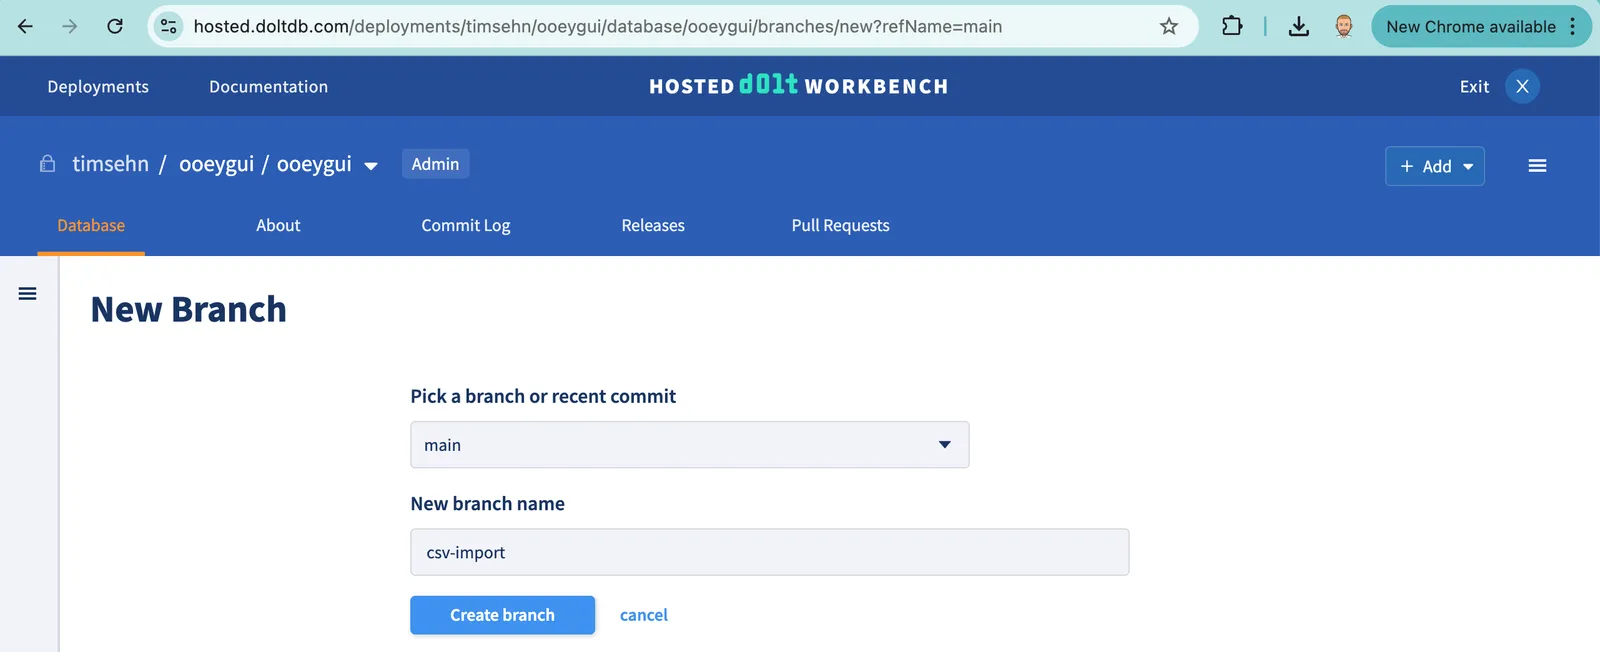
After I’m done, I click “Create branch”. I’m returned to the Database tab, but now the branch selector says csv-import, not main.
CSV Import#
To import a CSV, I click the ”+ Add” button and select “Upload a file”.
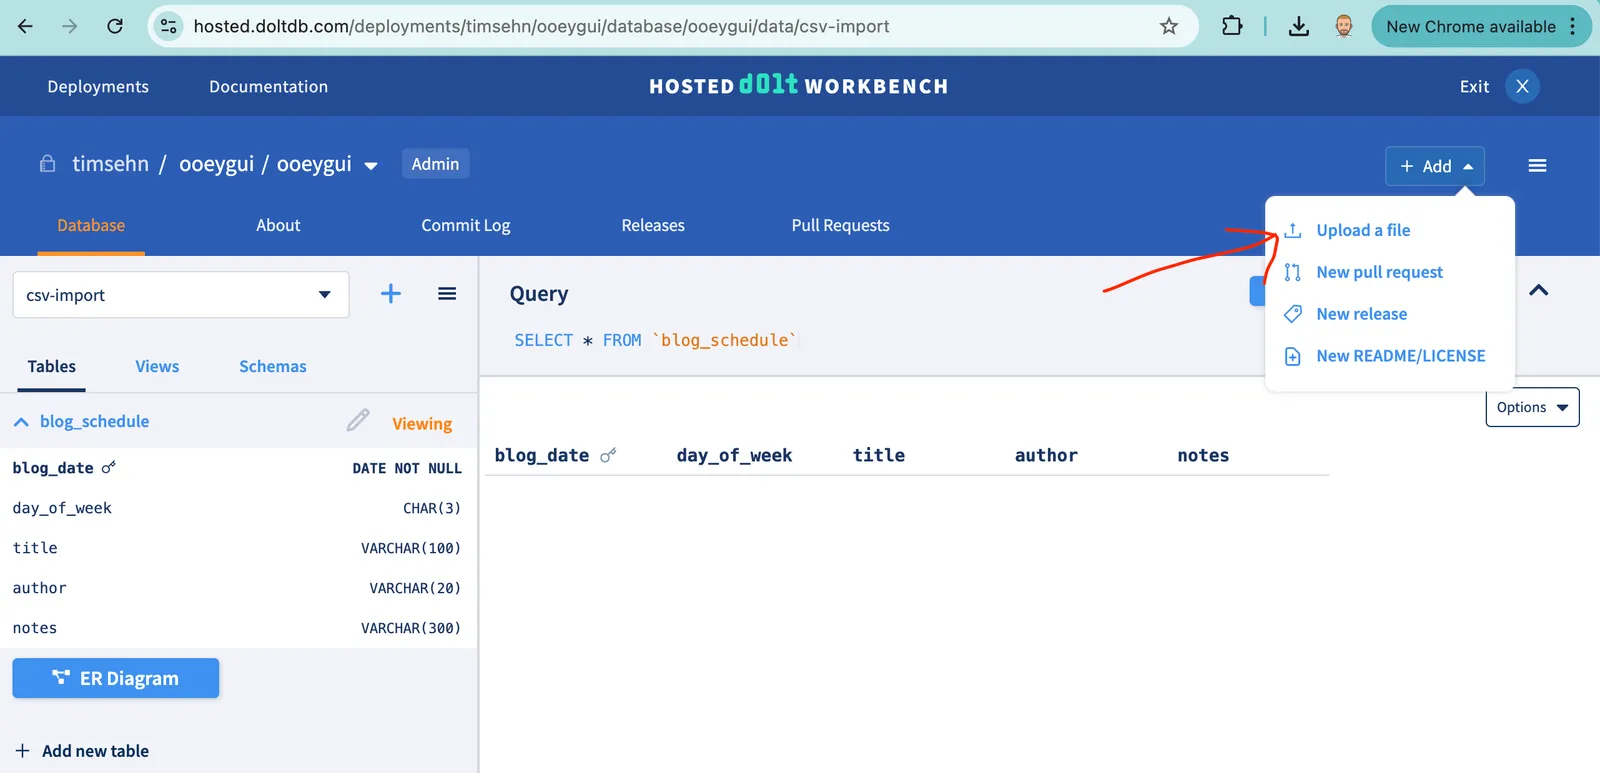
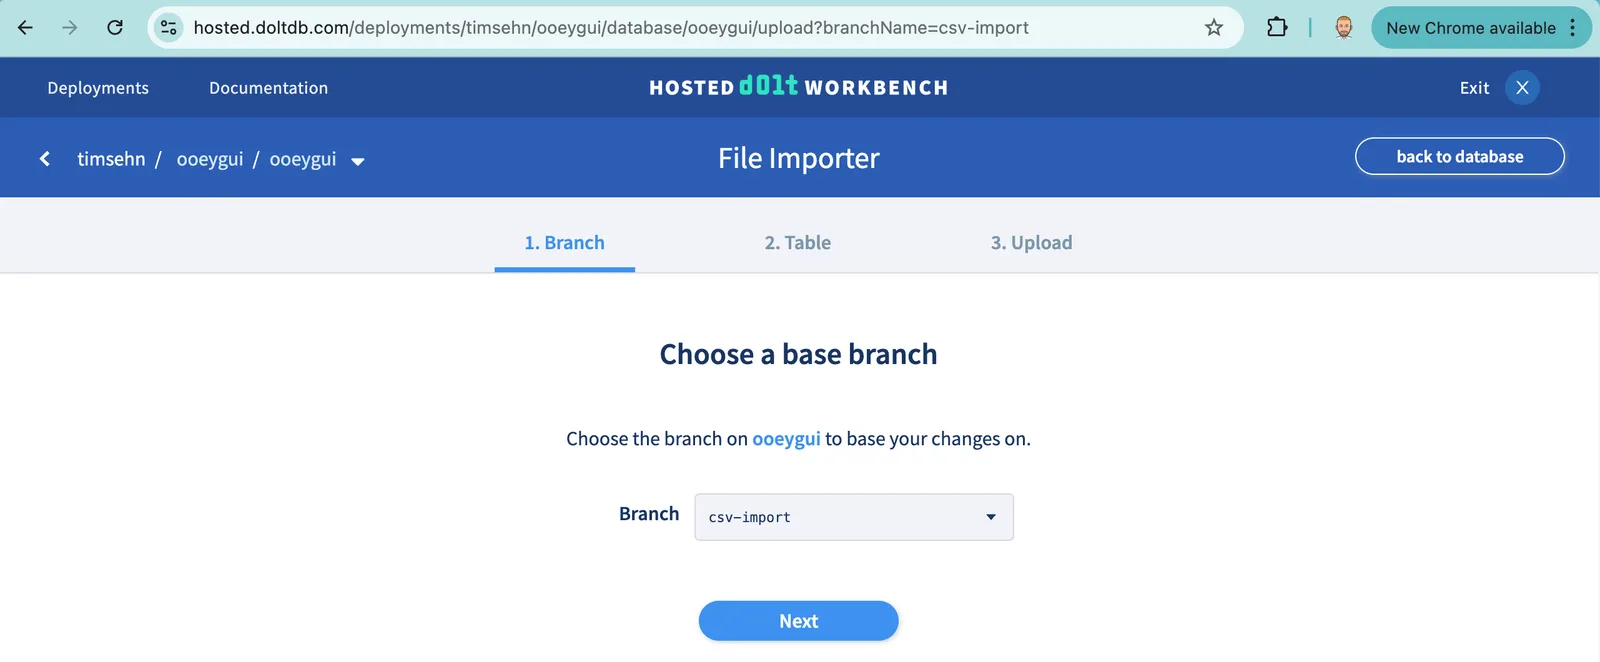
After clicking, I will walk through a file upload workflow. Behind the scenes it uses the LOAD DATA SQL query. This workflow builds the necessary configuration in order to run LOAD DATA correctly for your use case.
First, I select the branch I want the import to happen on, in this case, csv-import. After I pick the branch I click “Next”.
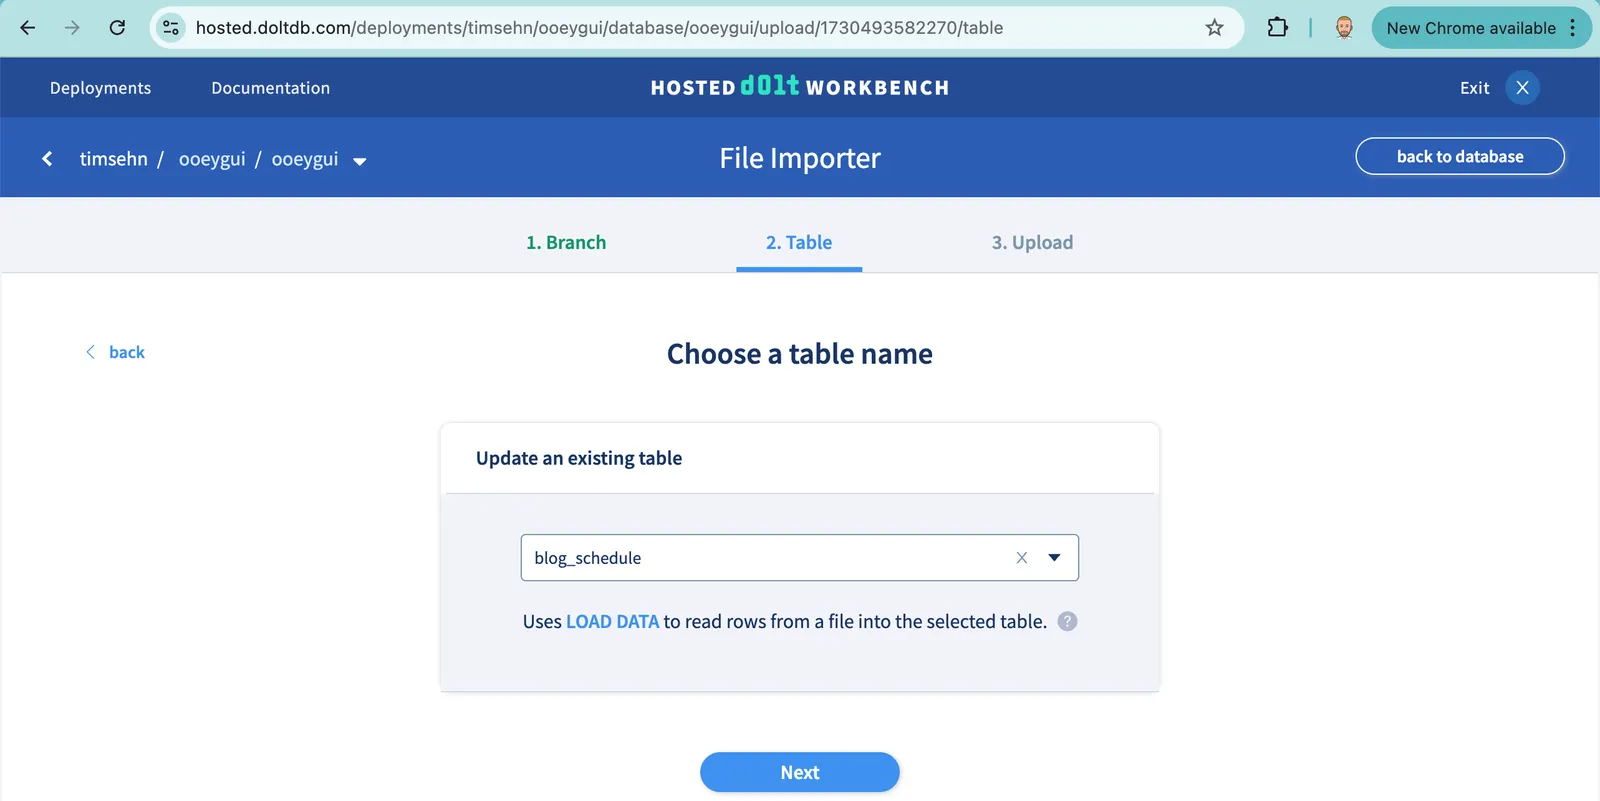
Now, I must select the table I wish to update from the table dropdown. I select blog_schedule. I, again, click “Next”.
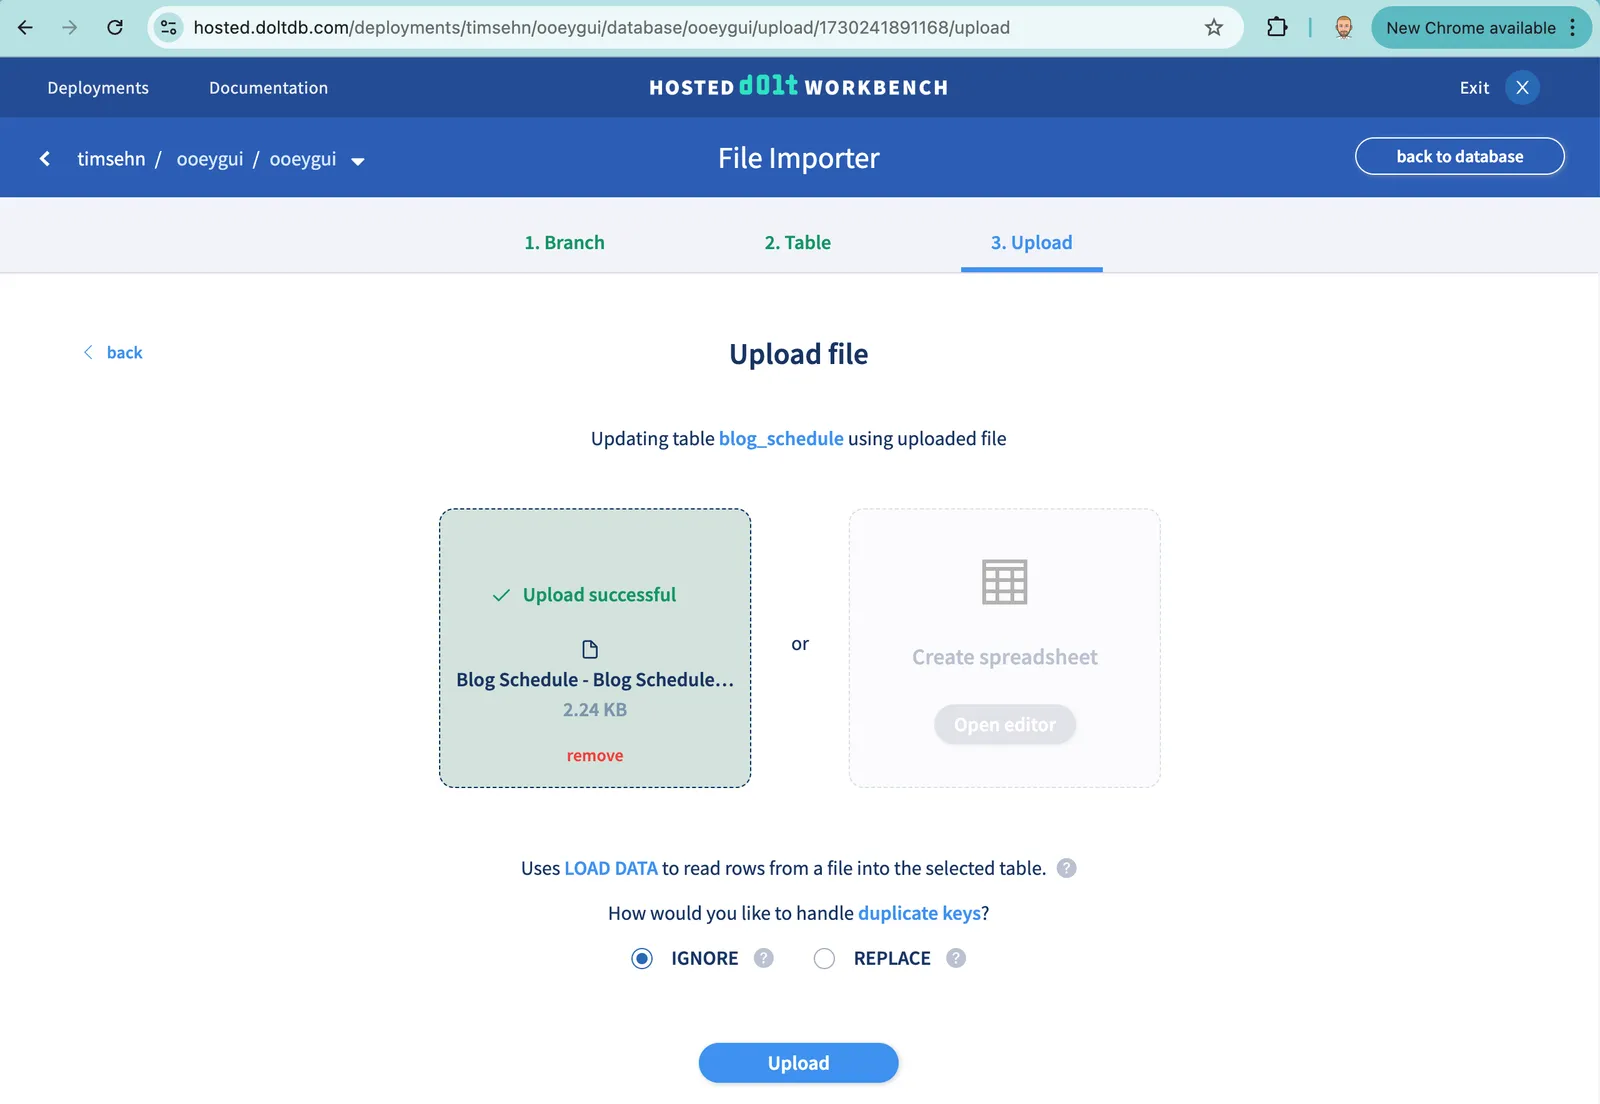
Almost there. I just need to grab the file to import. I grabbed the file from my Downloads folder. I have the option to ignore or replace duplicate keys. My table is empty so this choice does not matter. You also have the option to make your own spreadsheet. The Dolt Workbench is full featured. When I’m ready, I click “Upload”.
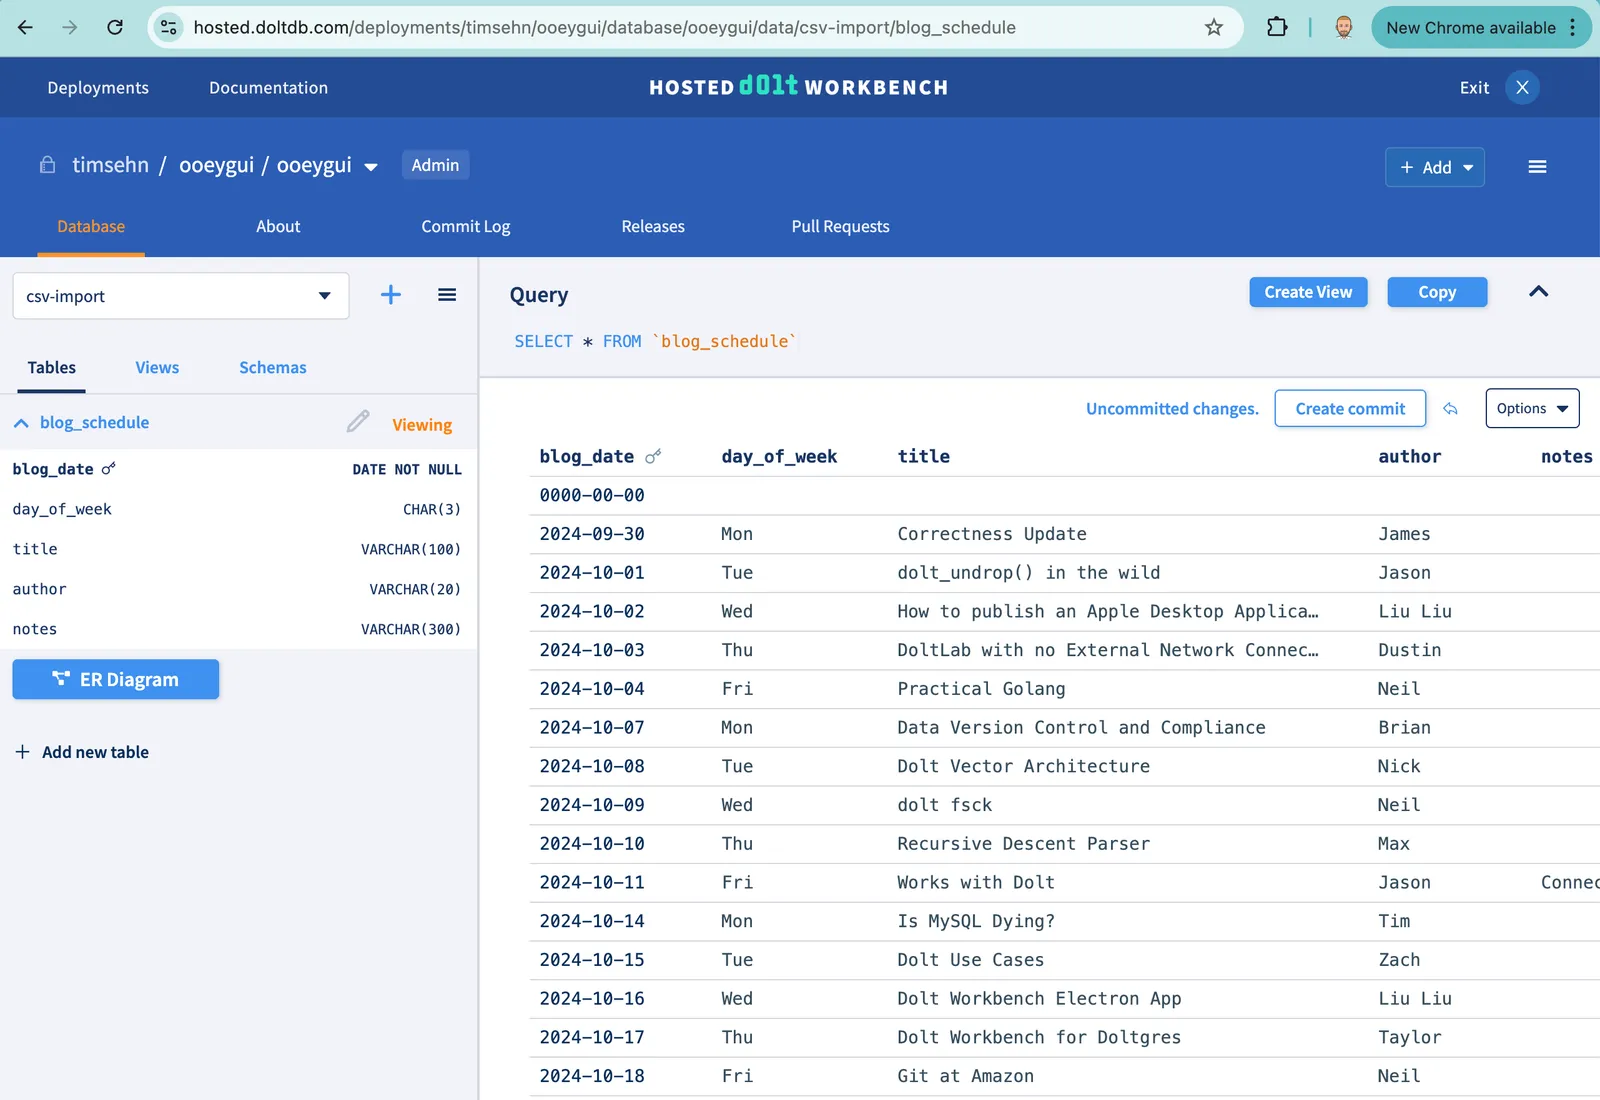
If everything is correct, you’ll be presented with your updated table.
Rollback!#
Astute readers will notice a bad row was inserted. The row is empty with a date of 0000-00-00. This is common with CSV imports and comes from a populated row later in the Google Sheet. Let’s imagine this is a production system and we don’t want this mistake alive for very long, even on a branch. Dolt has the ability to do instantaneous rollbacks.
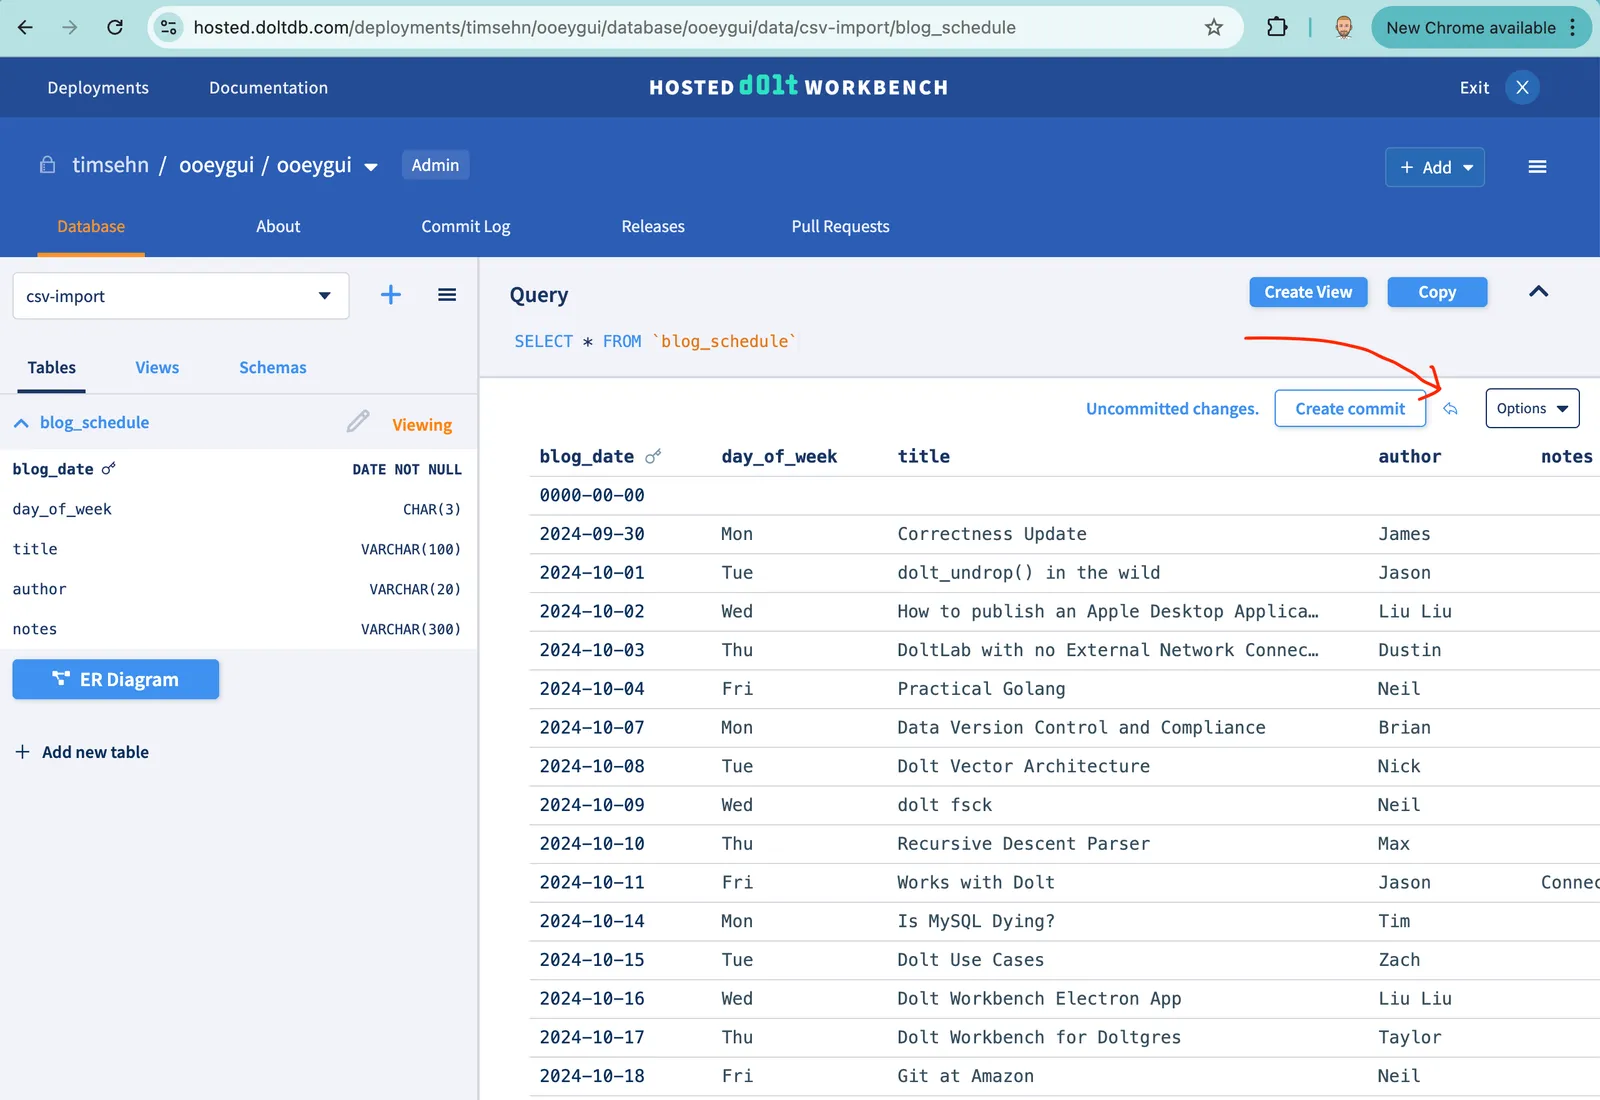
Clicking that “Rollback” icon brings me to a screen where I can choose to rollback individual tables or the set of changes across all tables since the last commit, also known as the working set. I’m in a hurry so I’ll do the whole working set using “Restore all tables”.
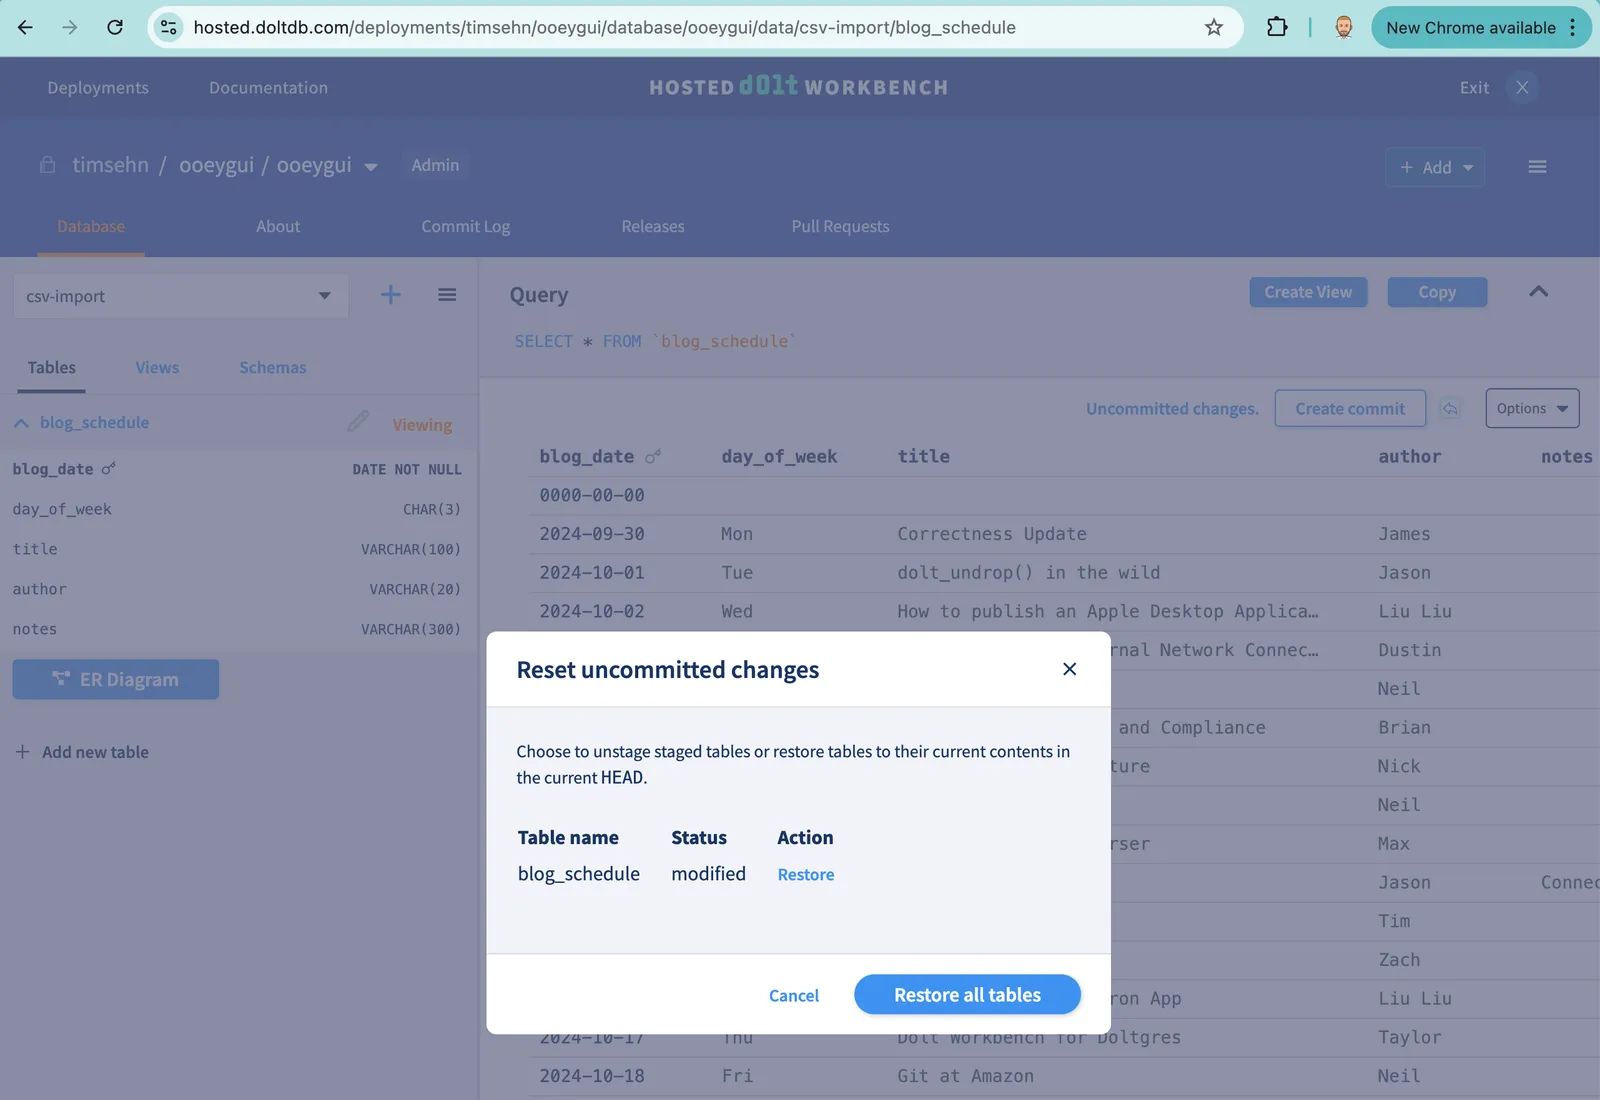
After clicking the button, rows are removed from my table and I’m back in a good place. Crisis averted.
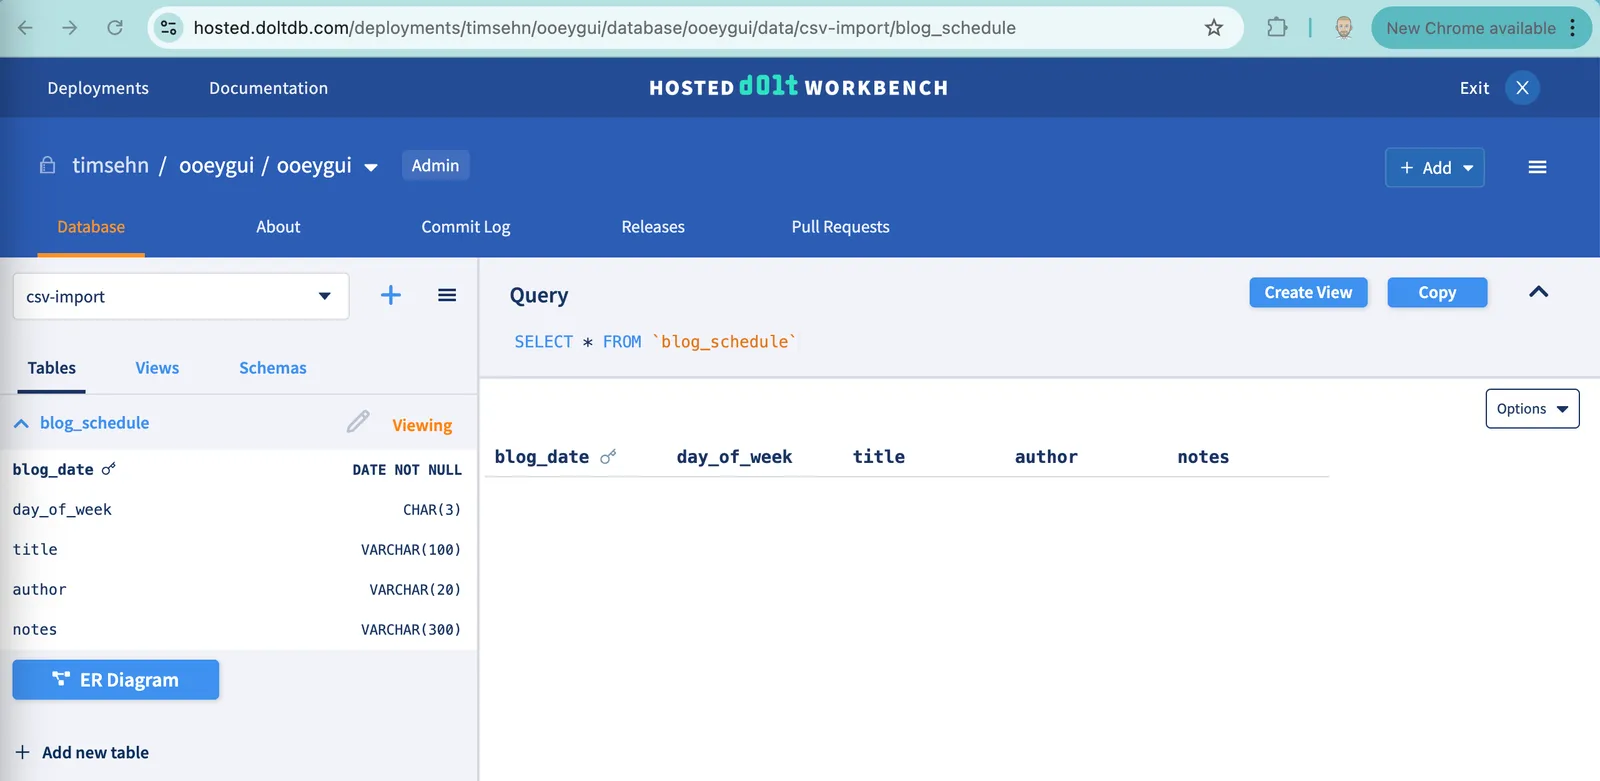
Fix it#
Let’s say instead of rolling back I wanted to delete the bad row. I can just redo the Upload file process until I get to this screen again.

With the Dolt Workbench, we can just remove this row before we make a Dolt commit. We can either write a delete SQL query but in the spirit of our GUI focus, we’ll just click the “Delete Row” button. This is accessed by clicking on the “hamburger” menu next to the row.
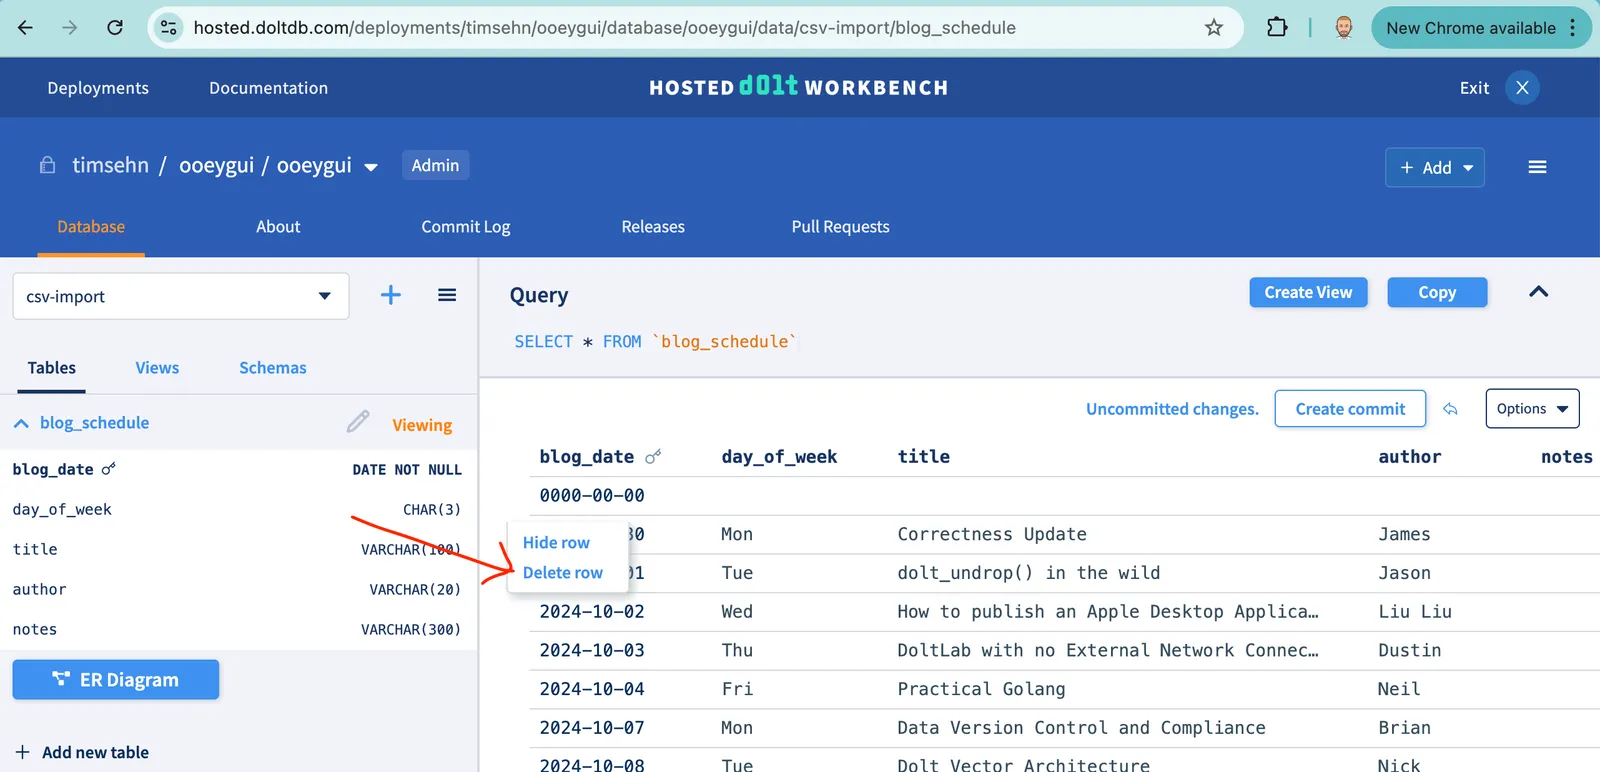
After clicking the button, the bad row is removed and I’m presented with my current working diff.
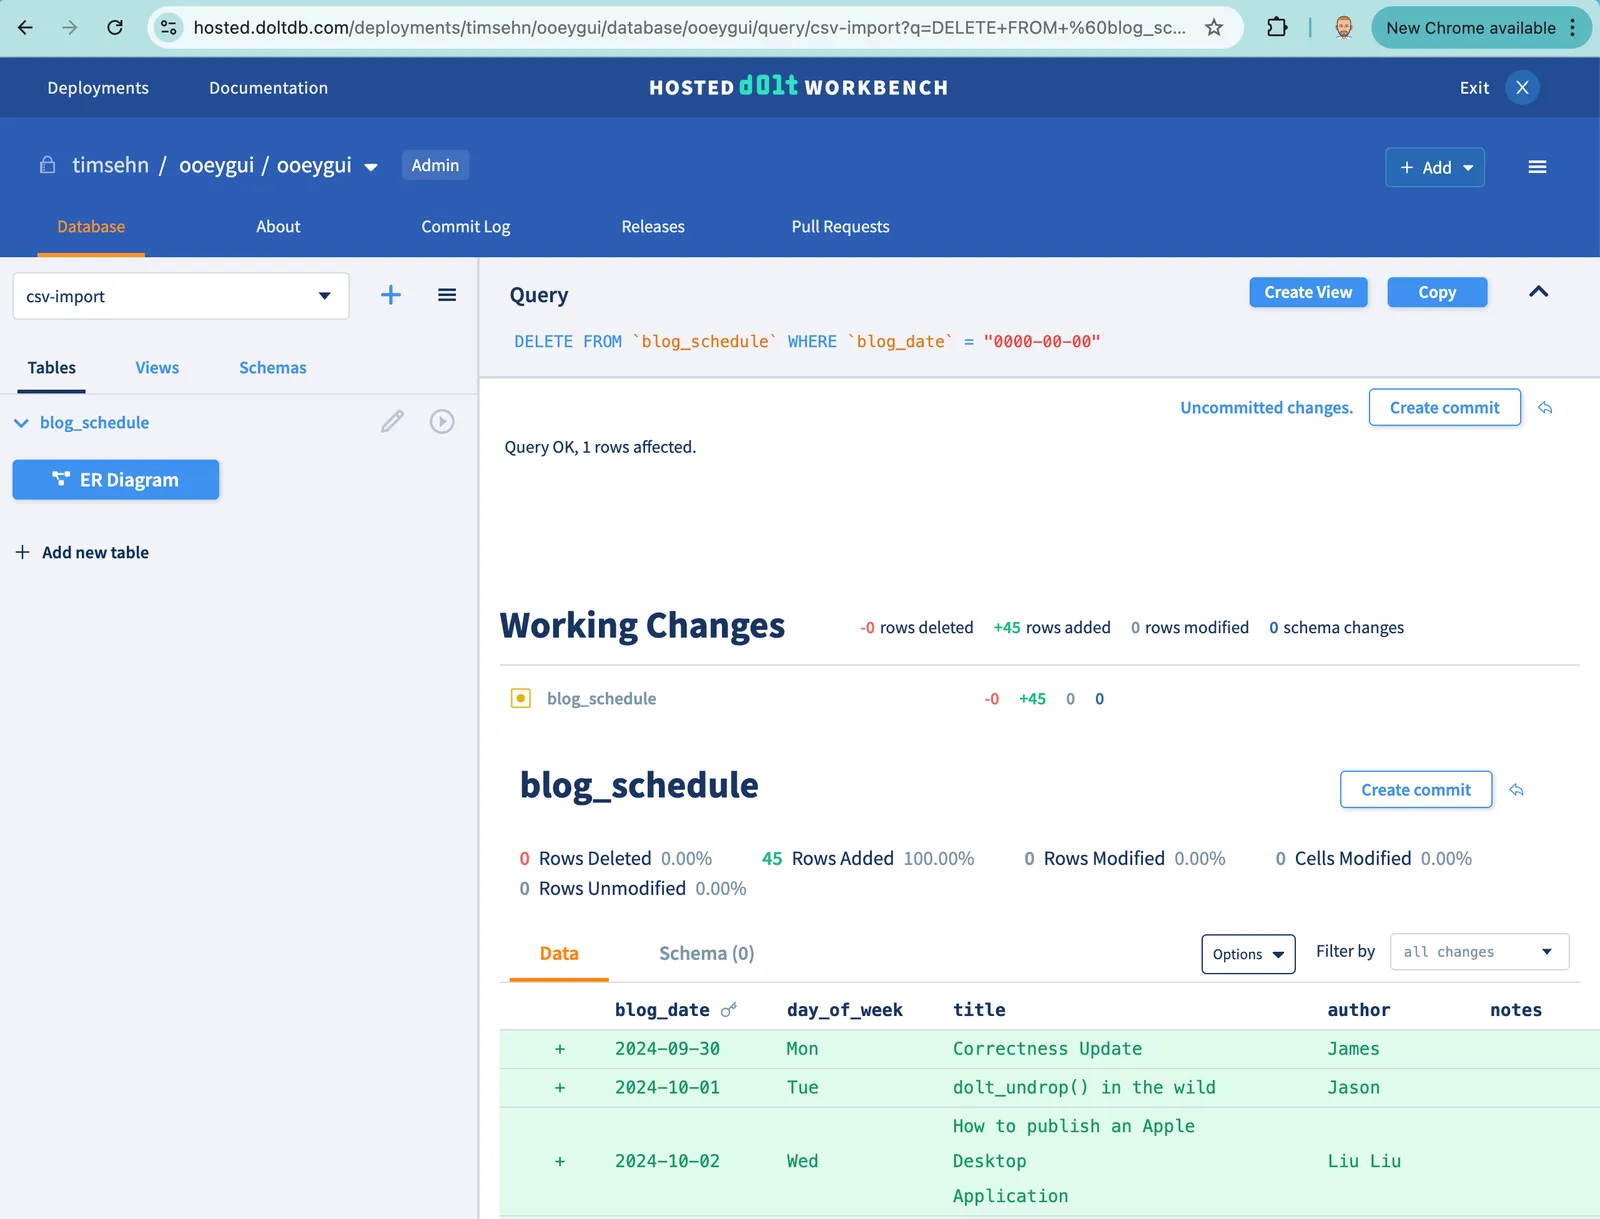
After clicking on the table to view it, my table looks pristine.
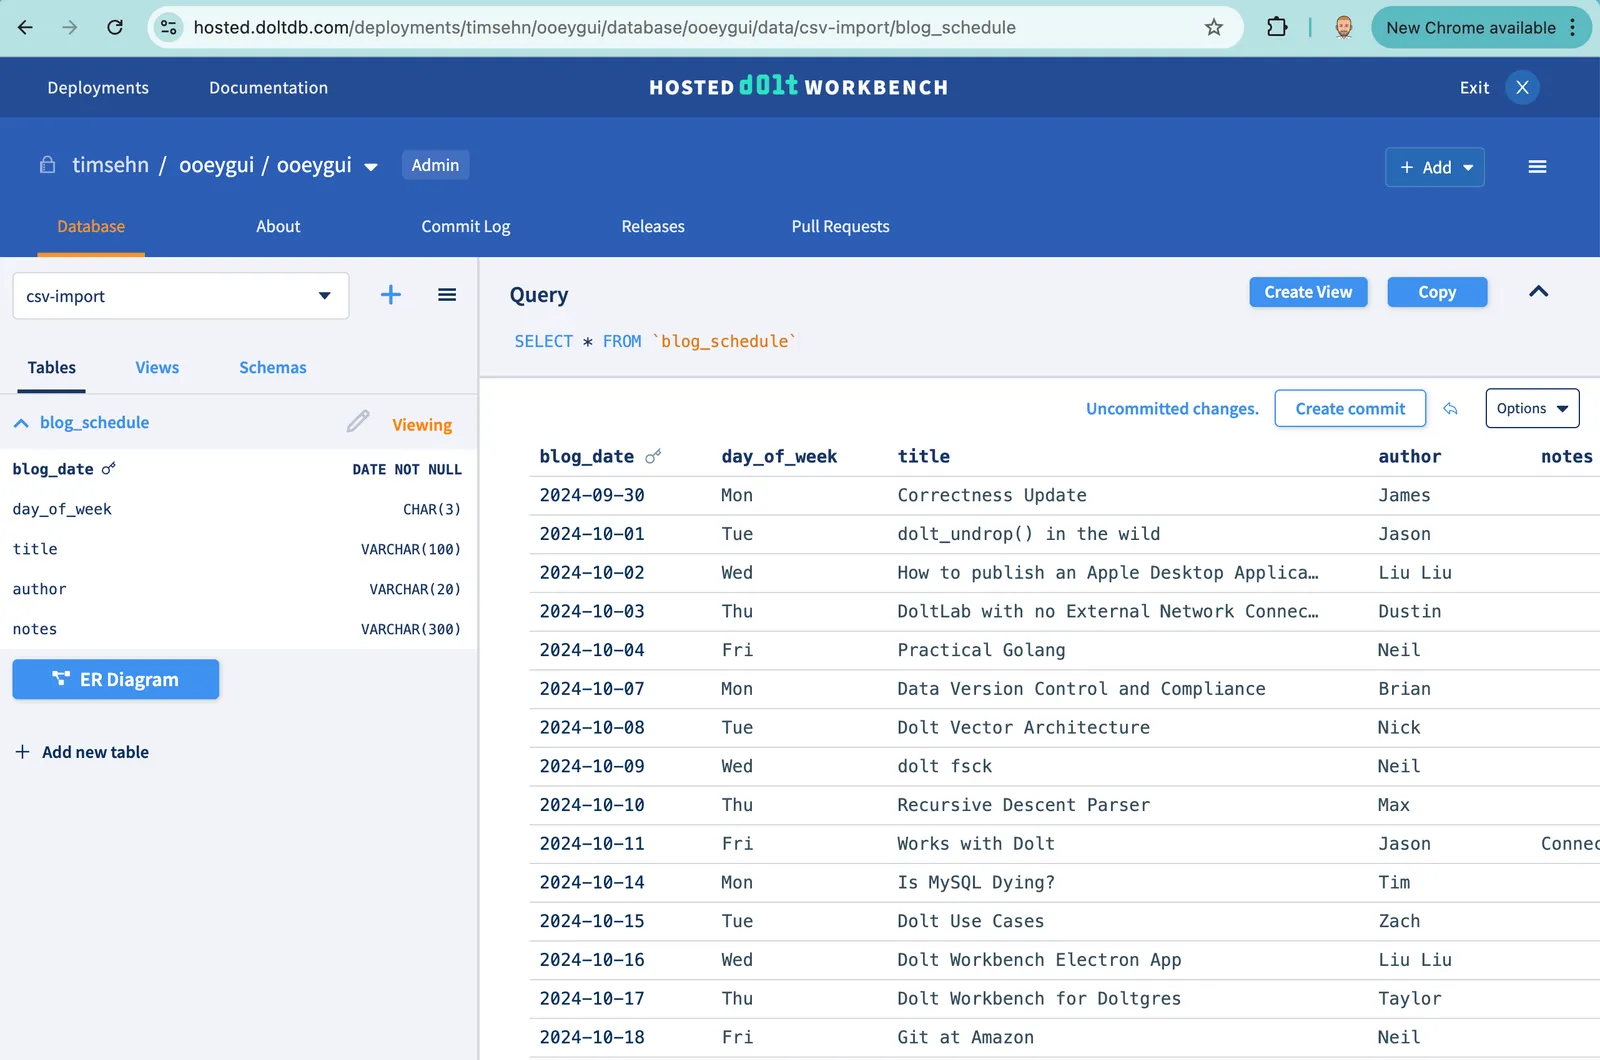
I’m satisfied so I make another Dolt commit with the commit message “Imported blog schedule from Google Sheet”. I can see it in the Commit Log.
Make a Pull Request#
Those familiar with GitHub or any other Git hosting site should be familiar with the concept of a Pull Request. A pull request is a workflow to merge one branch into another. On GitHub, Pull Requests are an opportunity to perform continuous integration tests and code reviews on changes. The Dolt Workbench offers a similar feature.
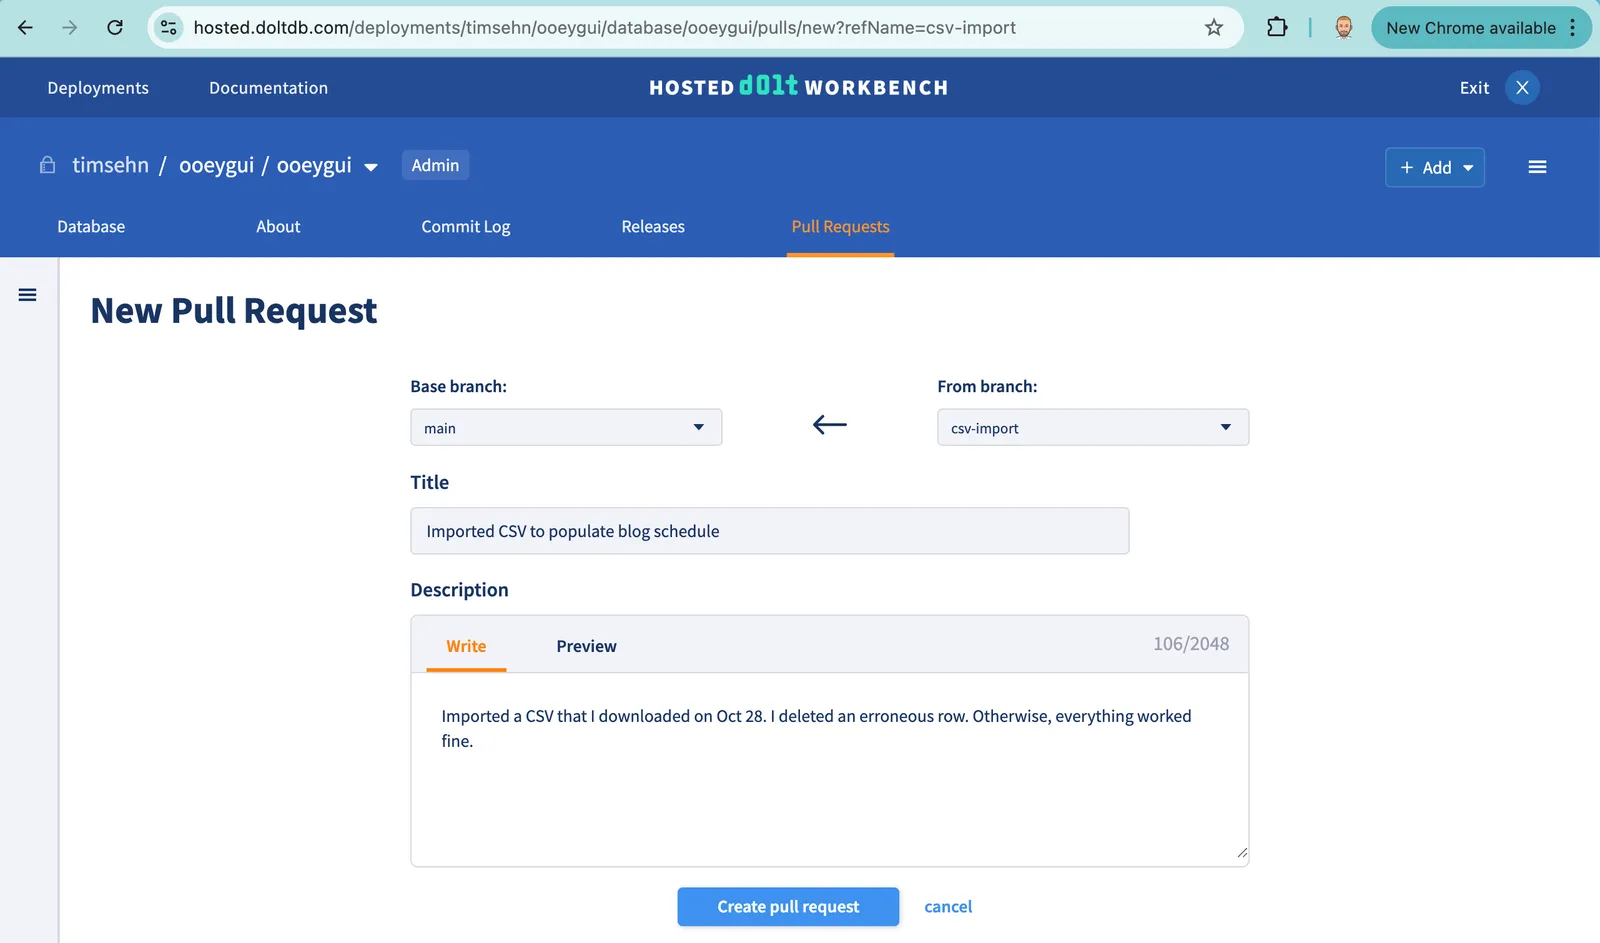
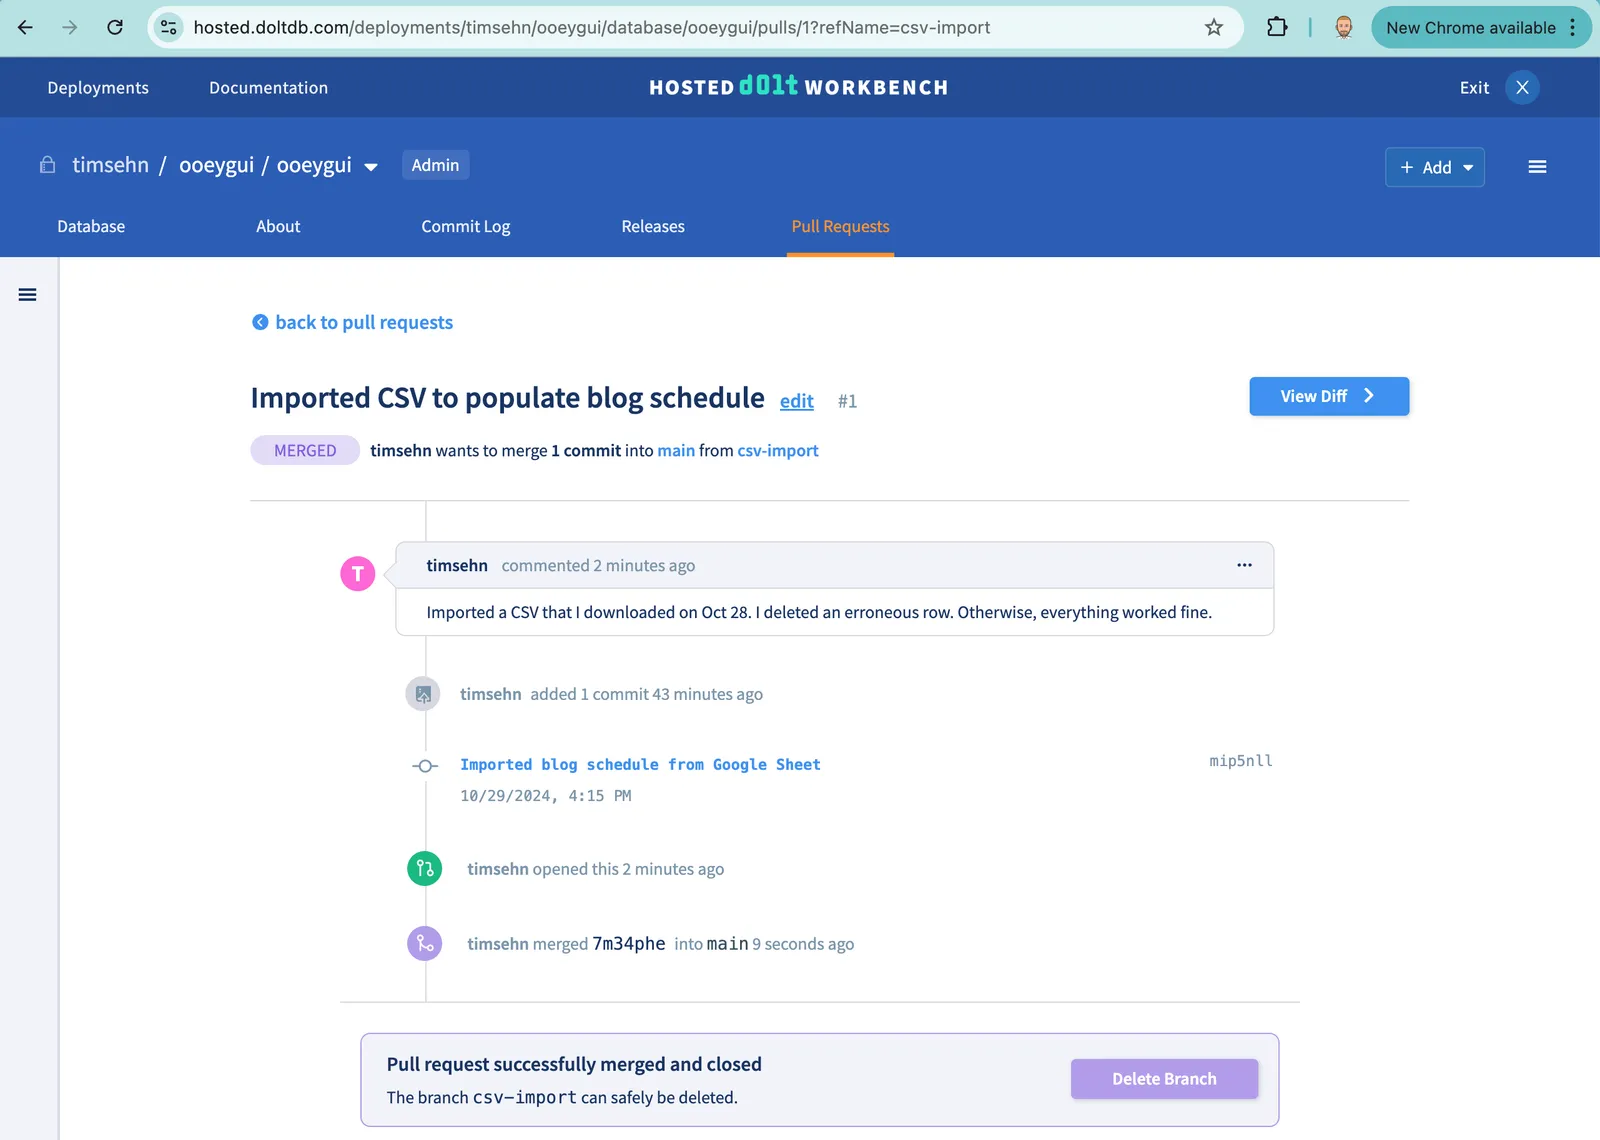
Let’s merge the csv-import branch into main. To do this I click on the “Pull Request” tab and click “Create Pull Request”.

I then select main as my “Base branch” and csv-import as my “From branch”, indicating I want to merge csv-import into main. I then give my Pull Request a title and description. When I’m ready, I click “Create pull request”.
I can now use the Hosted Workbench to collaborate with my coworkers to review this change.
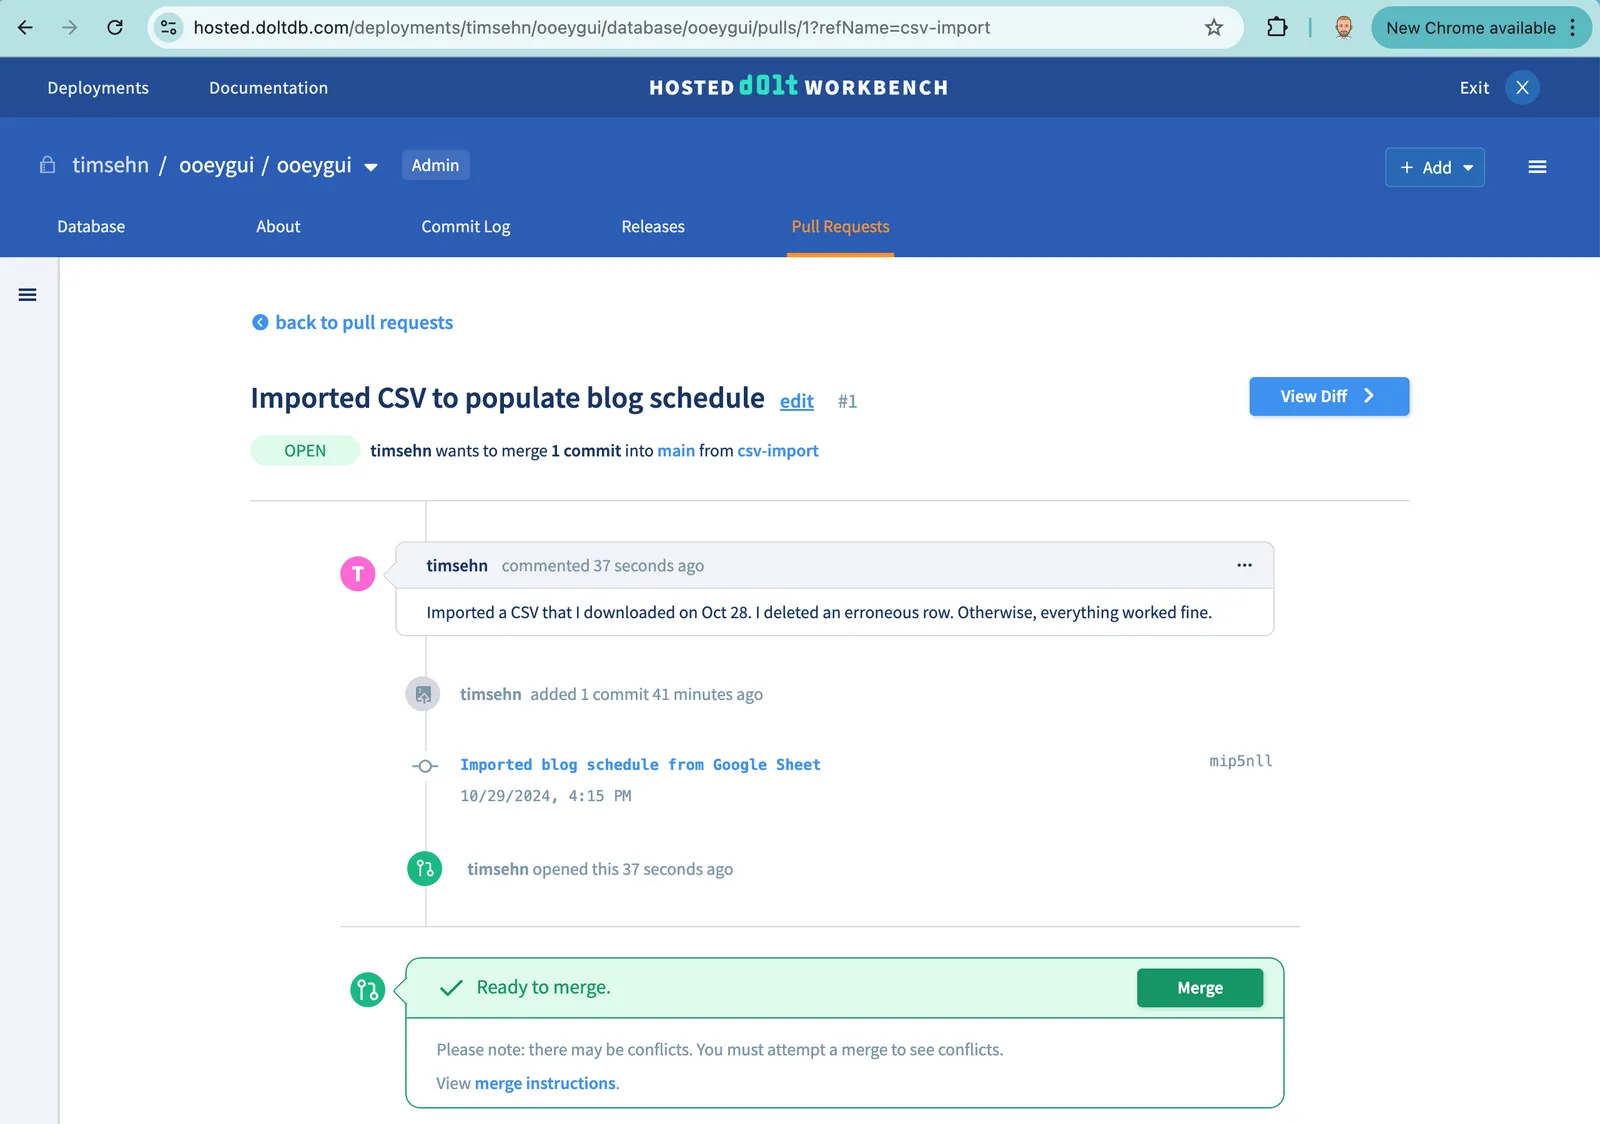
Once all the reviews are complete, I can click the Merge button and merge my changes into main.
Query#
Of course, now that I have data populated on main I can run select queries. Dolt is a fully-compatible MySQL database that supports complex JOINs, Common Table Expressions, and Views, to name a few advanced SQL features. Our database doesn’t have much data in it yet so let’s stick to something simple. Let’s see all the times I’m on the blog schedule. Just like I did with create table, I enter the SQL query into the query box and click the “run” button.
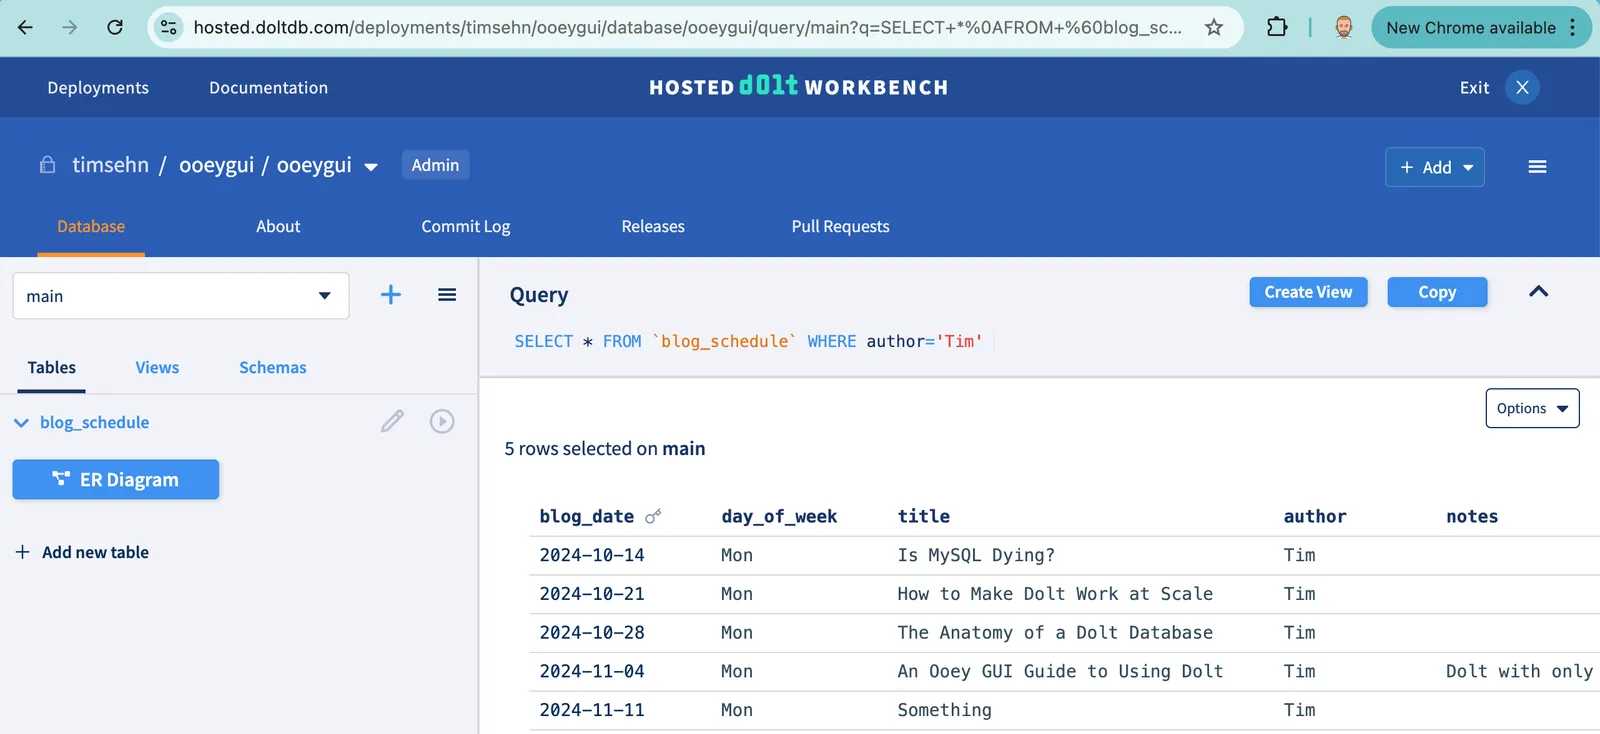
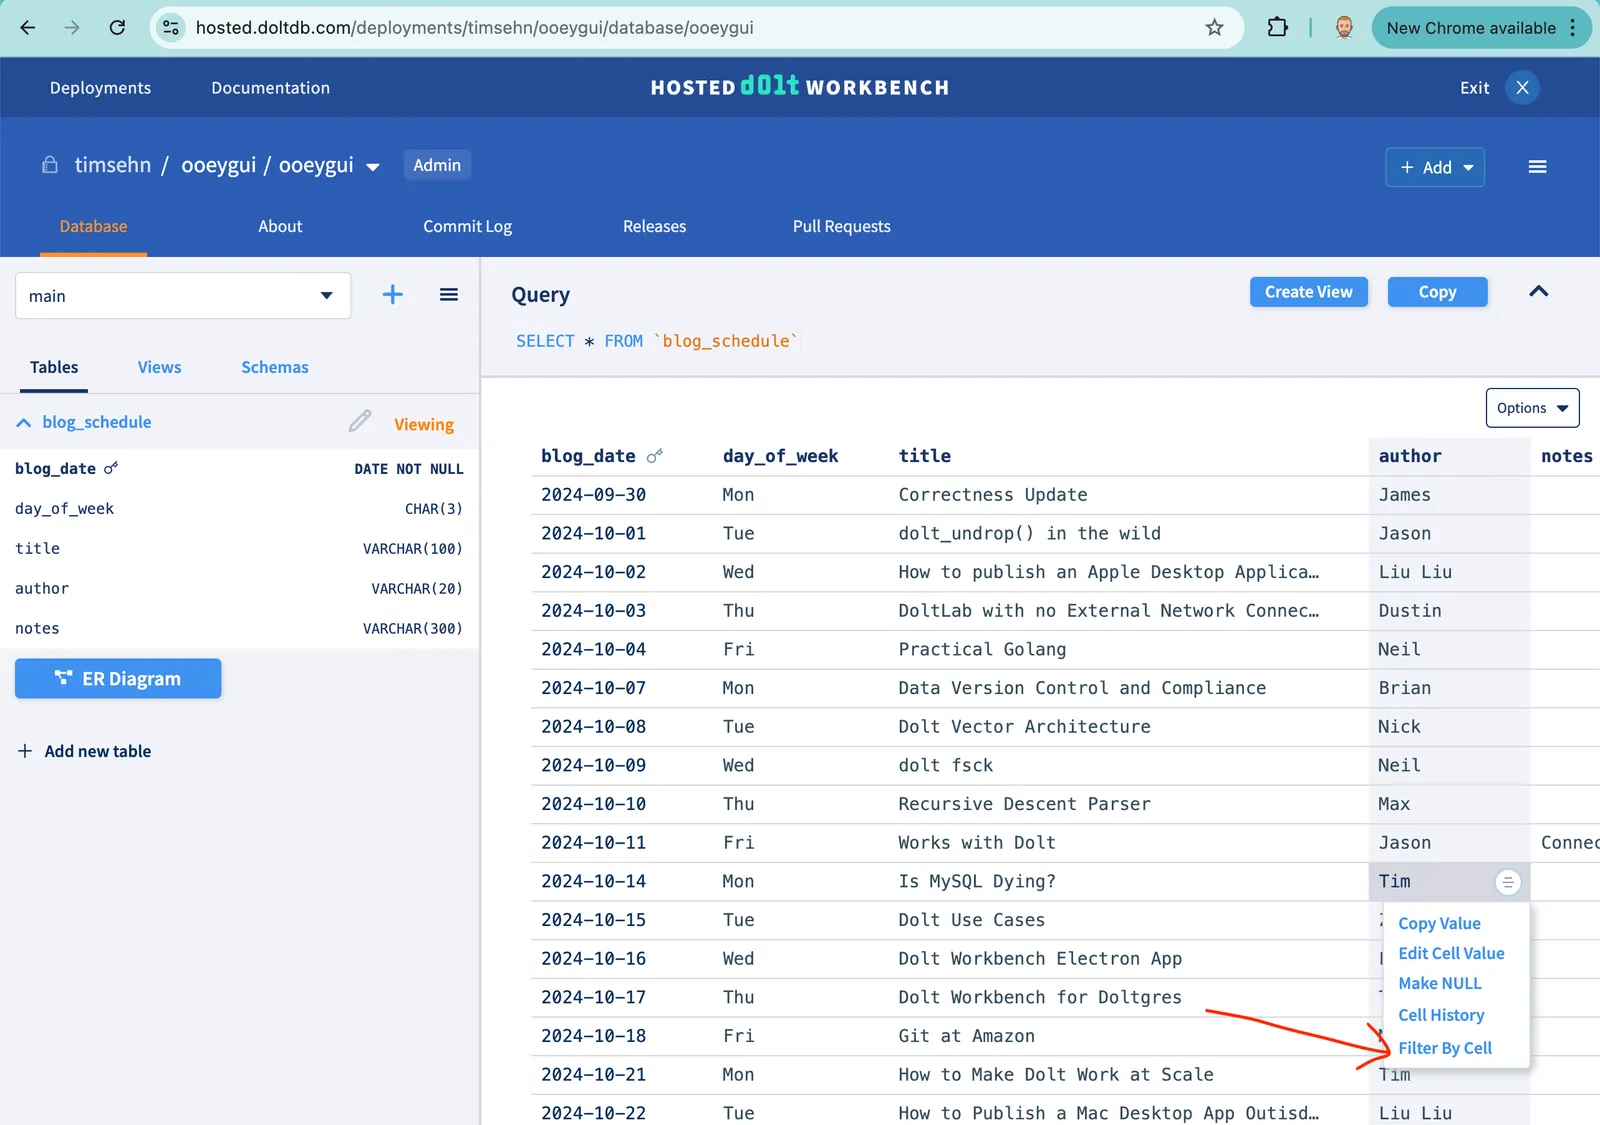
I can also use the “Filter by cell” button if I am not that familiar with SQL. This is accessed via the “hamburger” menu in any cell. Clicking that button reproduces the select query above. No typing required. That’s ooey GUI!
Release#
One final Dolt feature I would like to show off is data release. A data release corresponds to a tag in in Dolt. A tag is a named commit. In Git, this often signals a version of your code that you are releasing. In Dolt, it can mean the same thing. Often, Dolt users use releases when they train a machine learning model with their data to insure reproducibility.
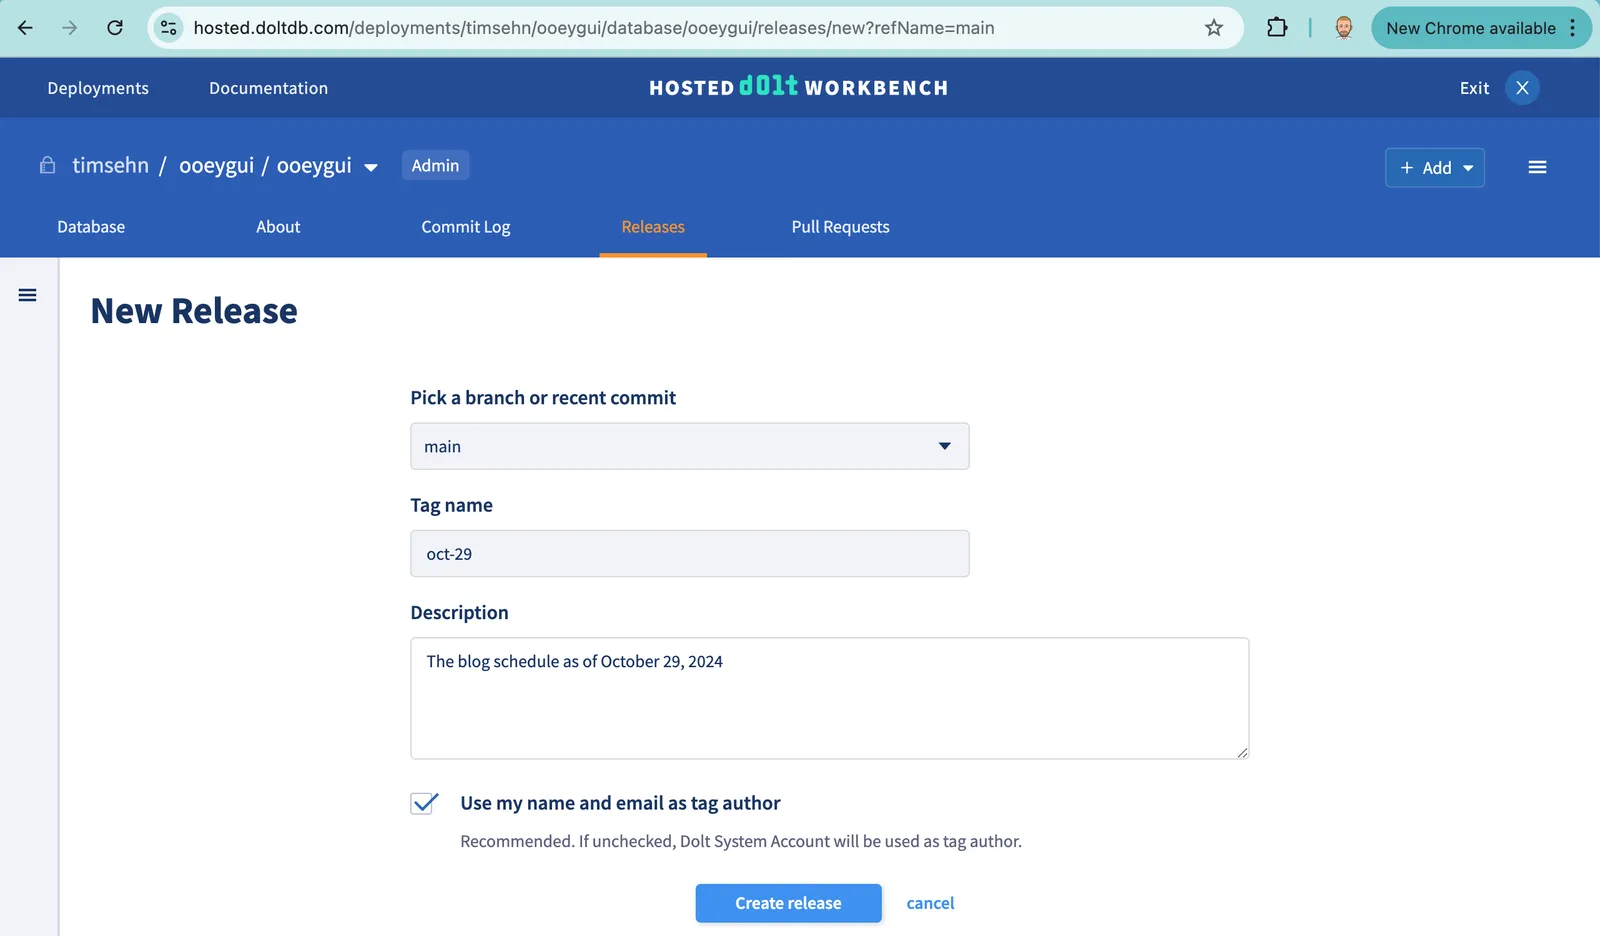
Let’s create a release named today’s date, oct-29. I click the “Releases” tab and the “Create Release” button. I select main as my branch, enter oct-29 as the name, and add a useful description. When I’m done, I click “Create release”.
Now I have a release on the releases page. I can access this version of the data by selecting it in the branch selector under Tags.

Local Workbench#
Do you like what you see but would rather see an icon in your dock? Everything you just saw is also available in a Mac and Windows App. You can download it from the appropriate App Store. We’re official! Launch it and get a nice icon in your dock.
When you open the Dolt Workbench, it prompts you to set up the connection. Remember your connection information I mentioned earlier? Enter it here. I’ll use the URL method. I just copy the MySQL connection string from the Hosted website and paste it in the URL field.
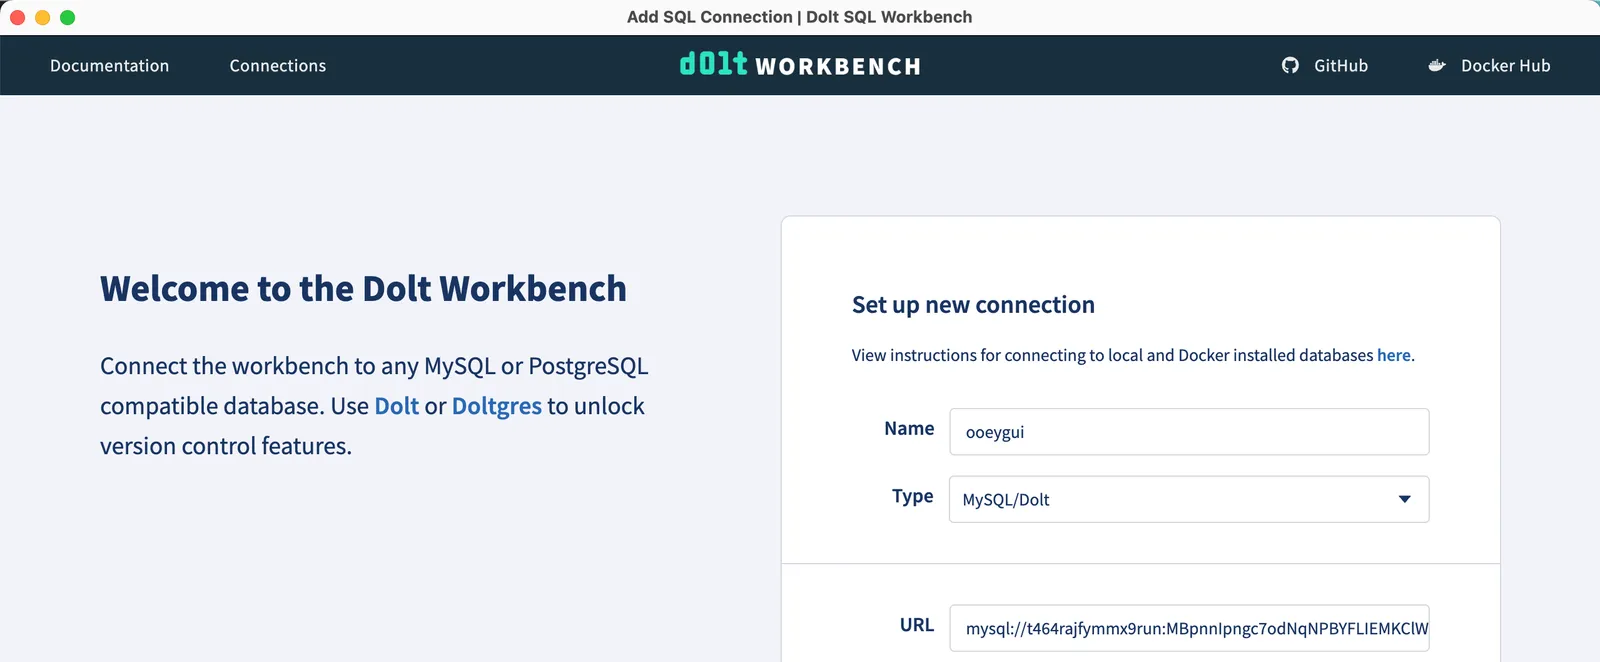
I click “Launch Workbench” and I have all the features and functionality I showed you on the Hosted Workbench but on my laptop.
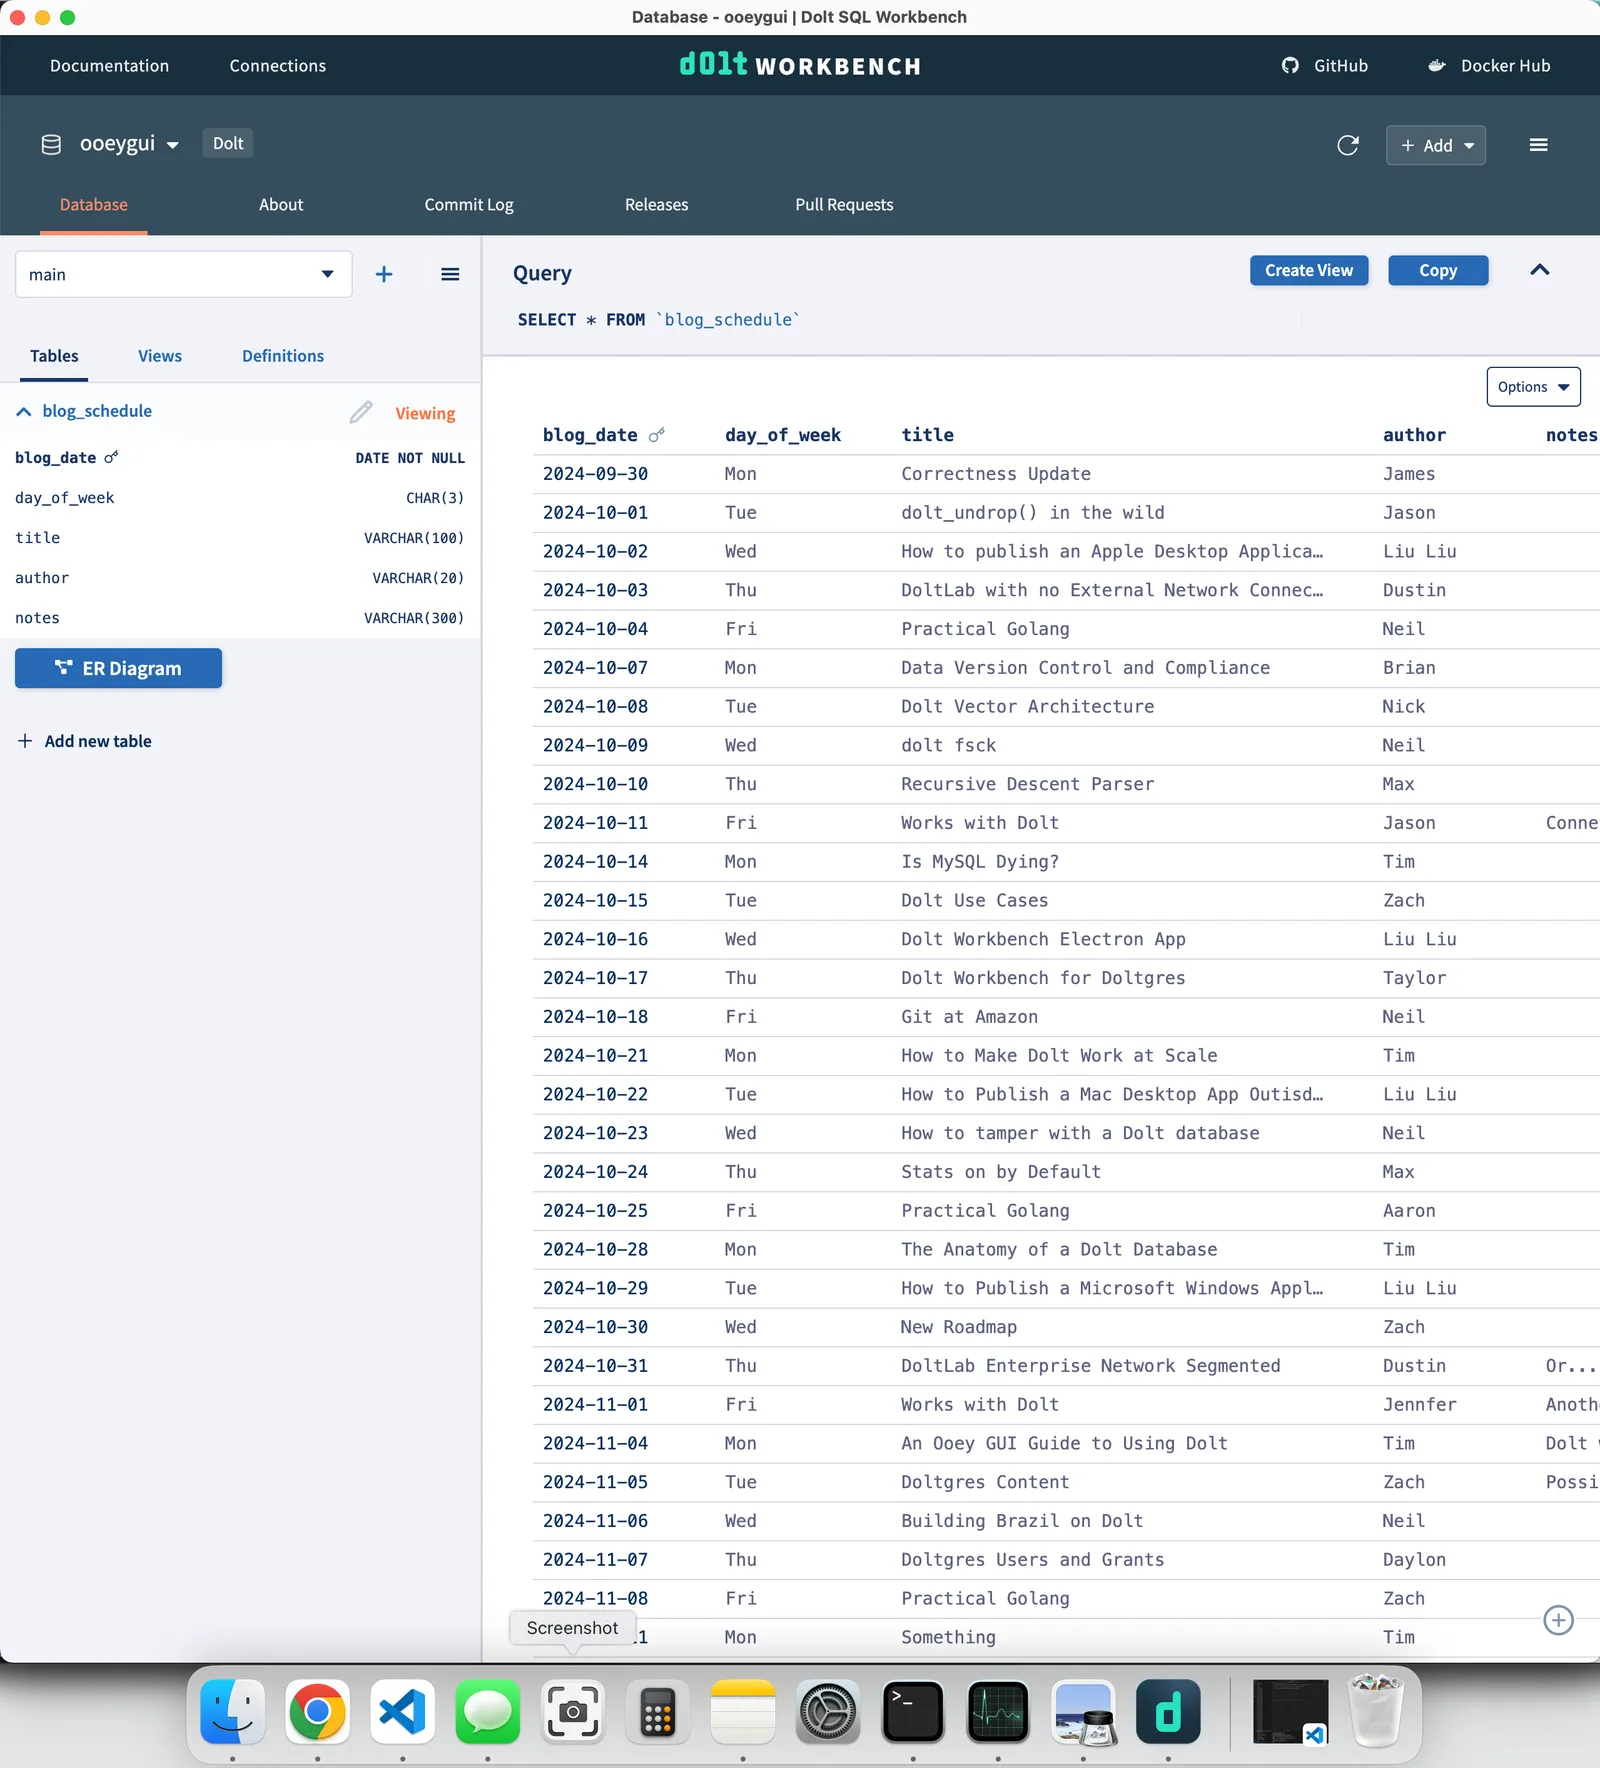
The only real difference between the Hosted Workbench and the Dolt Workbench App is Pull Requests. Locally, pull requests are more like merge requests. They are single player. They allow you to review a branch merge before you execute it.
DoltHub#
Dolt also has its own version of GitHub, called DoltHub, where you can share databases with the world or just to your team. You access Dolt as a remote via clone, push, pull, and fetch. This concept is new for database users but Git users should be very familiar with it. Git remotes are the backbone of decentralized collaboration on source code, like what you find in open source. Dolt brings that collaboration model to databases.
While writing this blog, I noticed we don’t have a good GUI-based remote interface in the workbench so I made an issue.
In order to set up a DoltHub remote, I first need to create a DoltHub account. This is a different account pool than Hosted Dolt. Once I’ve done that, I need to click the “Create database button”.

I’ll again call my database ooeygui and fill out the necessary information.
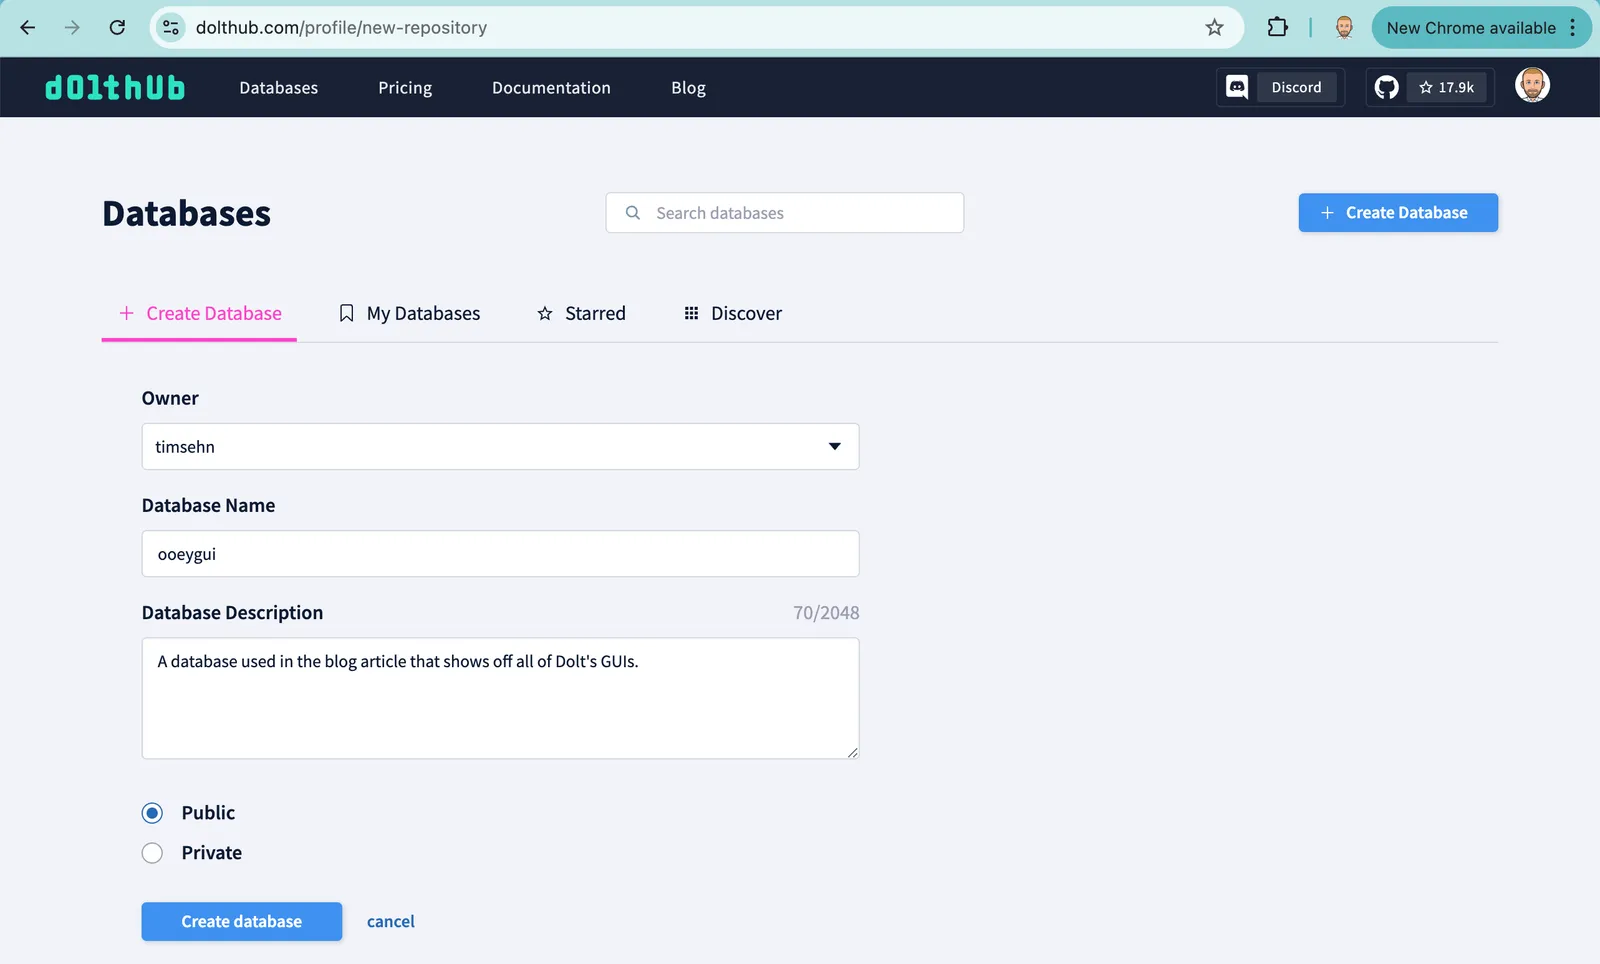
After I click “Create database”, I have an empty Dolt database.
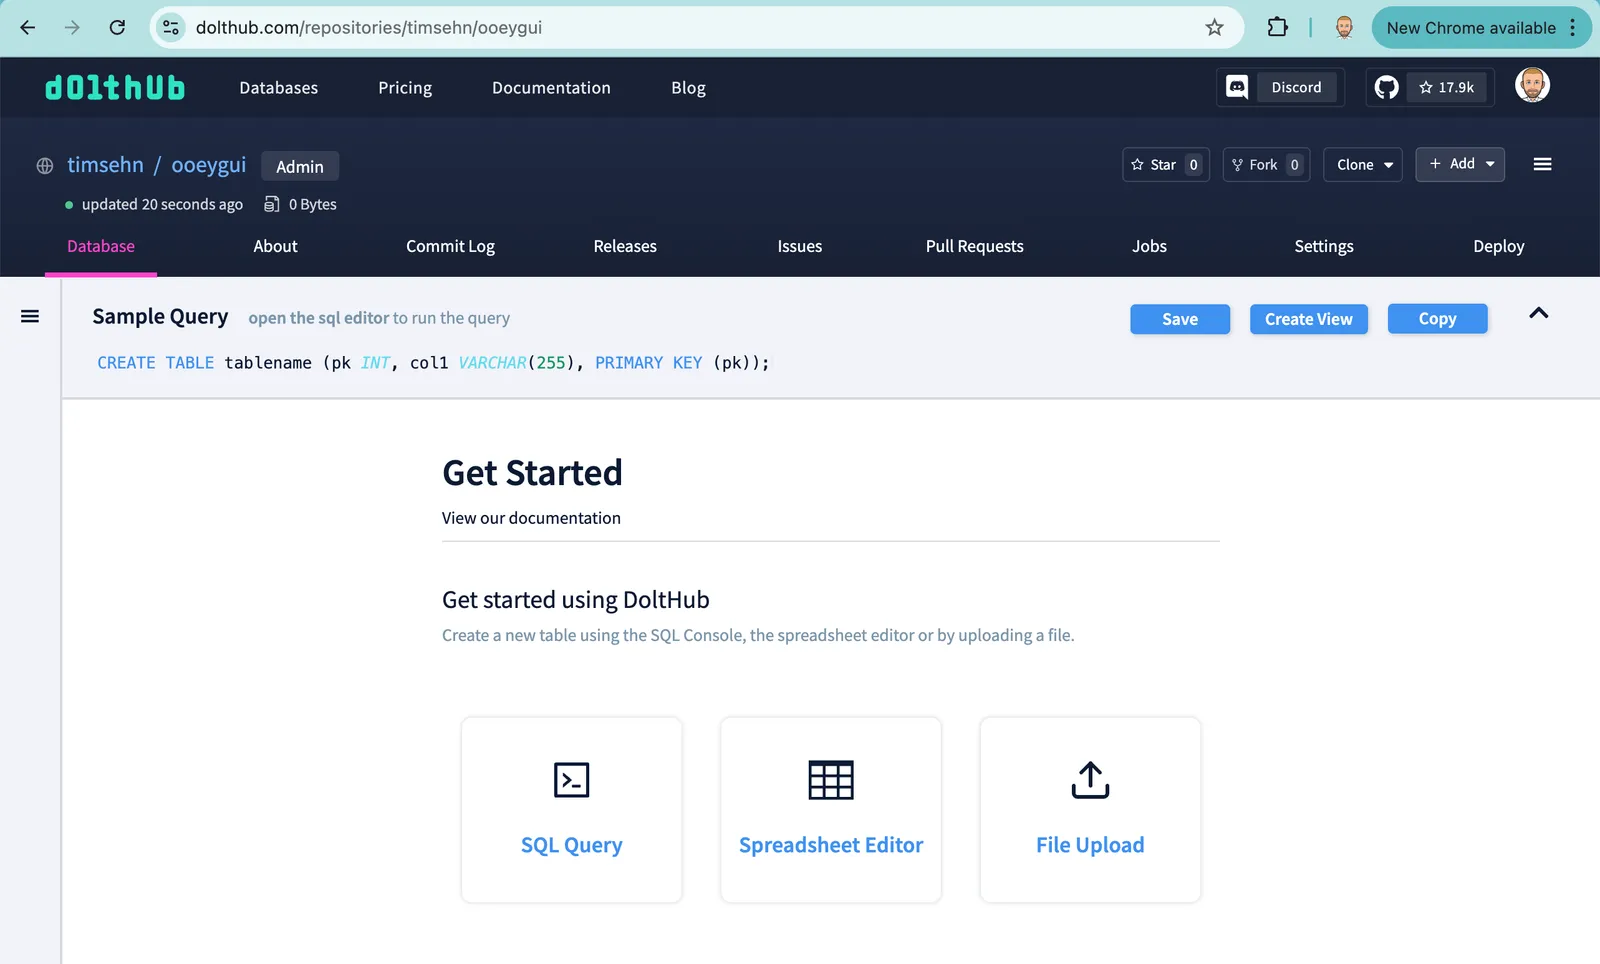
Now, on my Hosted Dolt I need to set DoltHub up as a remote and give it credentials to be able to write to DoltHub. This is all documented here and is a bit involved. To set DoltHub up as a remote, I run the call dolt_remote('add', 'origin', 'timsehn/ooeygui') query either on the Hosted or Local Workbench. I then go to the Settings page in Hosted and click “Create Credential”. After it completes, I click “Add to DoltHub”. That opens a DoltHub window, I add a name for the credential and click “Add”. Now, the moment of truth, I will sync my Hosted Dolt database with DoltHub using call dolt_push('origin', 'main').
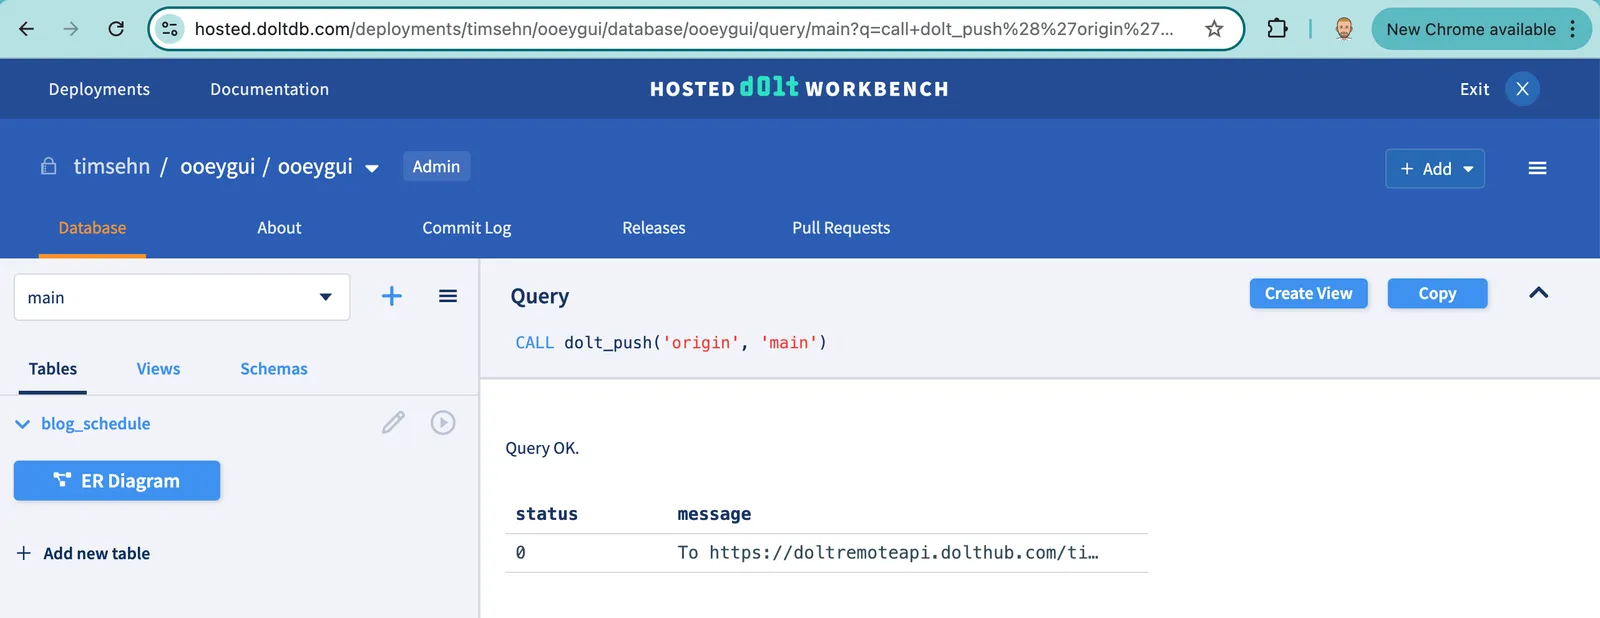
It succeeded. I now go to DoltHub and I will see the ooeygui database. The database on DoltHub is a clone of the database on Hosted Dolt and I can sync the two using push and pull. DoltHub has a very similar GUI to Hosted Dolt but there are some minor differences because DoltHub is offline. There is no SQL interface to DoltHub.
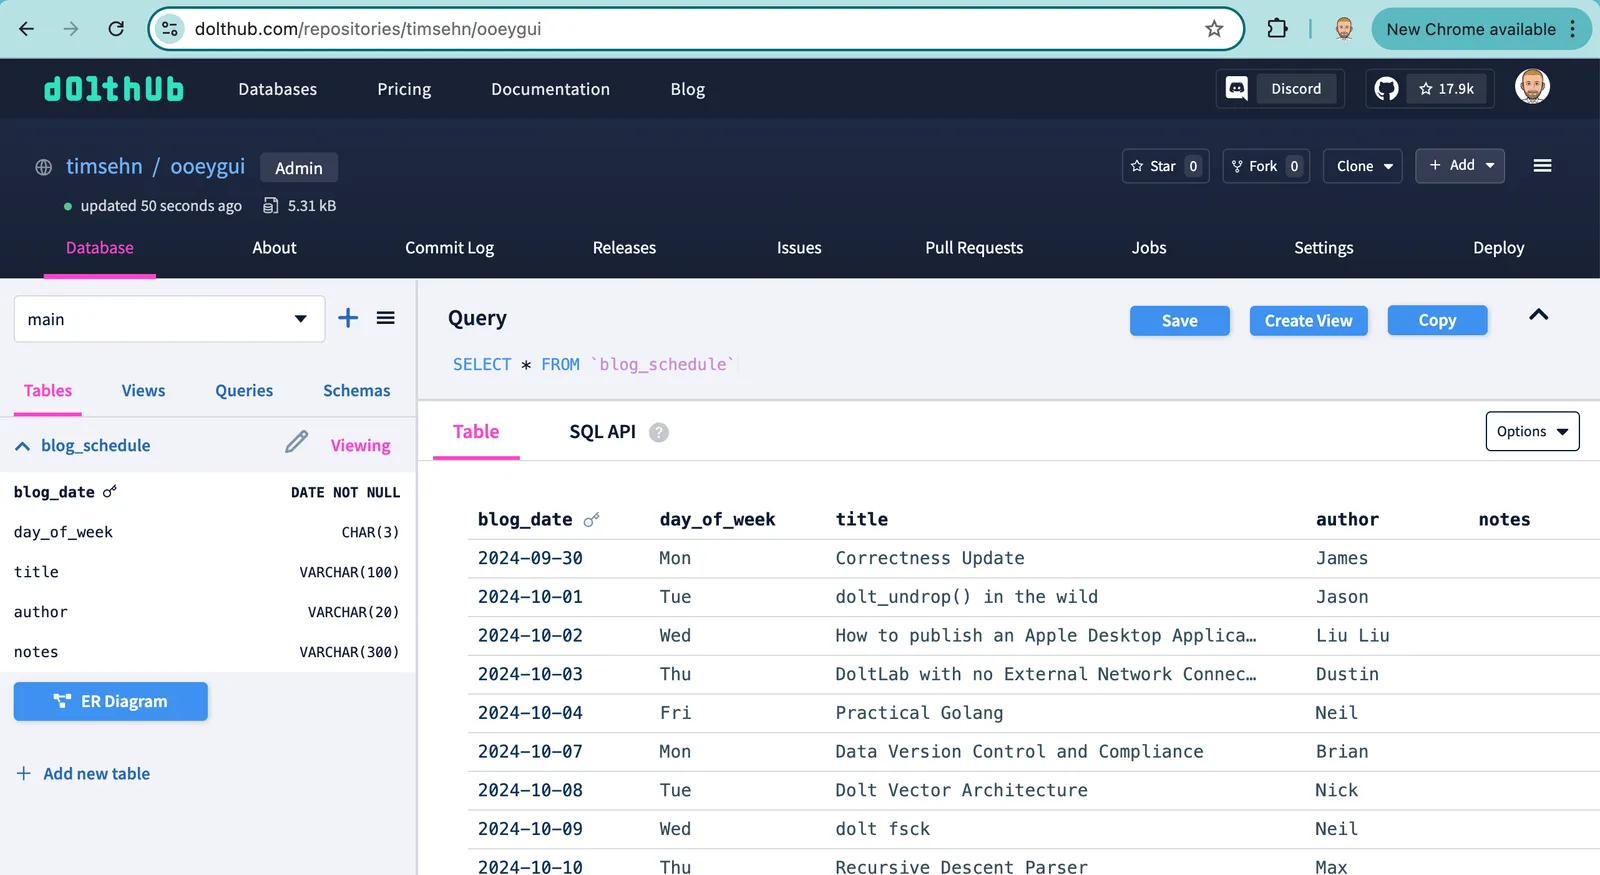
Start exploring and see if you can notice the UI differences.
Conclusion#
We did all that cool stuff with Dolt and we never once opened a terminal! Dolt is Ooey GUI. Questions? Just pop by our Discord and ask. No command line required.
