
We are excited to be nearing the release of the Dolt Workbench desktop application! If you’re curious about how we built our desktop app, check out our previous blogs about building an Electron app and adding custom menus.
When distributing an Electron app for macOS, Apple recommends using the Mac App Store (MAS). Publishing an app through the MAS offers credibility and increases the chances of reaching more users. Apple reviews all apps before they are listed on the store. Navigating Apple’s submission process, especially for an Electron app, can be complex. In this post, we’ll guide you through the process of submitting an Electron app to the Mac App Store. I’ll cover key steps like registering on Apple, creating certificates and entitlements, configuring Electron for MAS distribution, and addressing common challenges I encountered along the way.
Create an Apple Developer Account#
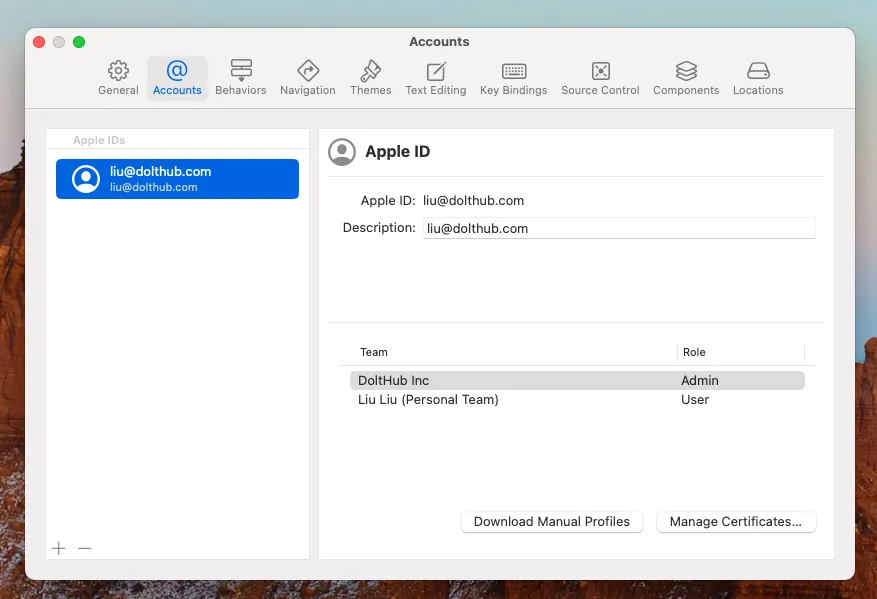
To start, you’ll need an Apple Developer Account. Sign up at developer.apple.com. If you’re publishing under your company’s name, the account must be created by someone with legal authority, and they can add developers to the team.
Complete the Forms on Apple’s Site#
Once Apple approves your account, sign in and start filling in information about your app on the Apple Developer site.
Register your Device#
Navigate to devices and register your device.
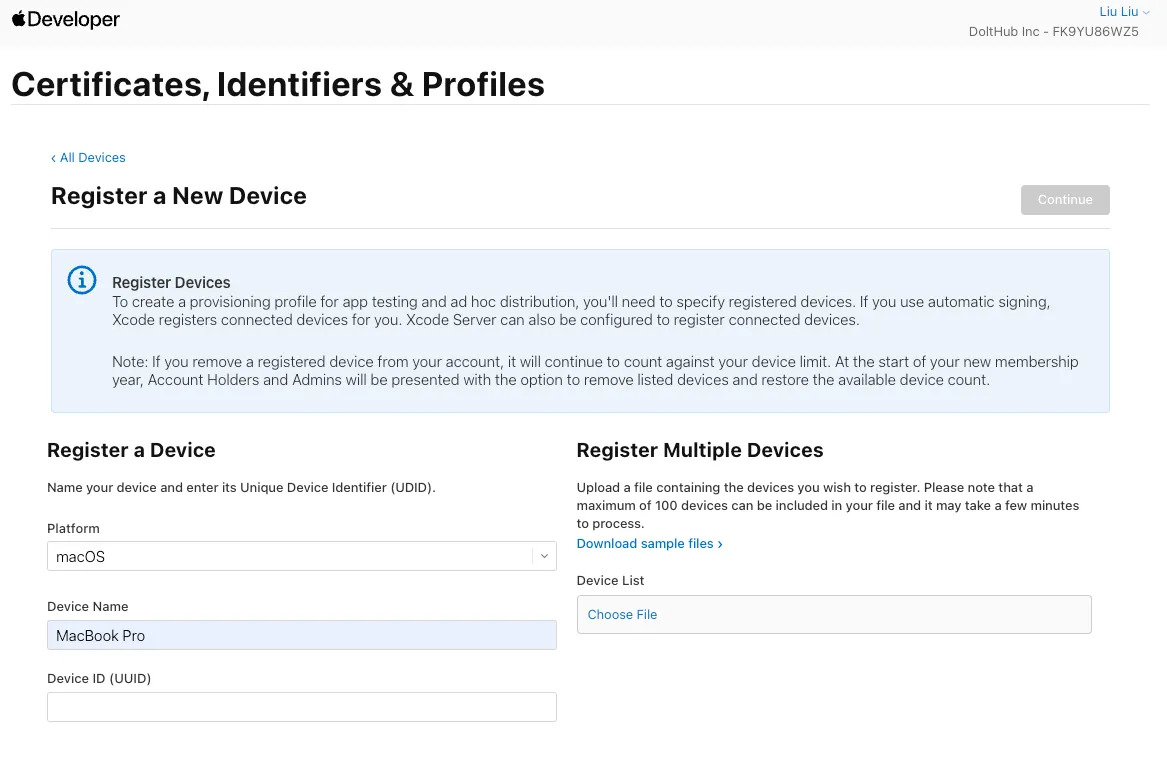
To find your Mac’s device ID (UUID), go to System Information > Hardware Overview > Hardware UUID.
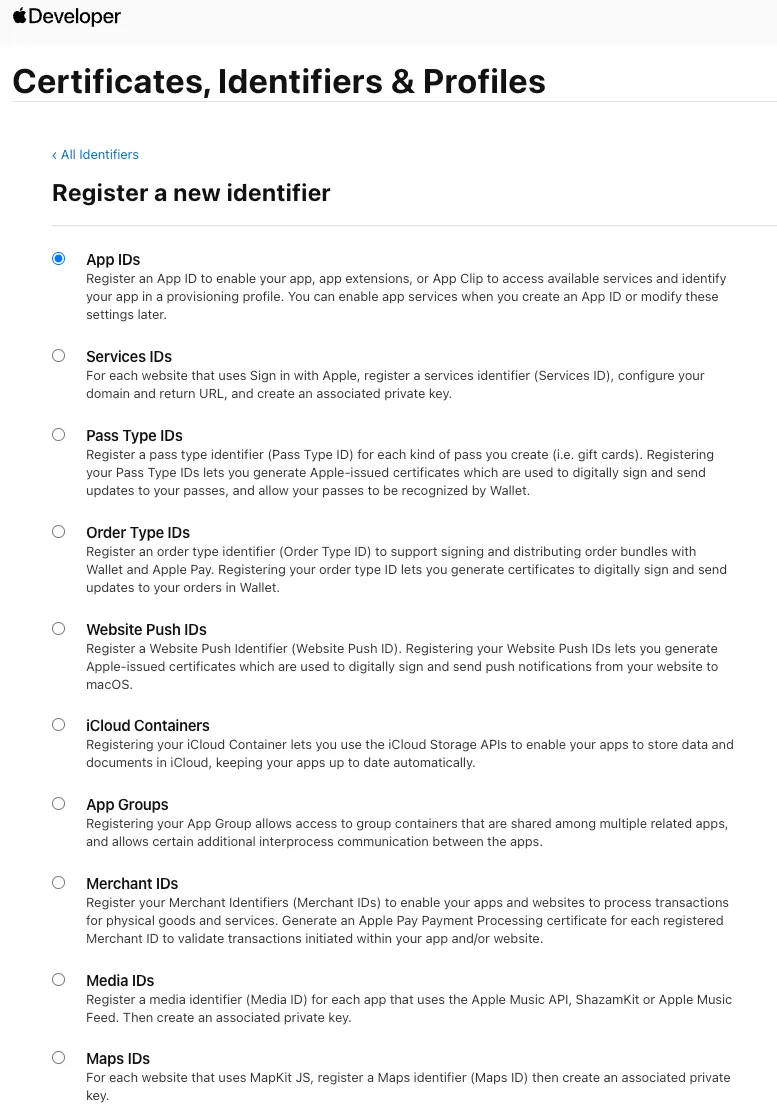
Create an App ID#
Go to Certificates, IDs & Profiles and register your App ID. Apple recommends using a reverse-domain format for your bundle ID (e.g., com.domainname.appname).
Generate Provisioning Profiles#
You’ll need two provisioning profiles: one for development and one for distribution via the Mac App Store. Go to Profiles, click the plus icon, and create profiles for both purposes. Follow the instructions to fill out the necessary information, such as your App ID.
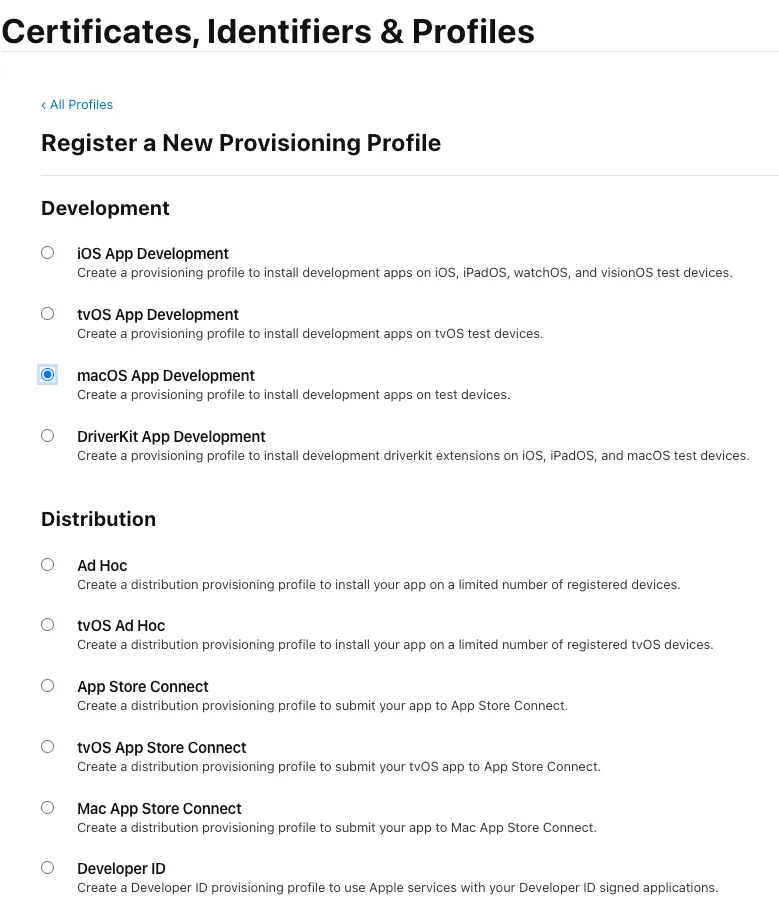
Once the profiles are generated, download and save these profiles in your project folder. You will need them during the Electron app build process.
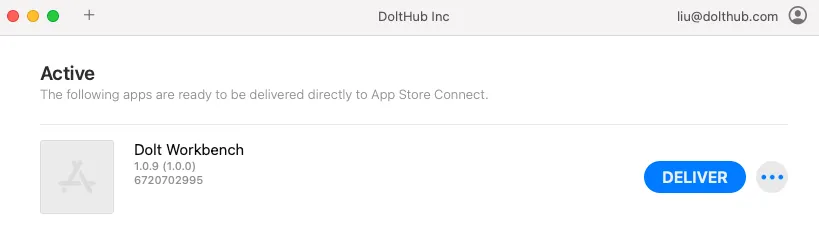
Add Your App to App Store Connect#
Next, go to App Store Connect, click Apps and select New App. Choose the bundle ID you created in the previous step.
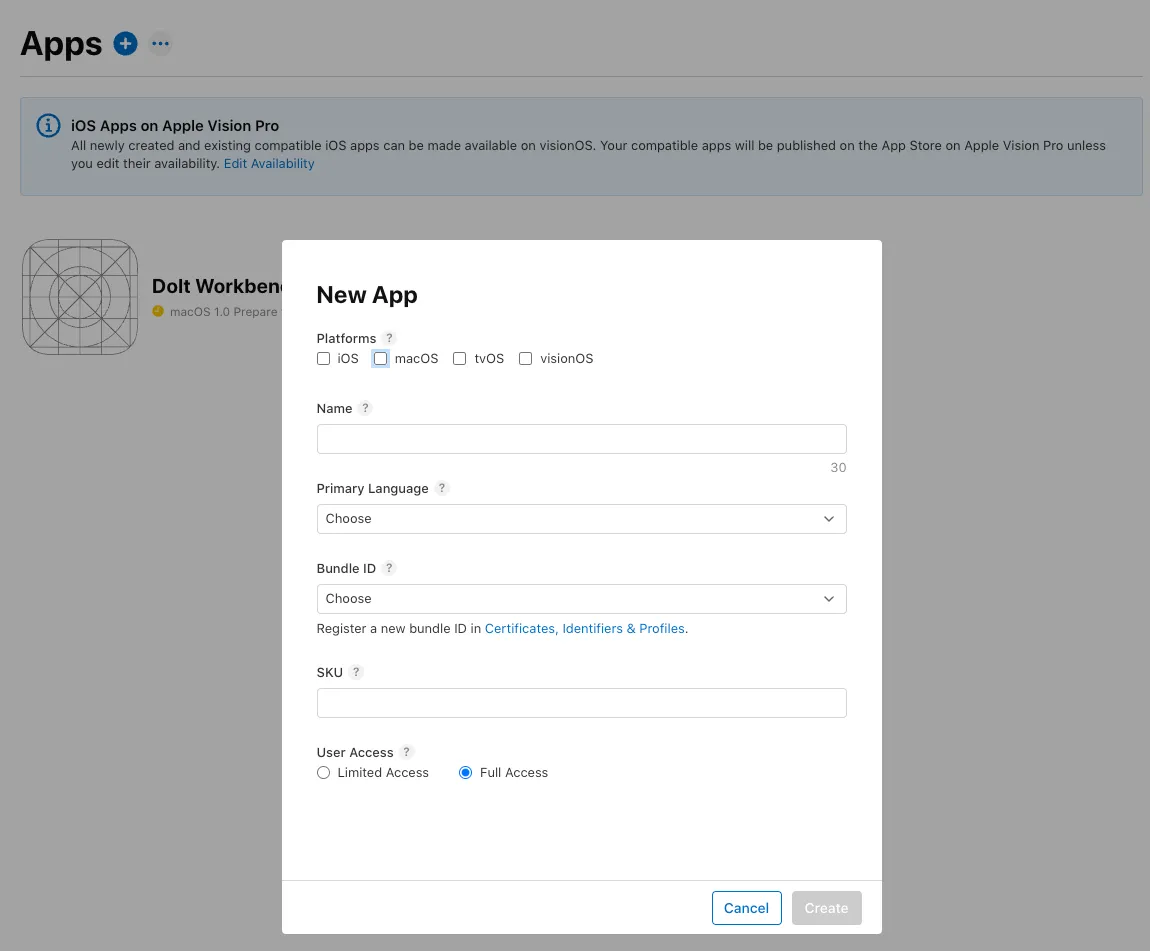
Fill in the required app information:
-
Your app must have a privacy policy URL and a support URL.
-
Choose the category for your app from the available categories.
-
Add a license agreement. You can use Apple’s Standard License Agreement.
-
Set a price for your app and choose the countries where it will be available (default is worldwide).
-
Add screenshots of your app (acceptable sizes: 1280x800px, 1440x900px, 2560x1600px, or 2880x1800px).
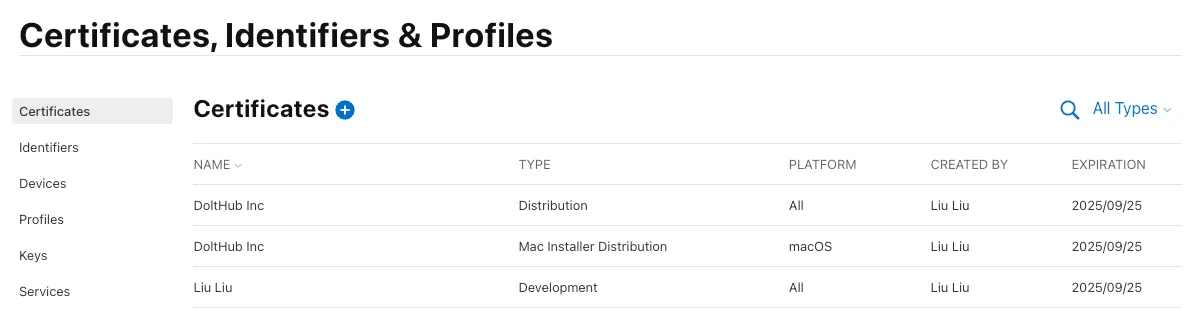
Create Signing Certificates#
You’ll need three types of certificates:
-
Apple Development: for running the app on devices and using app services during development.
-
Apple Distribution: for signing the app before distributing it on the Mac App Store.
-
Mac Installer Distribution: for signing and submitting a Mac Installer Package.
You can create these certificates using Xcode:
Open Xcode > Settings > Account > Manage Certificates, then click the + button to create the three certificates.
If you see “certificate is not trusted” in the Mac Keychain Access app, download the Worldwide Developer Relations Intermediate Certificate. Additional certificates can be found here.
The certificates will also show up in your Apple developer account.
Add Entitlements#
Entitlements are necessary to sign your app and grant specific permissions. We are using electron-builder for our app, which allows you to configure entitlements in the build configuration.
Here’s an example of an entitlements.mas.plist file:
<?xml version="1.0" encoding="UTF-8"?>
<!DOCTYPE plist PUBLIC "-//Apple//DTD PLIST 1.0//EN" "http://www.apple.com/DTDs/PropertyList-1.0.dtd">
<plist version="1.0">
  <dict>
    <key>com.apple.security.app-sandbox</key>
    <true/>
    <key>com.apple.security.application-groups</key>
    <array>
      <string>TEAM_ID.App_ID</string>
    </array>
    <key>com.apple.security.network.client</key>
    <true/>
    <key>com.apple.security.network.server</key>
    <true/>
    <key>com.apple.security.files.user-selected.read-only</key>
  	<true/>
  </dict>
</plist>
The com.apple.security.application-groups key should contain your team ID and app ID. The com.apple.security.app-sandbox key must be set to true because all apps distributed through the MAS must be sandboxed. This restricts access to resources outside the app unless an entitlement is granted.
For example, if your app allows users to select files, you need to set com.apple.security.files.user-selected.read-only to true. In our case, since our app runs a GraphQL server and communicates with a database, we also enabled the com.apple.security.network.client and com.apple.security.network.server entitlements. You can find more entitlement keys here.
Create the Icon Set#
For macOS apps, your icon must be in icns format and include at least two sizes: 512x512 px and 1024x1024 px. If your app lacks a valid icns file with both these sizes, you’ll encounter the error message: Missing required icon in ICNS format, containing both a 512x512 and a 512x512@2x image when attempting to upload the app to Apple.
To create it:
-
Create a folder called
icon.iconsetand place PNG images of your icon in various sizes. -
Run this command to generate the
icnsfile:
iconutil -c icns icon.iconset- Place the generated
icon.icnsfile in thebuildfolder.
Build Configuration in package.json#
For MAS distribution, here’s an example build configuration:
"mac": {
      "category": "public.app-category.<categoryName>",
      "icon": "build/mac/icon.icns",
      "extendInfo": {
        "CFBundleIconName": "icon",
        "CFBundleIconFile": "icon.icns"
      },
      "artifactName": "${productName}-mac-${arch}.${ext}",
      "target": [
        {
          "target": "mas",
          "arch": "universal"
        }
      ],
      "notarize": {
        "teamId": "YOUR_TEAM_ID"
      },
      "x64ArchFiles": "*",
      "type": "distribution",
      "hardenedRuntime": false,
      "gatekeeperAssess": false,
      "provisioningProfile": "build/mac/MacAppStore.provisionprofile",
      "entitlements": "build/mac/entitlements.mas.plist",
    }
Common Issues:#
- Missing CFBundleIconName Error: During the app submission process, you might encounter an error like
Missing CFBundleIconName. This can be resolved by ensuring that the icon is correctly specified in the extendInfo section, as shown below:
      "extendInfo": {
        "CFBundleIconName": "icon",
        "CFBundleIconFile": "icon.icns"
},- Make sure to build the app as
universalto support botharm64andx64architectures. If you only build for one architecture (e.g., arm64), you might get an errornot covered by the x64ArchFiles rule: "undefined"in the delivering app process.
      "target": [
        {
          "target": "mas",
          "arch": "universal"
        }
      ],
Deliver the App for Review#
Apple recommends using the Transporter app to upload your app. Open the app, add your .pkg file, and it will generate an ITMSP package. If no errors are detected during this step, you can proceed to submit the app for review.
Asset Catalog Issues#
Create a Assets.car File#
During the submission process, I encountered a problem when uploading my app through Transporter. I received an email from Apple stating that the asset catalog was missing:
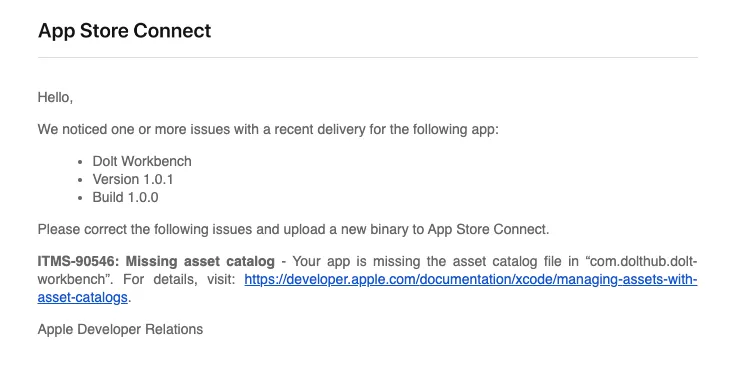
The issue occurred because electron-builder doesn’t automatically generate an asset catalog for the app. After researching various options, I found that there isn’t an easy tool to create a valid Assets.car file for Electron apps. But the documentation in the email provided some inspiration, even though it focuses on creating assets using Xcode. I found a workaround: building a test app in Xcode to generate the Assets.car file and then copy it to our Electron app.
Here’s how to do it:
- Build a test app using Xcode, and import your icon images into Xcode’s Assets section.
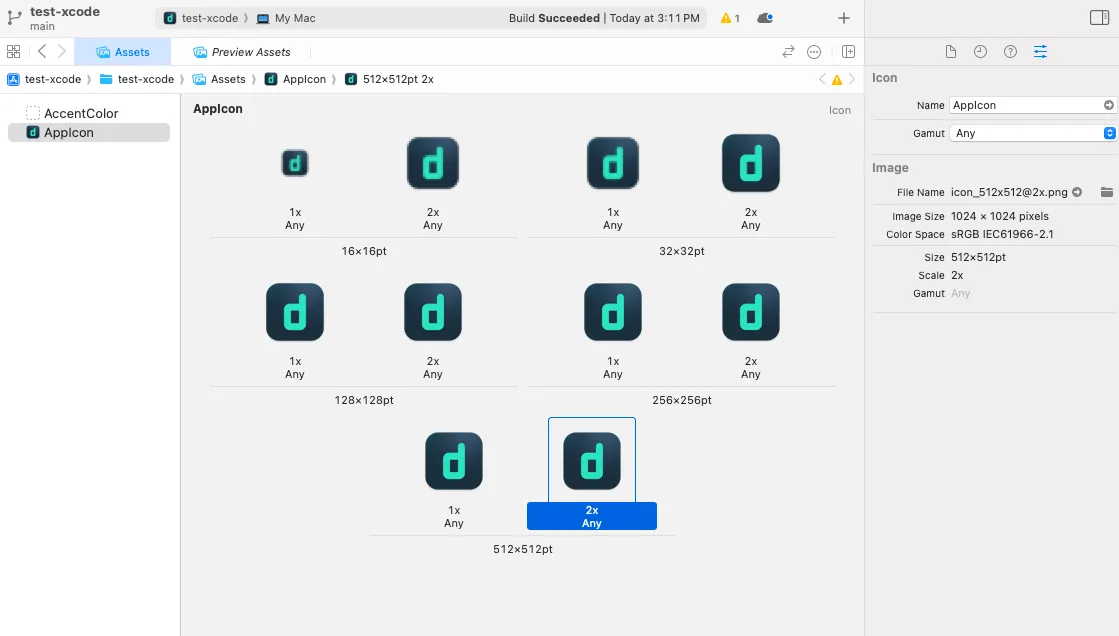
-
After importing icons of all required sizes, go to Product > Build for > Running in the Xcode menu.
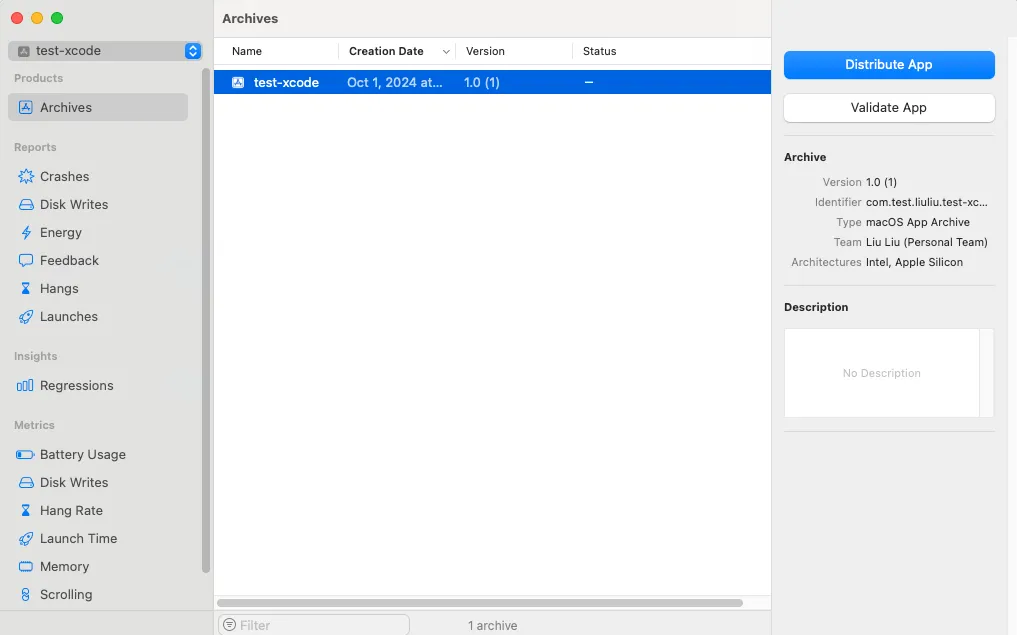
-
Once built, go to Product > Archive, and then select Distribute App.
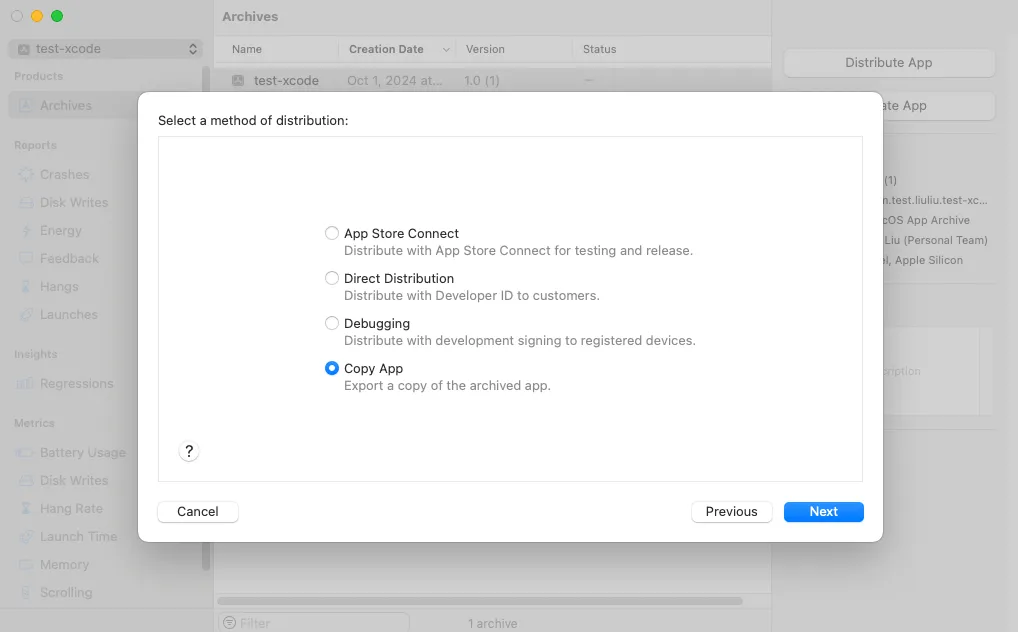
- In the pop-up window, select Custom and then choose Copy App to save a local copy instead of distributing it to the MAS.
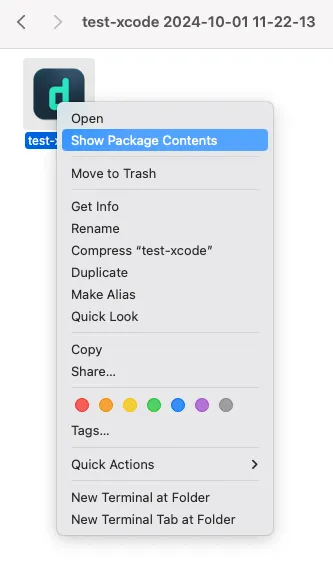
- To extract the
Assets.carfile, right-click the saved app and chooseShow Package Contents. Inside theResourcesfolder, you’ll find theAssets.carfile.
To include the Assets.Car in your electron app, update your package.json build configuration:
"extraFiles": [
  {
    "from": "build/mac/Assets.car",
    "to": "Resources/Assets.car"
  }
],
Solve the “Missing Required Icon” Issue#
After building the app, I verified that the Assets.car file was included in the Resources folder and then uploaded the app again via Transporter. Unfortunately, it failed again with the error message “missing required icon.”
![]()
The “missing required icon” problem troubled me for two days. I found a tool called Asset Catalog Tinkerer, which allowed me to inspect the contents of the Assets.car file and confirm that all necessary icon sizes were present. And unfortunately, when I contacted Apple Support, they could only direct me to general documentation without providing much specific help. The breakthrough came when I realized I needed to rename the icon to AppIcon. Since electron-builder generates the icon file as icon.icns, I also had to copy the AppIcon.icns file into the extraFiles. Here are the final changes that made the upload successful:
    "extraFiles": [
      {
        "from": "build/mac/Assets.car",
        "to": "Resources/Assets.car"
      },
      {
        "from": "build/mac/AppIcon.icns",
        "to": "Resources/AppIcon.icns"
      }
    ],
    "mac": {
      "icon": "build/mac/AppIcon.icns",
      "extendInfo": {
        "CFBundleIconName": "AppIcon",
        "CFBundleIconFile": "AppIcon"
      },
    }
If anyone has a more efficient method for adding asset catalogs to Electron apps, I’d love to hear it!
Conclusion#
In creating this guide, I referenced this tutorial but added some additional insights based on my own experience. One of the main challenges in publishing an Electron app is keeping up with the rapidly changing tools and APIs. What worked perfectly a few months ago may no longer be viable due to updates or deprecations. For example, the certificate is not trusted issue is not clearly addressed on Apple’s documentation. I hope these tips provide a clear path and help you navigate the process more efficiently. Feel free to file issues or request features on GitHub, or reach out to us on Discord.