We’re on a DoltLab documentation tear. A few weeks ago, I wrote a Getting Started blog that outlined how to get DoltLab installed on an AWS EC2 host. Upon customer request, Dustin wrote a blog on how to get DoltLab set up on Azure. Today, I complete the trilogy and show you how to get DoltLab set up on Google Cloud Platform, also known as GCP. Hopefully this blog is more Return of the Jedi than The Last Jedi.

Get a Ubuntu Host#
We need a properly configured Ubuntu host to run DoltLab on. This will take a few steps. Start by going to Google Cloud Platform console.
Create a GCP Project#
Let’s create a new project for our DoltLab. Click Create Project and you’ll be greeted by this screen.
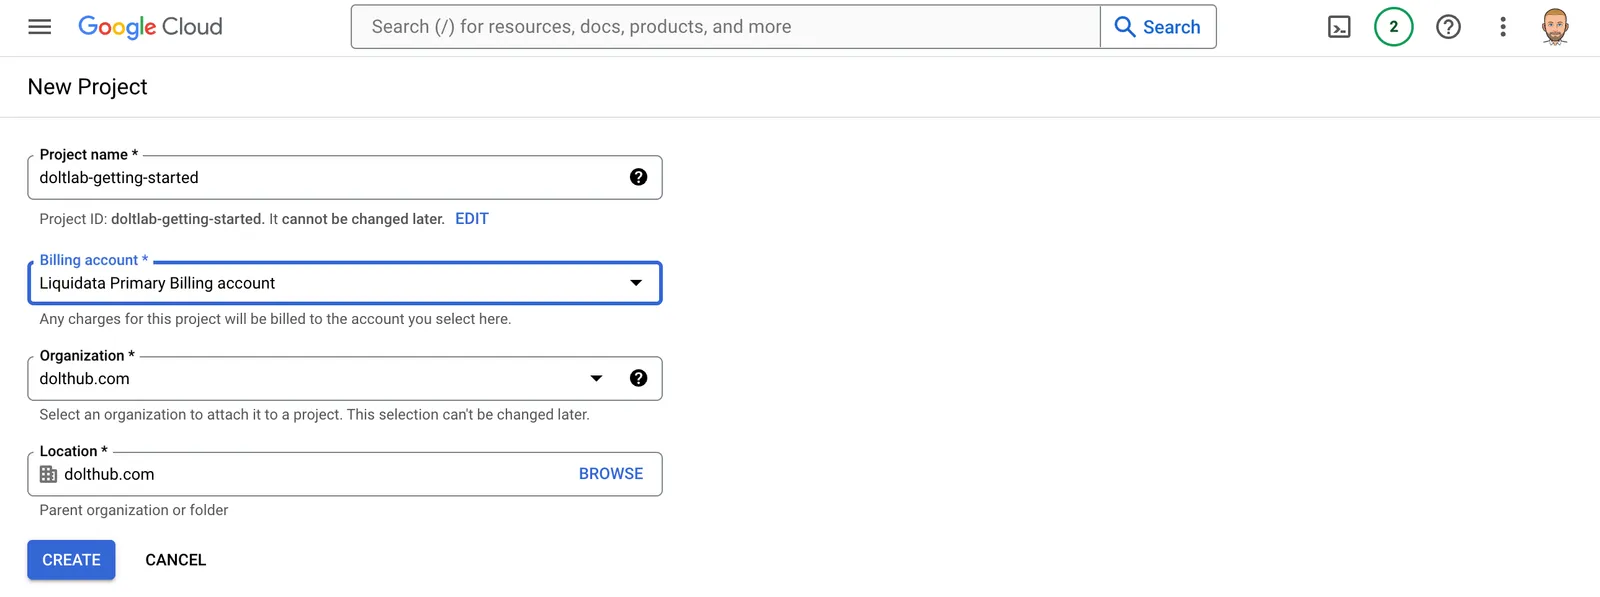
This takes a couple seconds and then you need to switch to the project.

Google really wants me to use Gemini. I can’t get rid of that pop up.
Procure a New Compute Engine Instance#
Now, we need a compute engine instance. Click Compute Engine and then click Enable. Compute Engine does not seem to be on by default for new projects. This takes a couple minutes but once enabled you’ll be greeted with this screen.
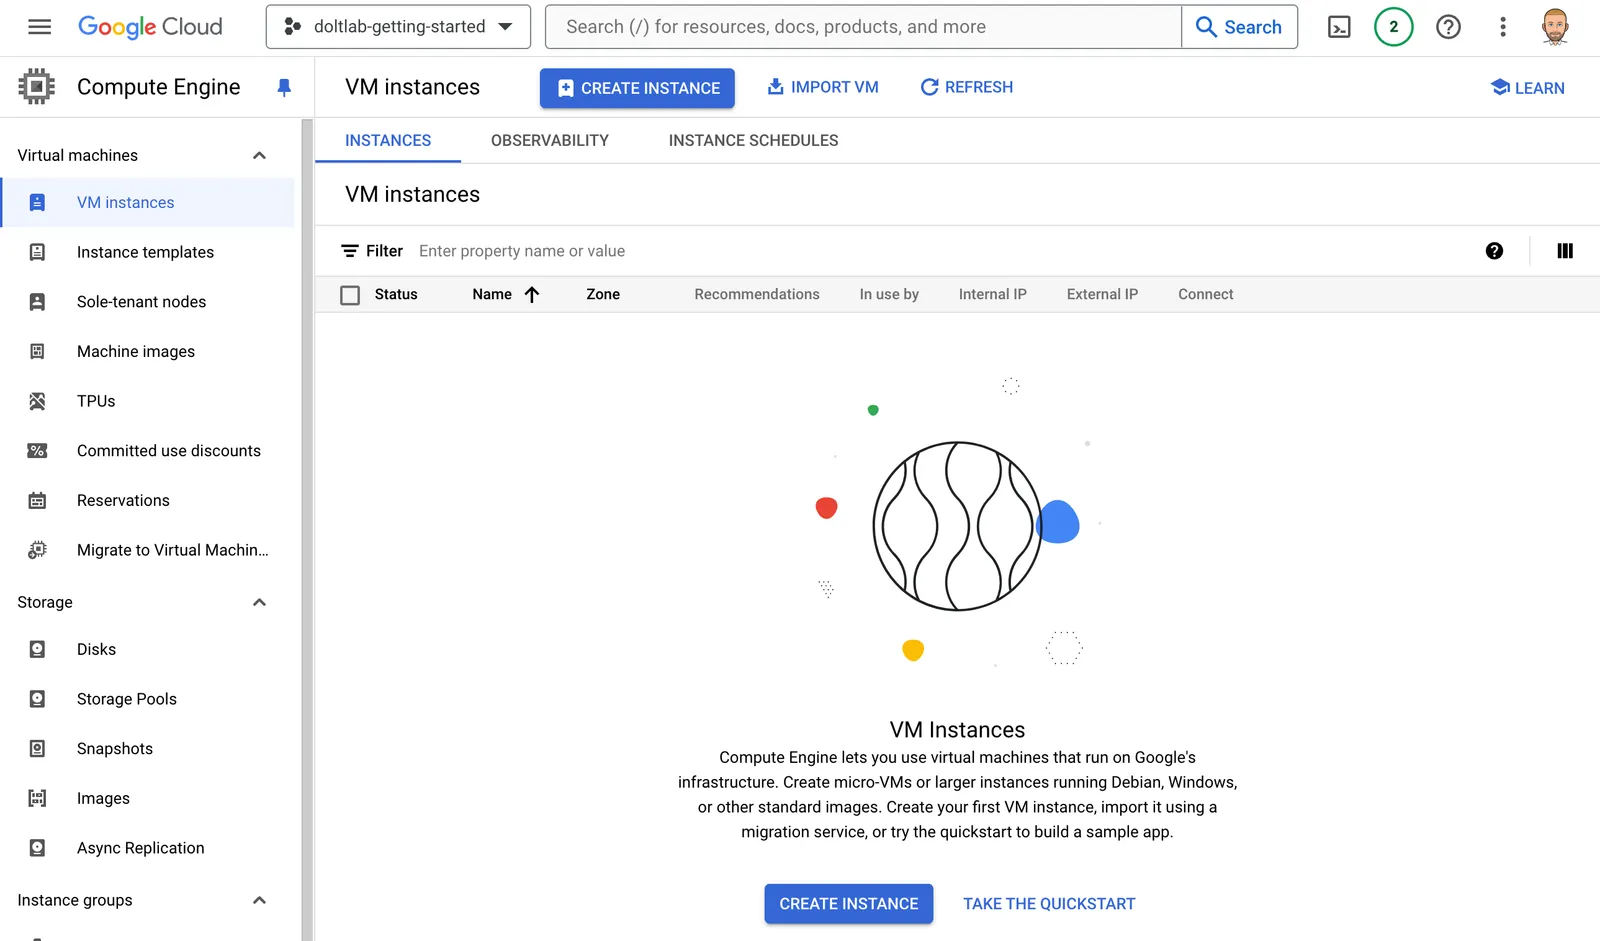
Click Create Instance.
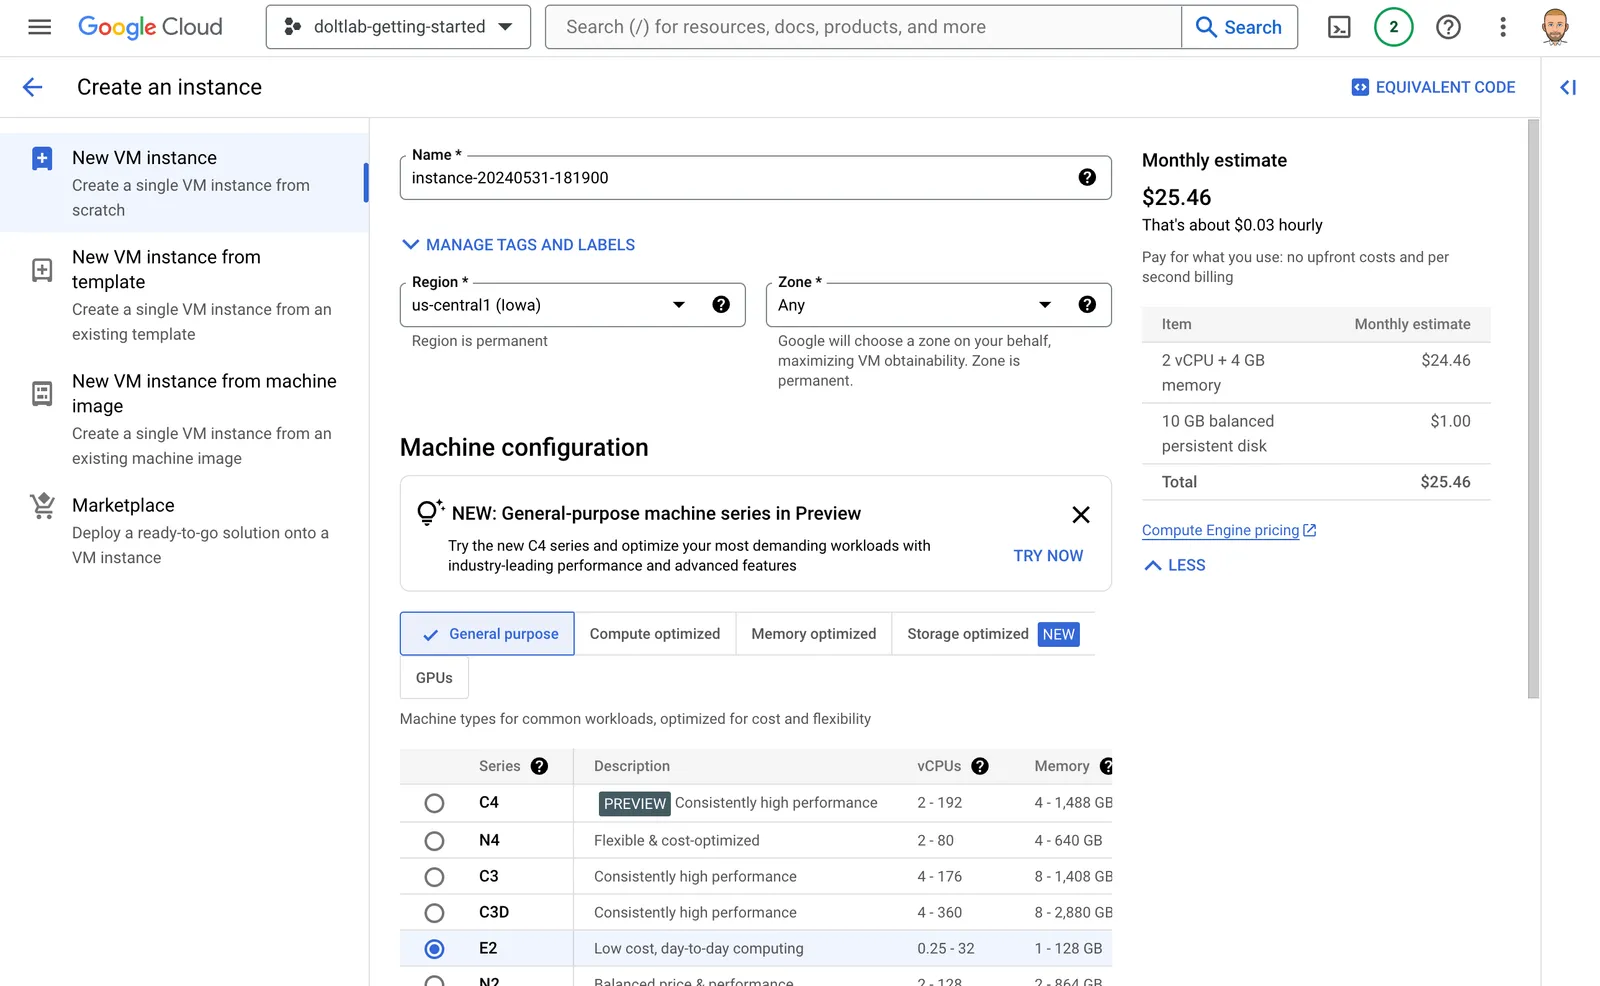
Call it something cool. I called mine doltlab-getting-started.
Now, you need to hit the DoltLab minimum hardware requirements; 4CPUs, 16GB of RAM, and 300GB of disk. For this, I select the E2 family of instance (because it’s the default) and then in the “Machine Type” drop down I switch to “Standard” and select the “4CPU, 16GB RAM” option.

Now, it’s time to change the Operating System and the disk size under the Boot Disk section.
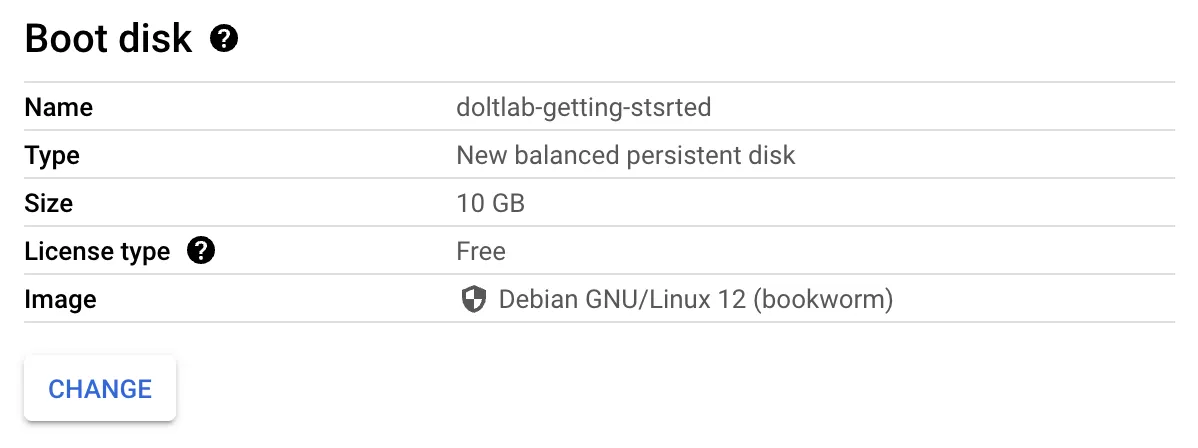
It looks like GCP defaults to Debian with 10GB of disk. We need Ubuntu with 300GB of disk.

Much better. Either Debian 22.04 or 24.04 will work with DoltLab.
Finally, on this page, we’ll enable HTTP traffic under the Firewall section. We’ll need a few more ports open but we do that after the instance is created.

Let’s fire this baby up by clicking “CREATE”. After a couple minutes I have a running instance.

Make note of your public IP. You’ll need this to install DoltLab on the host. Ours is 34.171.211.99.
Open the Required Ports#
We need to open a few more ports for DoltLab to operate correctly. Click “Set Up Firewall Rules” and the “Create new Firewall Rule”.
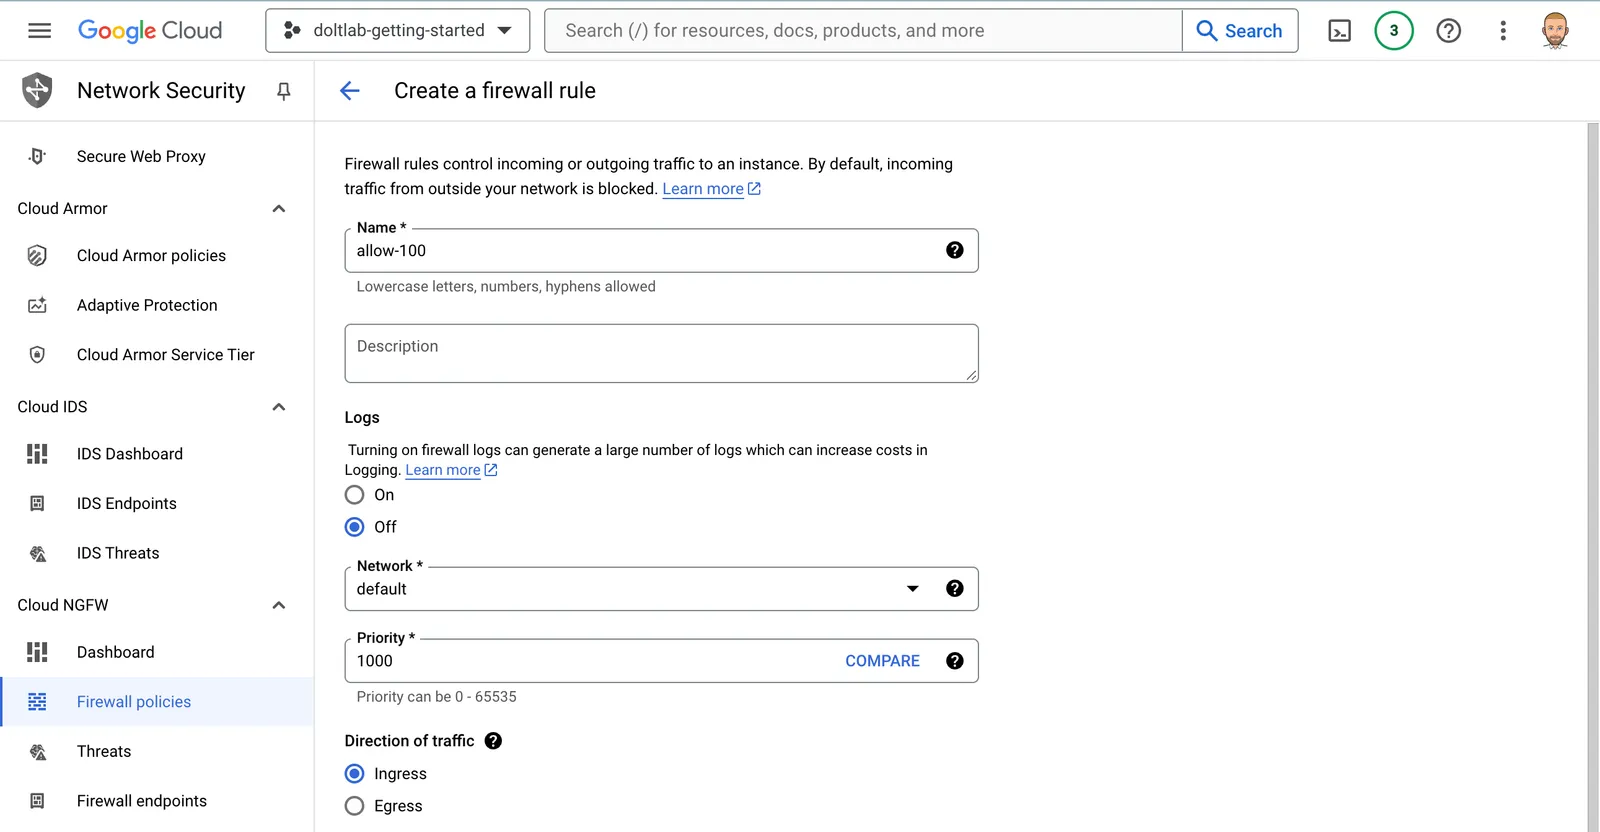
In “Actions on match”, select “All instances in the network” and enter a Source IPv4 range as 0.0.0.0/0 or the entire range. We want the whole internet to see this wonderful DoltLab we’re creating.

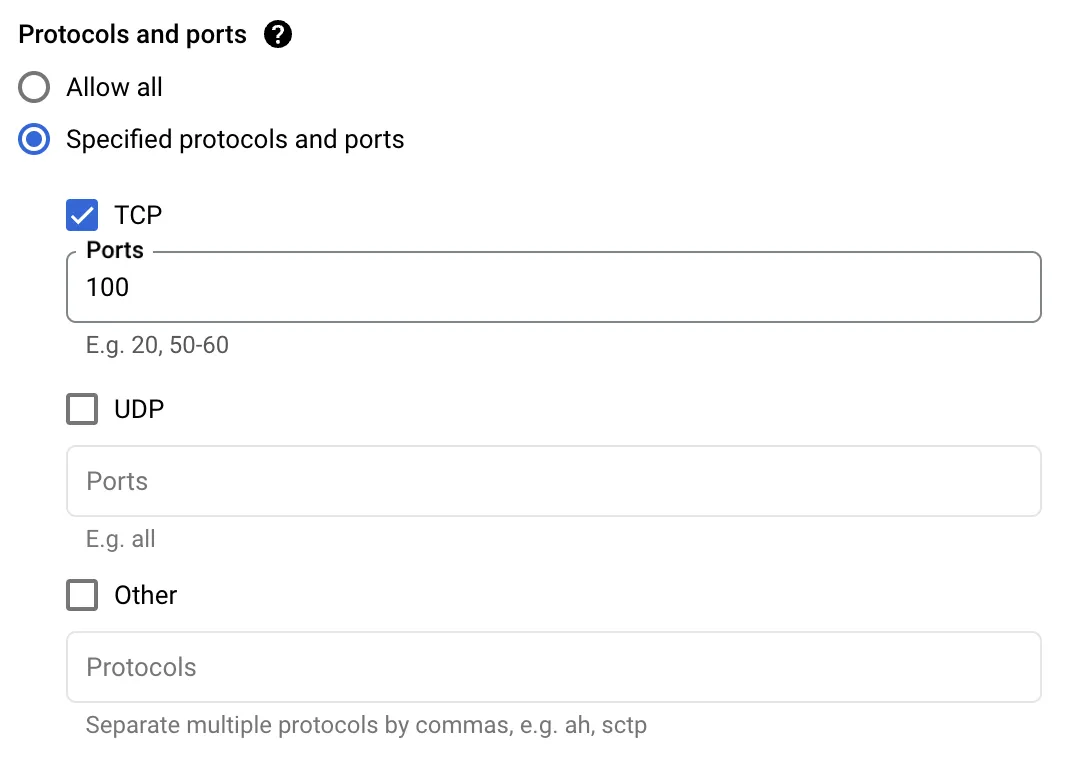
Scroll down to “Protocols and ports” and enable TCP on port 100.
Click “CREATE”.
Rinse and repeat for ports 4321 and 50051. After you’re done, your firewall rules should look like this.

SSH to the host#
GCP has a cool SSH in browser that I’ll use.

This opens a new browser window for you to SSH with. Click authorize and you should be greeted with an in browser terminal window connected to your new instance.
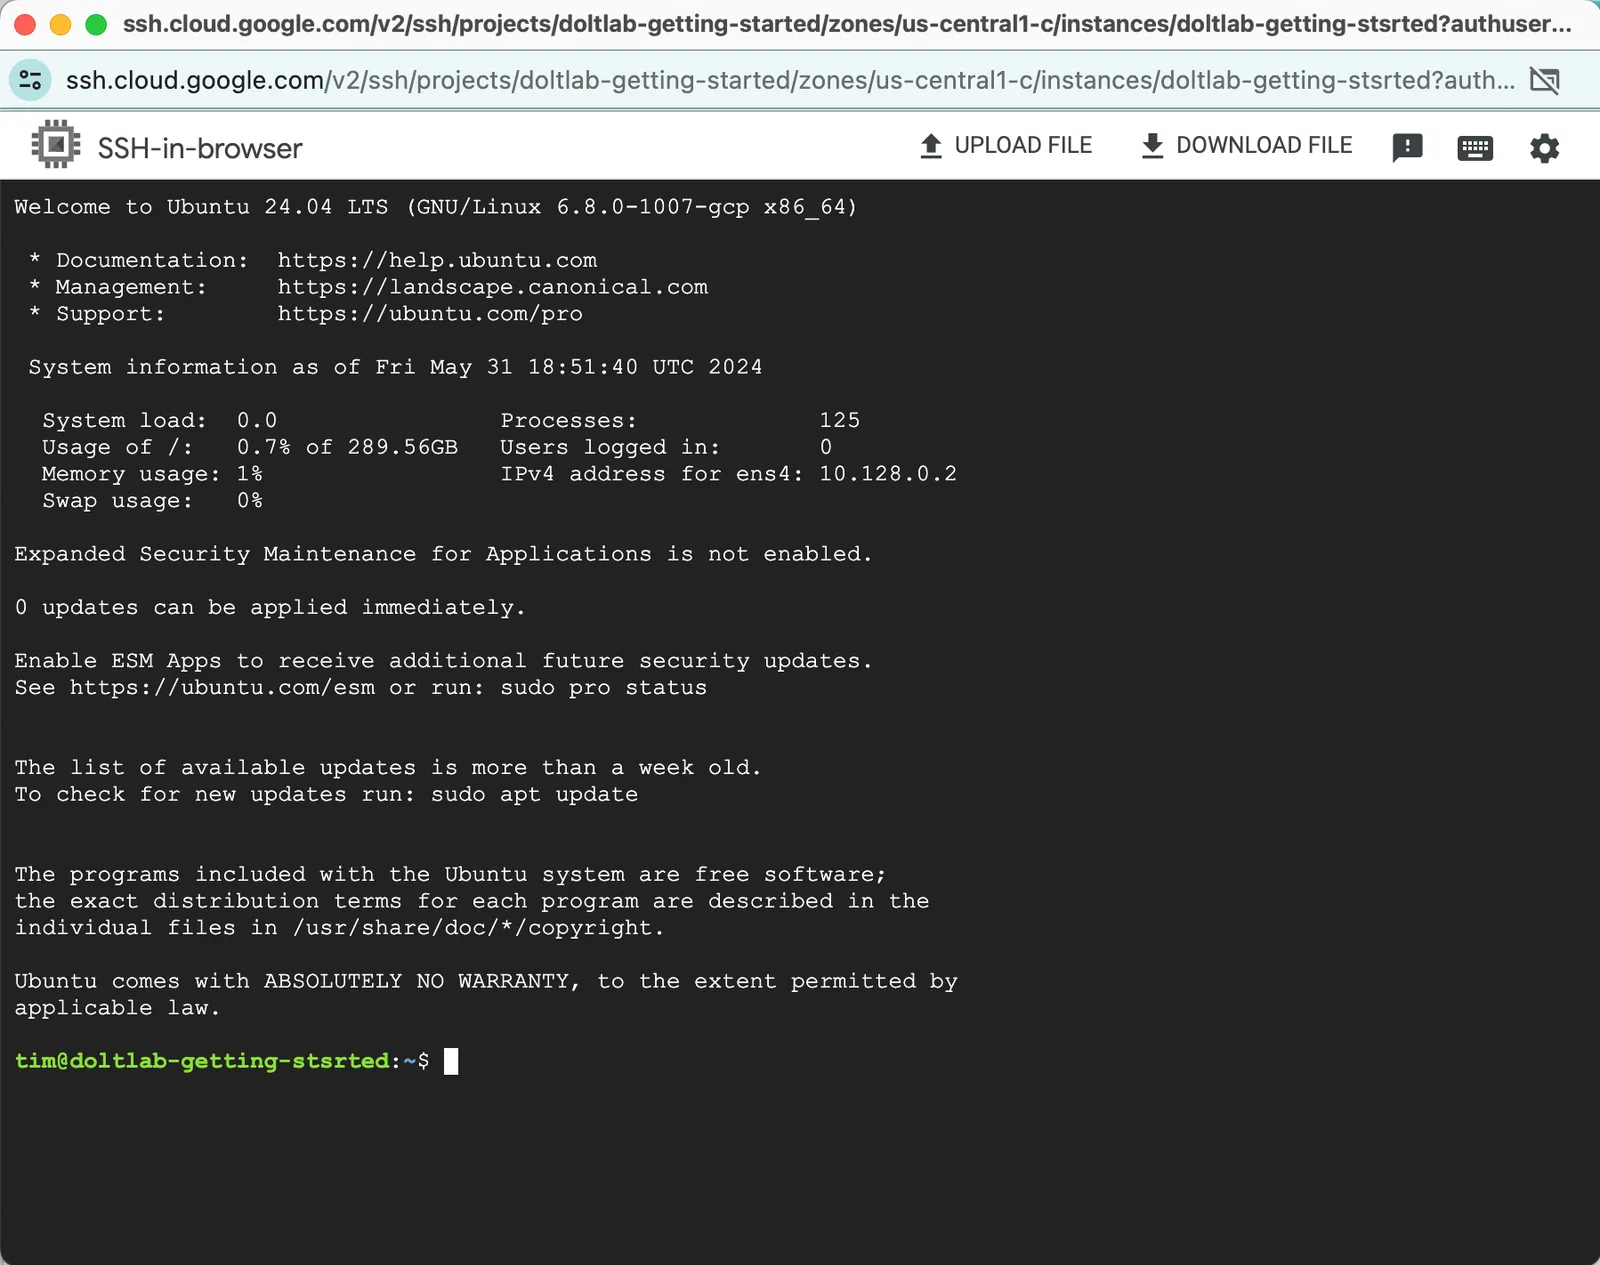
Pretty slick Google. Pretty slick.
Download DoltLab and its Dependencies#
Now that you’re on the host, you need to get DoltLab and its dependencies on the host. First, you’ll need curl and unzip as a basic minimum. curl was already on my Ubuntu host by default but unzip was not. So, I grabbed unzip like so:
tim@doltlab-getting-started:~$ sudo apt install unzip
Reading package lists... Done
Building dependency tree... Done
Reading state information... Done
Suggested packages:
  zip
The following NEW packages will be installed:
  unzip
0 upgraded, 1 newly installed, 0 to remove and 0 not upgraded.
Need to get 175 kB of archives.
After this operation, 384 kB of additional disk space will be used.
Get:1 http://us-central1.gce.archive.ubuntu.com/ubuntu noble/main amd64 unzip amd64 6.0-28ubuntu4 [175 kB]
Fetched 175 kB in 0s (4835 kB/s)
Selecting previously unselected package unzip.
(Reading database ... 71953 files and directories currently installed.)
Preparing to unpack .../unzip_6.0-28ubuntu4_amd64.deb ...
Unpacking unzip (6.0-28ubuntu4) ...
Setting up unzip (6.0-28ubuntu4) ...
Processing triggers for man-db (2.12.0-4build2) ...
Scanning processes...
Scanning linux images...

Running kernel seems to be up-to-date.

No services need to be restarted.

No containers need to be restarted.

No user sessions are running outdated binaries.

No VM guests are running outdated hypervisor (qemu) binaries on this host.
Then I downloaded and unzipped the latest DoltLab.
$ curl -LO https://doltlab-releases.s3.amazonaws.com/linux/amd64/doltlab-latest.zip
$ unzip doltlab-latest.zip -d doltlab
$ cd doltlab
This should produce a directory that includes the DoltLab installer. It can take it from here!
ubuntu@ip-10-2-0-24:~/doltlab$ ls
installer  smtp_connection_helper
I run ./installer --ubuntu to generate an install script for the rest of DoltLab’s dependencies. Then, I run the install script.
tim@doltlab-getting-started:~/doltlab$ ./installer --ubuntu
2024-05-31T18:56:02.183Z        INFO    metrics/emitter.go:111  Successfully sent DoltLab usage metrics

2024-05-31T18:56:02.183Z        INFO    cmd/main.go:489 To install DoltLab's dependencies, use this script    {"script": "/home/tim/doltlab/ubuntu_install.sh"}
tim@doltlab-getting-stsrted:~/doltlab$ ./ubuntu_install.sh
There are a few dependencies. This will take a couple minutes.
Make sure Docker works#
DoltLab uses Docker to run all of its services. After the bootstrap script is done, make sure Docker works with sudo by running:
tim@doltlab-getting-started:~/doltlab$ sudo newgrp docker
root@doltlab-getting-started:/home/tim/doltlab#
Then exit the docker shell.
root@doltlab-getting-started:/home/tim/doltlab# exit
exit
tim@doltlab-getting-started:~/doltlab$
You want to set it up so Docker can run as your current user, in my case ubuntu. The steps to do this are here but I just ran:
ubuntu@ip-10-2-0-124:~/doltlab$ sudo usermod -aG docker $USER
ubuntu@ip-10-2-0-124:~/doltlab$ newgrp docker
And then ran docker ps to test.
tim@doltlab-getting-started:~/doltlab$ docker ps
CONTAINER ID   IMAGE     COMMAND   CREATED   STATUS    PORTS     NAMES
If docker ps works without sudo, you are in business.
Installer#
Now that my host is set up for DoltLab, I need to generate the configuration needed to run it. This is done with the installer as well, this time by only passing in the name of your host.
tim@doltlab-getting-started:~/doltlab$ ./installer --host 34.171.211.99
2024-05-31T19:01:39.936Z        INFO    metrics/emitter.go:111  Successfully sent DoltLab usage metrics

2024-05-31T19:01:39.936Z        INFO    cmd/main.go:496 Successfully configured DoltLab {"version": "v2.1.5"}

2024-05-31T19:01:39.936Z        INFO    cmd/main.go:502 To start DoltLab, use:  {"script": "/home/tim/doltlab/start.sh"}
2024-05-31T19:01:39.936Z        INFO    cmd/main.go:507 To stop DoltLab, use:   {"script": "/home/tim/doltlab/stop.sh"}
Then, I just run the start.sh that was generated. This pulls all the Docker images and runs them. I got rate limited the first couple times I ran it, just keep running it until it works.
tim@doltlab-getting-started:~/doltlab$ ./start.sh
[+] Running 43/43
 ✔ doltlabdb Pulled                                                                                      11.2s
   ✔ 4a023cab5400 Pull complete                                                                           4.2s
   ✔ 7f934085bded Pull complete                                                                           4.4s
   ✔ 87d4239f76b3 Pull complete                                                                           4.8s
   ✔ 1c53bbd81b3a Pull complete                                                                           6.1s
   ✔ 325b7692ff92 Pull complete                                                                           6.1s
   ✔ 3dcddc2fa0c7 Pull complete                                                                           6.1s
   ✔ 9beedc919374 Pull complete                                                                           6.2s
   ✔ 12e83feaa8b4 Pull complete                                                                           7.2s
   ✔ d89959799ab8 Pull complete                                                                           7.2s
 ✔ doltlabui Pulled                                                                                     181.8s
   ✔ 619be1103602 Pull complete                                                                           3.8s
   ✔ 738ed9d2c558 Pull complete                                                                           9.6s
   ✔ ba3b98b2e159 Pull complete                                                                          10.4s
   ✔ df5b844a1292 Pull complete                                                                          10.5s
   ✔ a2922733db2c Pull complete                                                                          10.5s
   ✔ bf89f8be4828 Pull complete                                                                         181.0s
 ✔ doltlabfileserviceapi Pulled                                                                          12.9s
   ✔ e8614d09b7be Pull complete                                                                           6.7s
   ✔ c6f4d1a13b69 Pull complete                                                                           7.3s
   ✔ 438f912d83c9 Pull complete                                                                           8.2s
   ✔ e2975e2786f4 Pull complete                                                                          10.2s
   ✔ 2793cdfc10bd Pull complete                                                                          10.4s
   ✔ facae7d576b2 Pull complete                                                                          12.0s
   ✔ c55fd0452358 Pull complete                                                                          12.2s
 ✔ doltlabenvoy Pulled                                                                                    4.5s
   ✔ 43cfb69dbb46 Pull complete                                                                           2.4s
   ✔ be3b2ffdc401 Pull complete                                                                           2.5s
   ✔ 14996c115d84 Pull complete                                                                           2.5s
   ✔ c9a8c8872dcd Pull complete                                                                           3.1s
   ✔ 53fd8416c370 Pull complete                                                                           3.2s
   ✔ f79887314984 Pull complete                                                                           3.2s
   ✔ 320fd87eb7e2 Pull complete                                                                           3.2s
   ✔ c7dd92188c98 Pull complete                                                                           4.1s
   ✔ 4f4fb700ef54 Pull complete                                                                          10.8s
 ✔ doltlabremoteapi Pulled                                                                               18.7s
   ✔ 998274e0ed47 Pull complete                                                                          17.9s
 ✔ doltlabgraphql Pulled                                                                                176.2s
   ✔ 309e1948670b Pull complete                                                                          10.5s
   ✔ 6147c96665cf Pull complete                                                                         175.4s
 ✔ doltlabapi Pulled                                                                                     17.1s
   ✔ 780d20e2b479 Pull complete                                                                          12.6s
   ✔ 60d7595ea05e Pull complete                                                                          16.4s
[+] Running 13/13
 ✔ Volume "doltlab_doltlabdb-dolt-data"       Created                                                     0.0s
 ✔ Volume "doltlab_doltlabdb-dolt-root"       Created                                                     0.0s
 ✔ Volume "doltlab_doltlabdb-dolt-configs"    Created                                                     0.0s
 ✔ Volume "doltlab_doltlabdb-dolt-backups"    Created                                                     0.0s
 ✔ Volume "doltlab_doltlab-user-uploads"      Created                                                     0.0s
 ✔ Volume "doltlab_doltlab-remote-storage"    Created                                                     0.0s
 ✔ Container doltlab-doltlabdb-1              Started                                                     3.3s
 ✔ Container doltlab-doltlabenvoy-1           Started                                                     3.4s
 ✔ Container doltlab-doltlabfileserviceapi-1  Started                                                     1.0s
 ✔ Container doltlab-doltlabremoteapi-1       Started                                                     1.3s
 ✔ Container doltlab-doltlabapi-1             Started                                                     1.5s
 ✔ Container doltlab-doltlabgraphql-1         Started                                                     1.8s
 ✔ Container doltlab-doltlabui-1              Started                                                     2.1s
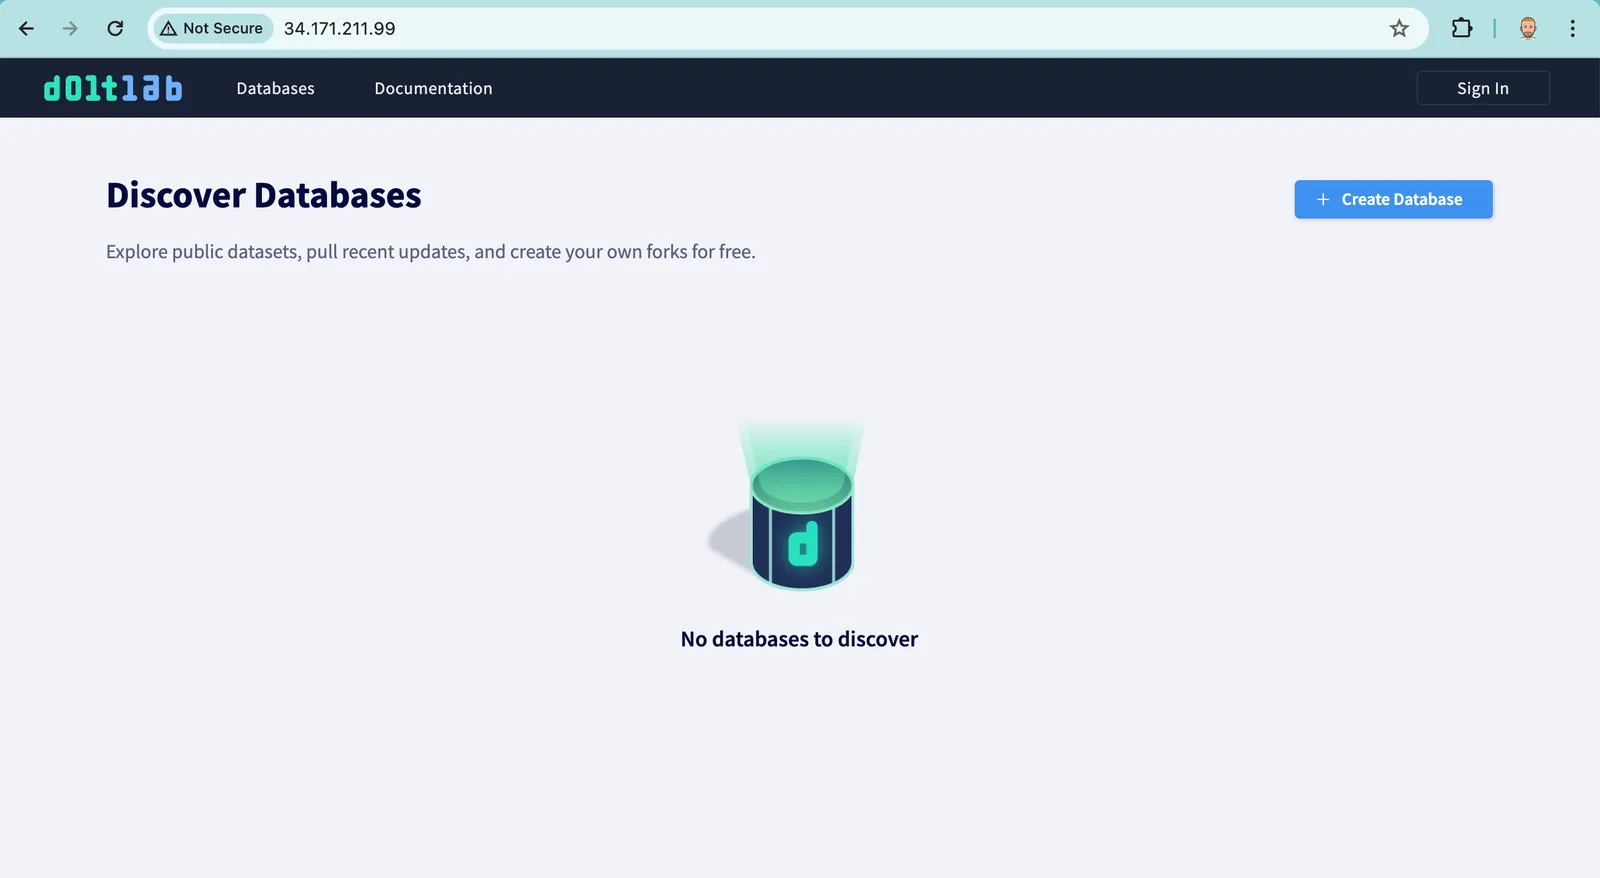
Now the moment of truth, I hit the IP over http, not https, http://34.171.211.99/. Bam!
Conclusion#
DoltLab is really easy to install on GCP. In less than an hour, you can have a running DoltLab to test out. Curious to learn more? Talk to us in the #doltlab channel on our Discord.
