We recently released the Dolt Workbench desktop application for both Mac and Windows. In our previous blog, we covered how to submit an Electron application to the Mac App store. Now, we will guide you through the process of publishing an app to the Microsoft Store.
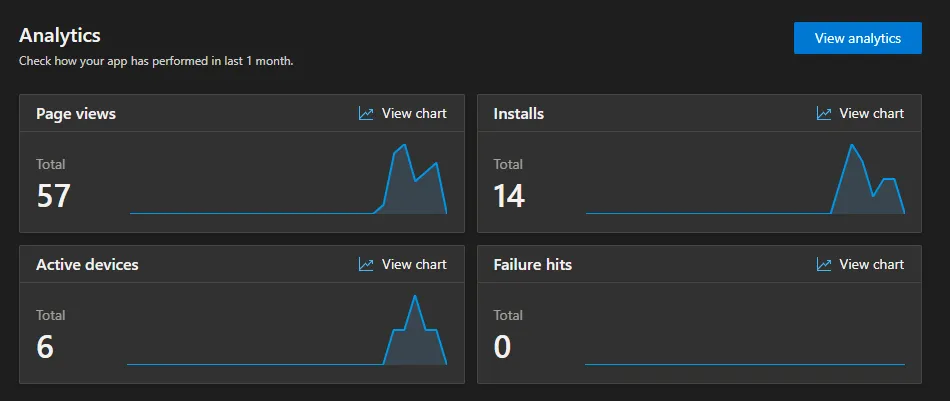
You can distribute your Windows Electron app either by providing a direct download link or through the Microsoft Store. Using the Microsoft Store increases visibility, reduces security prompts during installation, and provides access to analytics data from the store.

Create a Microsoft Developer Account#
Before you can publish an app, you’ll need to create a Microsoft developer account. Sign up at developer.microsoft.com. The registration fee is a one-time payment of $19 for individuals or $99 for companies. No renewal is required.
Reserve a Name and Create an App#
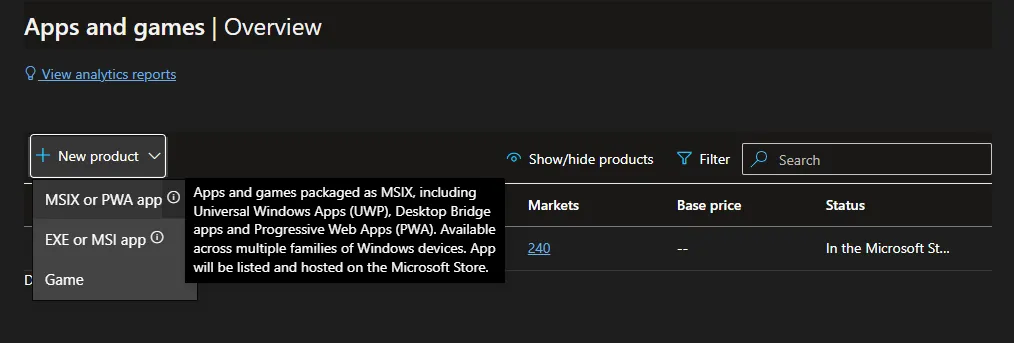
Once your account is set up, visit the Microsoft Partner Center. Navigate to the Apps and games, and click New product. We choose to create a MSIX or PWA app over EXE or MSI. Microsoft signs MSIX apps for free when they’re distributed through the Microsoft Store, while EXE and MSI apps require purchasing a code signing certificate.

Build the Electron App for Appx#
Follow these steps to package your Electron app for the Microsoft Store as an MSIX or Appx app. You’ll need to configure icons and set up product identity details from Microsoft Partner Center.
Icons and Logos#
You’ll need a 256x256px logo in PNG format. Convert this image to an ico file and place it in the build directory as icon.ico. Also, add Windows Store images like StoreLogo.png and Square44x44Logo.png to the build/appx folder. These will be used for your store listing.
Build Configuration in package.json#
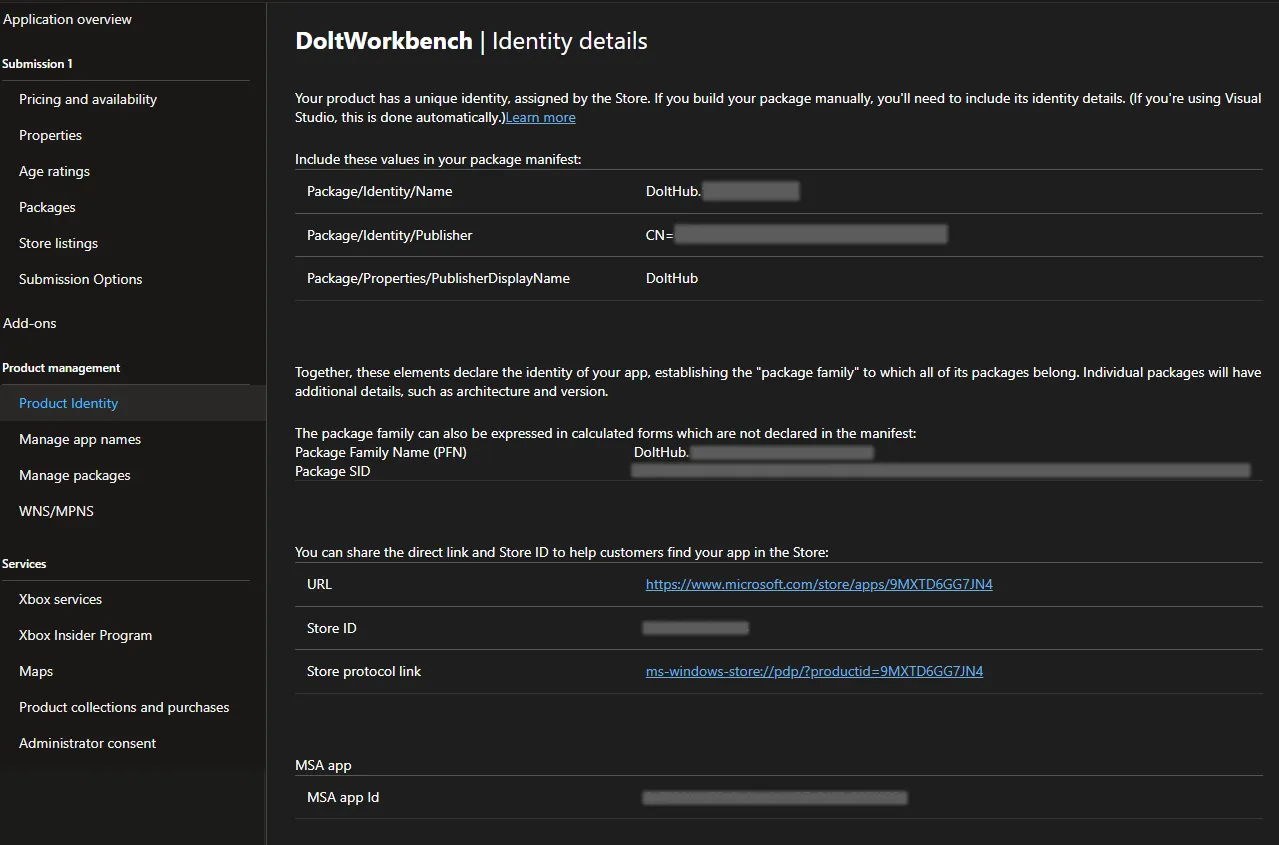
In Microsoft Partner Center, go to Product management > Product Identity and copy the values for Package/Identity/Publisher, Package/Identity/PublisherDisplayName and Package/Identity/Name. Use these in your package.json to configure the build process for your app.

Here’s how the configuration should look:
"win": {
    "icon": "build/appx/icon.ico",
    "signAndEditExecutable": true,
    "artifactName": "${productName}-win-${arch}.${ext}",
    "target":"appx"
},
"appx":{
    "applicationId": "com.company.app",
    "publisherDisplayName": "company",
    "identityName": "company.xxxxx",
    "publisher": "<CN=XXXXXXXX-XXXX-XXXX-XXXX-XXXXXXXXXXXX>"
},
Then, run yarn build to build your app. This will create an Appx file (Your-App.appx) and a win-unpacked folder containing the Your-App.exe file.
Submit the App for Review#
Go to your app’s dashboard, select your app, and fill out the required sections such as Pricing, Properties, and Age rating.
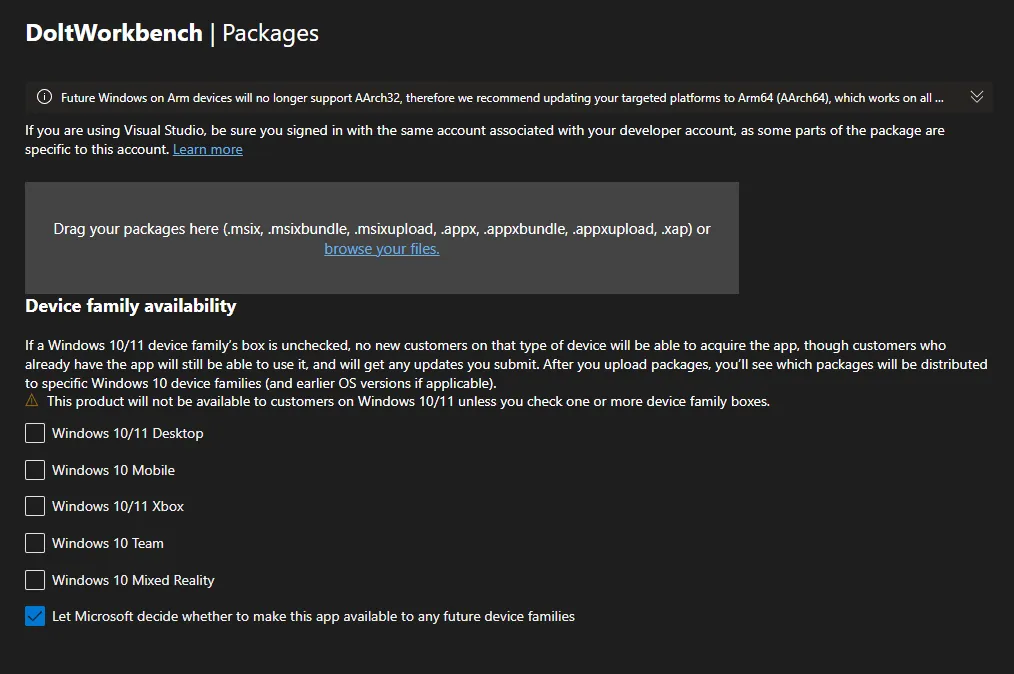
In the Packages section, upload the Appx file that you built earlier. After the validation process is finished, complete the remaining form details and click Submit for Certification.

Microsoft typically takes two to three days to review and certify your app. Once approved, your app will be available in the Microsoft Store for users to download.
Conclusion#
Publishing a Windows application to the Microsoft Store is a fairly straightforward process, especially when using MSIX for easier app signing and distribution. We hope this guide helps you navigate the submission process with ease.
If you have any questions or suggestions, feel free to file an issue or request features on GitHub, or reach out to us on Discord.
