
Last year, we launched the Dolt Workbench, an open-source SQL workbench for MySQL and PostgreSQL databases. It has become a popular tool among our users, offering a modern UI for viewing and editing your data with powerful version control features when using Dolt (Doltgres support coming soon). For a detailed look at its features, check out this blog.
The Dolt Workbench is currently a browser-based web application that’s distributed on Docker Hub. Not everyone loves Docker and we’ve gotten a few requests to make it a desktop application. This blog walks through how we have been converting the Dolt Workbench into a desktop application using Electron.
Electron and Nextron#
Many popular desktop apps, like Visual Studio Code and GitHub Desktop, are built using Electron, an open-source framework that allows developers to create cross-platform desktop applications with popular web technologies. Electron combines Node.js with the Chromium engine, enabling apps built with HTML, CSS, and JavaScript to run as desktop applications. Since the Dolt Workbench already runs in web browsers, we can use Electron to develop a desktop version compatible across different operating systems.
While Electron is widely used, converting a web app into a desktop app isn’t as straightforward as it might seem. Subtle differences between the Electron and Node.js environments can lead to unexpected, undocumented issues that are difficult to debug. That’s why I decided to write this article — to walk through the process of developing an Electron app and to share the challenges I encountered. I’ll also cover some basic concepts and structures along the way, giving you a better understanding of how it all works.
The Dolt Workbench is a Next.js application written in TypeScript and styled with Tailwind CSS, powered by a GraphQL server. After some research, I discovered Nextron, a package that combines the features of Next.js and Electron, making it an ideal fit for our project.
Starting a New Nextron Project#
Following Nextron’s directions, to create a new Nextron application using a TypeScript and Tailwind CSS template, run the following command:
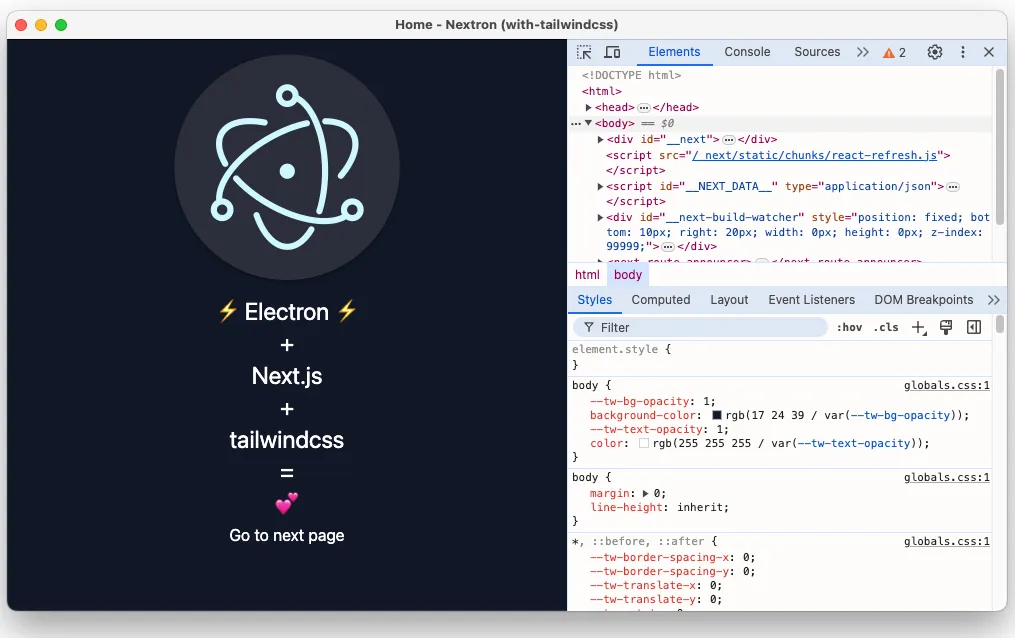
yarn create nextron-app my-app --example with-tailwindcssNextron offers various example templates, including options for JavaScript, Python, and Chakra UI. You can explore other examples here.
Inside your project directory, run yarn to install the dependencies. Once this is completed, you’ll have a basic Electron app set up.
Adding Nextron to an Existing Project#
In our case, we needed to integrate Nextron into an existing React app. For the Dolt Workbench, we have two folders: graphql-server and web. Running yarn dev in each folder respectively starts the GraphQL server on port 9002 and the web server on port 3002. You can then visit localhost:3002 to access the workbench in your browser.
To start, in the root package.json, specify the main script location for Electron as app/background.js.
{
  "private": true,
  "name": "dolt-sql-workbench",
  "productName": "dolt-sql-workbench",
  "version": "1.0.0",
  "main": "app/background.js",
  "workspaces": ["graphql-server", "web"]
}
Next, add essential dependencies like electron, nextron and next, etc:
yarn add electron --dev
yarn add next --dev
yarn add nextron --dev
Afterward, run yarn to install the dependencies. To enable development and build processes for the Electron app, add the following commands to the scripts section of your package.json:
{
  "scripts": {
    "dev": "nextron",
    "build": "nextron build"
  }
}
The Main and Renderer Processes#
An Electron app functions similarly to web browsers. A running Electron app maintains two types of processes: the main process and one or more renderer processes. The renderer processes are similar to tabs in the browser, and the main process acts as a process manager, overseeing the renderer processes. It can send messages to, start, or terminate renderer processes. Each renderer process manages its own content independently, which ensures that a crash or hang in one does not impact the others.
In the root directory, we will create a nextron.config.js file where we can specify directories for the main or renderer source files. In our case, we will change the rendererSrcDir from the default renderer to web.
process.env.NEXT_PUBLIC_FOR_ELECTRON = "true";

module.exports = {
  mainSrcDir: "main",
  rendererSrcDir: "web",
  webpack: (config, env) => config,
};
Note that we prefix the environment variable with NEXT_PUBLIC_ to make it available for the browser environment. Without this, the variable would only be available in the Node.js environment.
Run the main process#
The basic idea of building this Electron app is to bundle the web application into build files, which are then loaded into an application window to render the pages.
First, in the Next.js configuration, we set the distDir for the web build. When the Electron app runs, it loads the web page from this directory. In development, we set output:“standalone” to allow dynamic server-side rendering, it will create a minimal production build that includes only the necessary files required to run the application, this is ideal for fast rebuilds and updates. We store this build in the ./.next directory. For production, to ensure files are static and optimally bundled for enhanced performance and stability, we set output to export in the Next.js configuration, and use the ../app directory for production build.
const nextConfig = {
  distDir: process.env.NODE_ENV === "production" ? "../app" : "./.next",
  output:
    process.env.NEXT_PUBLIC_FOR_ELECTRON === "true" &&
    process.env.NODE_ENV === "production"
      ? "export"
      : "standalone", // Use standalone for server-based apps
};
module.exports = nextConfig;
The main process is the entry point for any Electron application, managing key tasks like controlling the app’s lifecycle, displaying native interfaces, and managing the renderer processes. The main process creates web pages using the Electron.js BrowserWindow object. Each web page runs in its own renderer process.
To initialize the main application window, we set its dimensions and load the web pages:
// in "/main/background.js"
const isProd = process.env.NODE_ENV === "production";

async function createWindow() => {
  const mainWindow = new BrowserWindow({
    width: 1280,
    height: 680
  })
  if (isProd) {
    await mainWindow.loadURL("app://./");
  } else {
    const port = process.argv[2];
    await mainWindow.loadURL(`http://localhost:${port}`);
  }
}
If in development mode, Nextron takes the localhost URL generated by running a Next.js application and serves it as an Electron app. However, if in production, Nextron takes the static files generated from a Next.js build and renders them instead.
Running the GraphQL Server#
Starting the GraphQL server within this app is a bit tricky. The GraphQL server manages data queries and mutations for database interactions, while the web interface retrieves and modifies data through the GraphQL server. Unlike the web server, which loads the pages into the application window, we need to manually run the GraphQL server in the background.
To set up the GraphQL server within our Electron app, we first need to build the GraphQL package. Run yarn build in the folder containing the GraphQL server to prepare it for integration, this creates a dist folder in graphql-server. Then, we will use utilityProcess to spawn a child process to run the GraphQL server. This is similar to using the child_process.fork API from Node.js, but tailored for Electron’s architecture, optimizing performance and resource management.
Here’s how you can start the GraphQL server as a background process:
function createGraphqlServerProcess() {
  const serverPath =
    process.env.NODE_ENV === "production"
      ? path.join(
          process.resourcesPath,
          "..",
          "graphql-server",
          "dist",
          "main.js"
        )
      : path.join("graphql-server", "dist", "main.js");
  serverProcess = utilityProcess.fork(serverPath, [], { stdio: "pipe" });
}
For develop mode, we can simply run the GraphQL script in its builds: graphql-server/dist/main.js. However, in production mode, the script that starts the GraphQL server needs to be accessed through resourcesPath. The is where we build the GraphQL server into the app content. We’ll discuss this path in more detail in the Building the executables section.
Once the app is ready, we start the GraphQL server and then load the web pages. We will change the code based on the createWindow function.
app.on("ready", () => {
const mainWindow = new BrowserWindow({
width: 1280,
height: 680,
});
createGraphqlSeverProcess();
if (isProd) {
setTimeout(async () => {
await mainWindow.loadURL("app://./");
}, 2500);
} else {
setTimeout(async () => {
const port = process.argv[2];
await mainWindow.loadURL(`http://localhost:${port}`);
}, 2500);
}
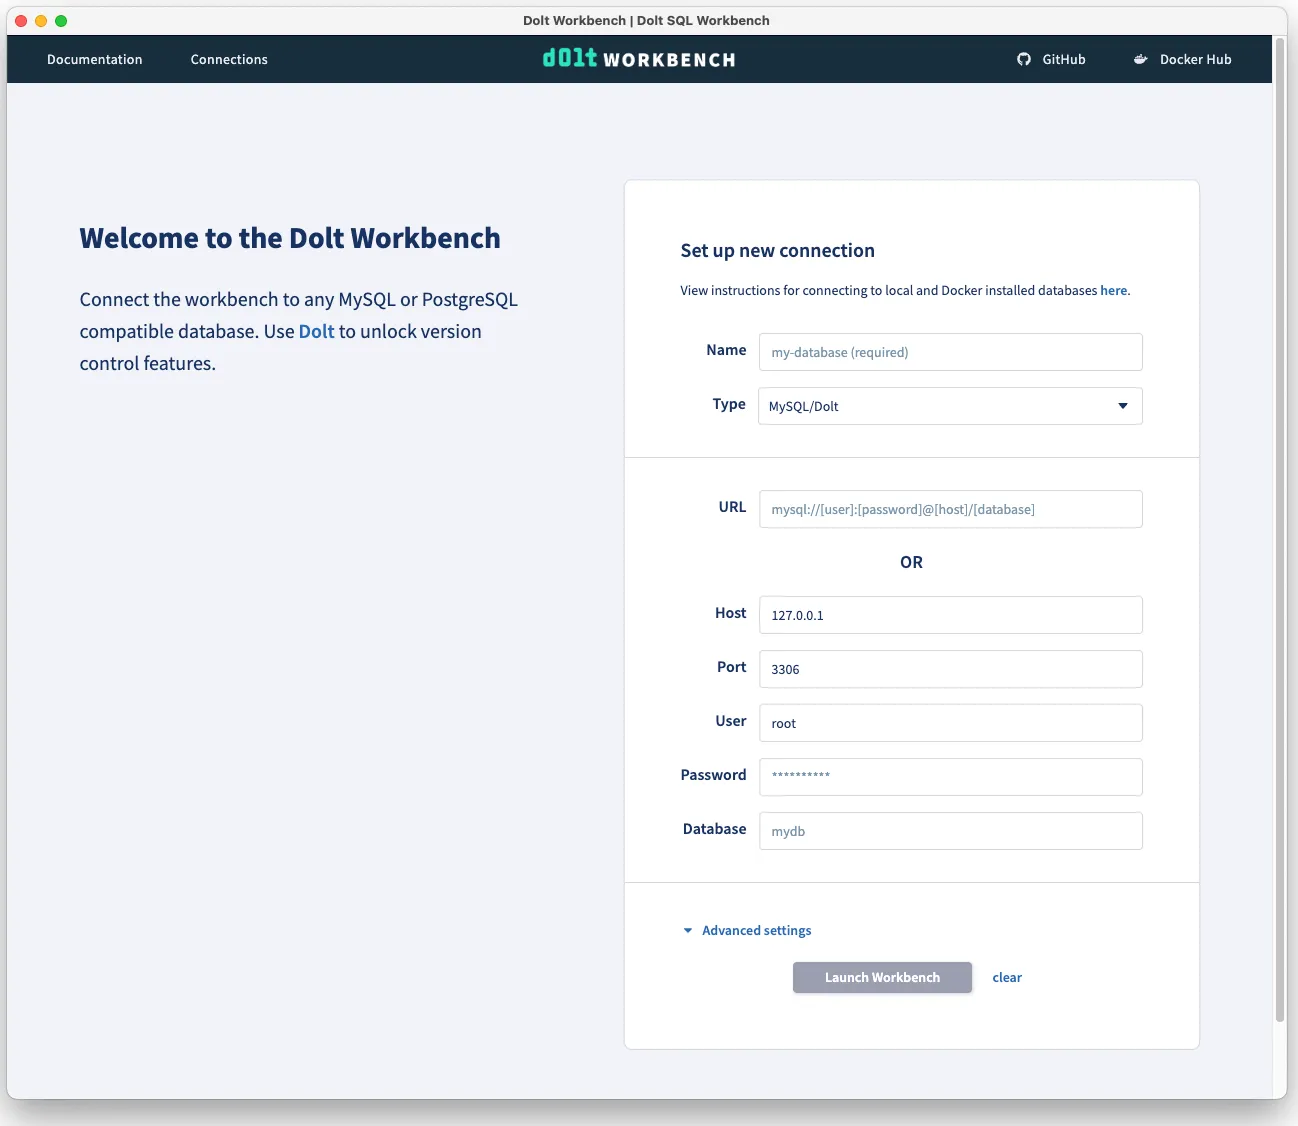
});Here’s a sneak peek of our Dolt Workbench SQL app, which will be released soon!
Before exiting the app, we need to terminate the GraphQL server process.
app.on("before-quit", () => {
  if (serverProcess) {
    serverProcess.kill();
    serverProcess = null;
  }
});
Building the Executables#
Now it’s time to build our application executables, which are the packaged versions of your app ready for distribution. Nextron uses electron-builder to handle this for us, so we can simply run nextron build. You can either create a builder-config.yaml file at the root of the project or add the build configuration directly in the package.json. The documentation for the builder configuration is available here. A basic builder configuration should include definitions for appId, productName and target.
Here’s an example of a builder-config.yaml file:
appId: "com.dolthub.dolt-workbench"
productName: "dolt-sql-workbench"
win:
  target: ["dir", "portable", "zip"]
  icon: "build/icon.ico"
linux:
  target: ["dir", "appimage", "zip"]
  icon: "build/icon.png"
mac:
  target: ["dir", "dmg", "zip"]
  icon: "build/icon.icns"
App Icon#
The app icon needs to be placed in the buildResources directory (which defaults to build). Use an icns file for macOS, a png for Linux, and an ico image for Windows.
Apple provides guidelines and a template for creating app icons for macOS. The image should be square, and for better appearance in the dock, include a padding area around the icon.
![]()
Including the GraphQL Server in the Build#
To package the GraphQL server with the application, add it under extraFiles in the build configuration:
extraFiles:
  - filter:
      - graphql-server/dist/*
      - graphql-server/dist/**/*
This configuration copies the graphql-server files into the app’s Content directory. For a macOS ARM64 build, the path will be something like: dolt-workbench-app/dist/mac-arm64/dolt-sql-workbench.app/Contents/graphql-server. We then use process.resourcesPath to reference the GraphQL server script in our code:
path.join(process.resourcesPath, "..", "graphql-server", "dist", "main.js");Problems and Debugging Tools#
Dev Tools#
To view client-side logs in the main window, we can open the developer tools once the page has loaded:
// in background.js
await mainWindow.loadURL(`http://localhost:${port}`);
mainWindow.webContents.openDevTools();
For debugging the GraphQL server process that runs in the background, we can send stdout and stderr logs to the main browser window:
  serverProcess?.stdout?.on("data", (chunk: Buffer) => {
    console.log("server data", chunk.toString("utf8"));
    // Send the Server console.log messages to the main browser window
    mainWindow?.webContents.executeJavaScript(`
        console.info('Server Log:', ${JSON.stringify(chunk.toString("utf8"))})`);
  });

  serverProcess?.stderr?.on("data", (chunk: Buffer) => {
    console.error("server error", chunk.toString("utf8"));
    // Send the Server console.error messages out to the main browser window
    mainWindow?.webContents.executeJavaScript(`
        console.error('Server Log:', ${JSON.stringify(chunk.toString("utf8"))})`);
  });
This helped me identify why the GraphQL server was exiting after the app started.
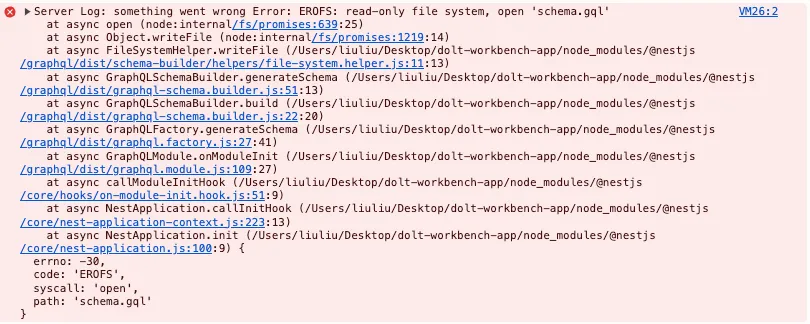
The issue was that we use @nestjs/graphql to generate our GraphQL schema in a code first approach, and the schema.gql file may be modified during the GraphQL server’s runtime. However, once the Electron app is built, all resources are packed inside a read-only .asar file. To fix this, we need to write the schema.gql file to the Application Support folder instead.
// in background.js
import { app } from "electron";
const userDataPath = app.getPath("userData");
const schemaPath = path.join(userDataPath, "schema.gql");
process.env.SCHEMA_PATH = schemaPath;
In the GraphQL server configuration, conditionally set the schema file path:
    GraphQLModule.forRoot<ApolloDriverConfig>({
      autoSchemaFile:
        process.env.NEXT_PUBLIC_FOR_ELECTRON === "true"
          ? process.env.SCHEMA_PATH
          : "schema.gql",
      context: ctx => ctx,
      driver: ApolloDriver,
    }),
Reducing App Size#
Once built, the app structure looks like this:
mac-arm64/dolt-sql-workbench.app/Contents/
├── Frameworks
├── MacOS
├── Resources
│   └── app.asar
└── index.html
The app’s source code is usually bundled into an ASAR archive. If your app is unusually large, it’s likely due to unnecessary node_modules being included in the ASAR file. You can unpack the ASAR file with:
npx asar extract app.asar destfolderBy inspecting the unpacked files, you can locate the large files, and remove unnecessary node_modules or move some to devDependencies. Extracting the ASAR file also helps debug path-related issues.
Static Export and SSR#
Electron simply renders a static webpage inside a native window, so backend functionalities of Next.js (like getStaticProps or API routes) cannot run directly within Electron.
In the Dolt Workbench React app, we use getServerSideProps to fetch data and render pages dynamically. A workaround is using the webpack-preprocessor-loader package.
Install the webpack-preprocessor-loader package in web:
yarn add webpack-preprocessor-loader --devAdd it to the webpack configuration in next.config.js:
webpack: (config) => {
  config.module.rules.push({
    test: /\.tsx$/,
    use: [
      {
        loader: "webpack-preprocessor-loader",
        options: {
          params: {
            isWeb: process.env.NEXT_PUBLIC_FOR_ELECTRON !== "true",
          },
        },
      },
    ],
  });
  return config;
};
Then wrap getServerSideProps to conditionally include it based on the environment:
// #!if isWeb
export const getServerSideProps: GetServerSideProps<Props> = async ({
  params,
  query,
}) => {
  return {
    props: {
      params: {
        ...(params as DatabaseParams),
        refName: query.refName ? String(query.refName) : null,
      },
    },
  };
};
// #!endifConclusion#
I’m still learning about Electron and am far from an expert, but I’m happy to share what I’ve learned while converting the Dolt Workbench to a desktop application. You may have noticed that this tutorial mainly focuses on macOS, as I haven’t had much experience testing or debugging an Electron app on Windows or Linux yet. I’ll share more insights once I get the chance to work on those platforms.
While I mentioned that using Next.js backend functionality directly in Electron isn’t possible, there are workarounds. For example, you can use Inter-Process Communication to communicate between the main and renderer processes. However, this approach can be more complex and requires careful validation of data to avoid security risks, such as unauthorized access or code execution.
The Dolt Workbench desktop app will be released soon, so stay tuned! Feel free to file issues or request features on GitHub, or reach out to us on Discord.