
DoltLab is the self-hosted version of DoltHub that lets you manage and customize a web-based Dolt remote complete with pull-request style workflows for seamless database collaboration.
If you’re looking to try DoltLab for the first time, it has never been easier to get your own DoltLab instance up and running in under 30 minutes! Our updated documentation will walk you through setting up a host and running DoltLab as quickly, with minimal configuration.
For those looking to take the next step in their DoltLab journey by allowing new users to create accounts on their instance, it’s time to connect your DoltLab instance to an SMTP server. Doing so not only allows new users to create accounts, but also powers a number of additional DoltLab features that require the use of an email server. These features include inviting collaborators to databases, letting your users reset their forgotten passwords, and notifying database owners of important changes to issues or pull requests.
In today’s blog I’ll cover how to set up AWS SES and connect it to your DoltLab instance. Let’s dive right in.
Get set up#
To begin, you’ll need to be signed in to an AWS account, and search for “simple email” in the services search bar.

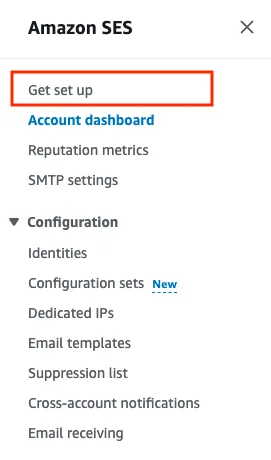
Select “Amazon Simple Email Service”. This will take you to the SES dashboard, but for now, click the “Get set up” link in the navigation panel on the left.
This will bring you to the “Get set up” page, like seen below.
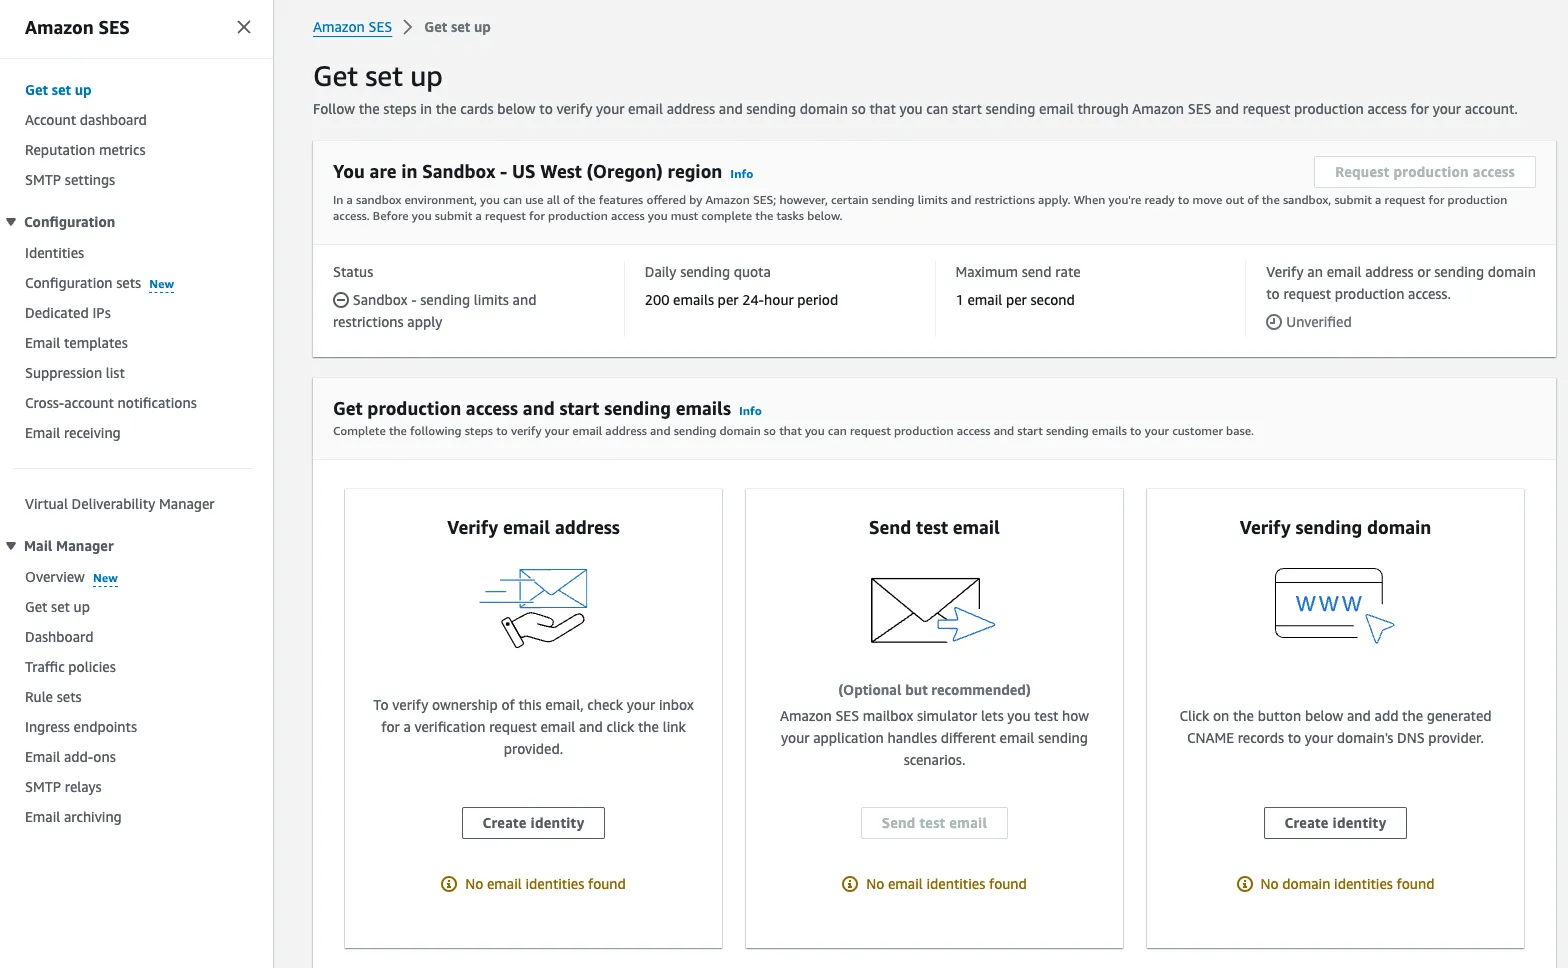
On this page you’ll see 3 cards. From left to right these are “Verify email address”, “Send test email”, and “Verify sending domain”. In this blog we’ll be using the first two cards to set up a single email address identity to use for our DoltLab instance. However, domain identities are easily configured with the “Verify sending domain” card. Verifying your desired domain only requires adding unique CNAME’s AWS provides you to the DNS server where your domain is registered.
Let’s move forward by selecting the “Verify email address” card, and clicking the “Create identity” button.
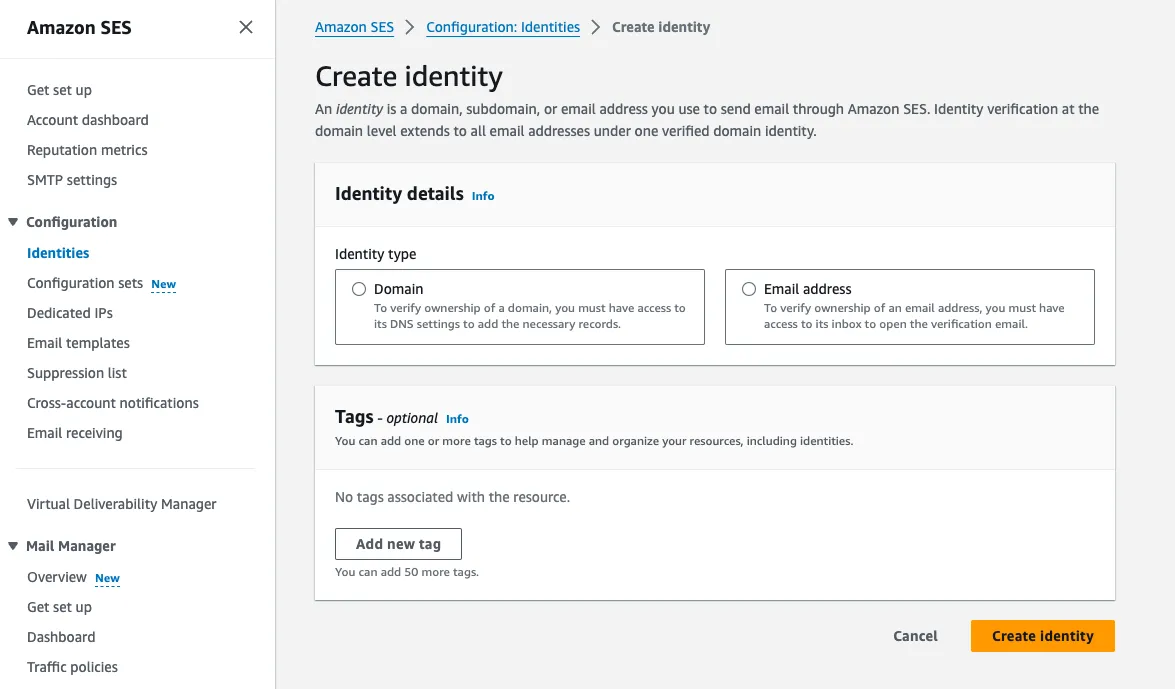
Check the “Email address” option, and enter the address you’d like to use as the sending address for your DoltLab instance. As you’ll see later when we configure DoltLab, this email address will be used as DoltLab’s “no_reply_email”.
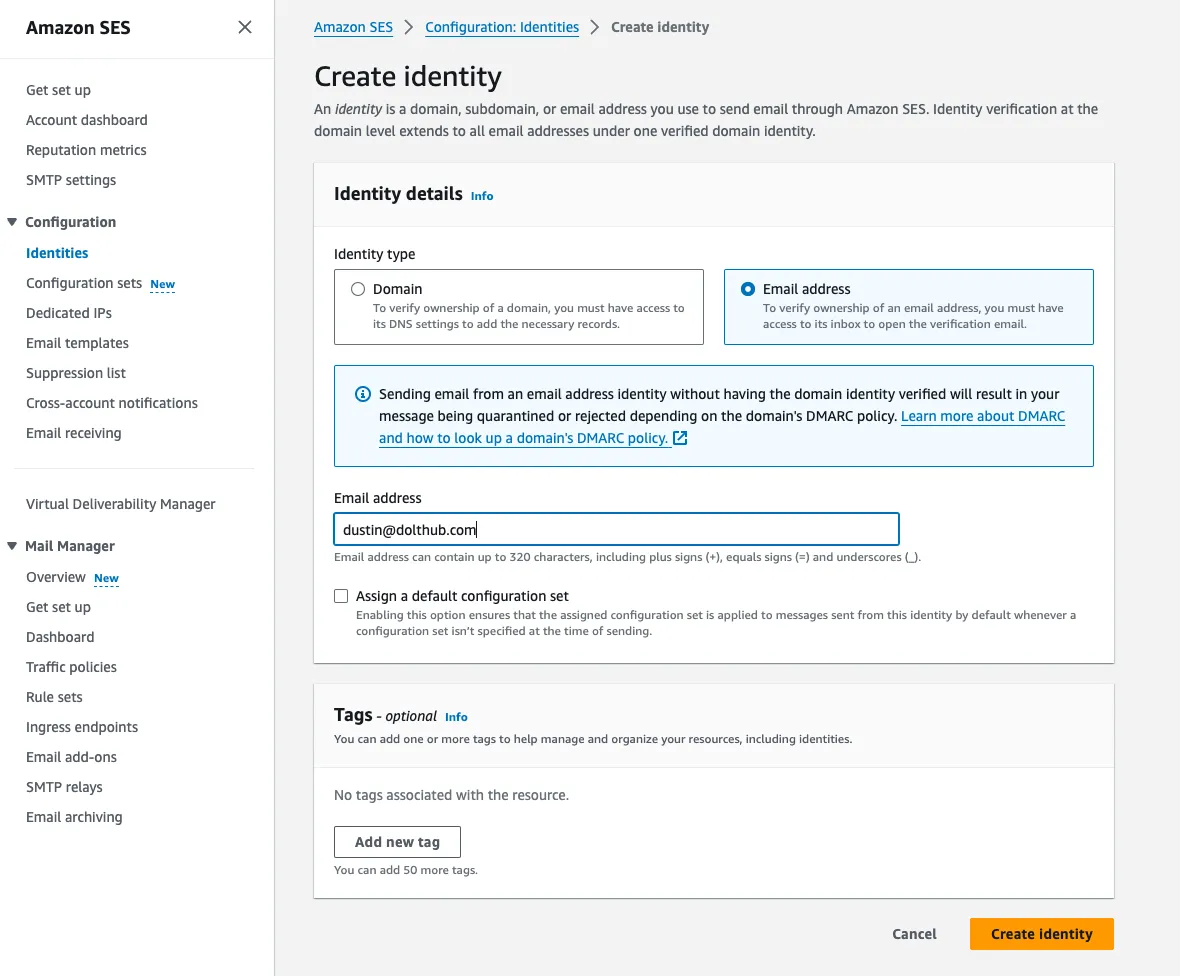
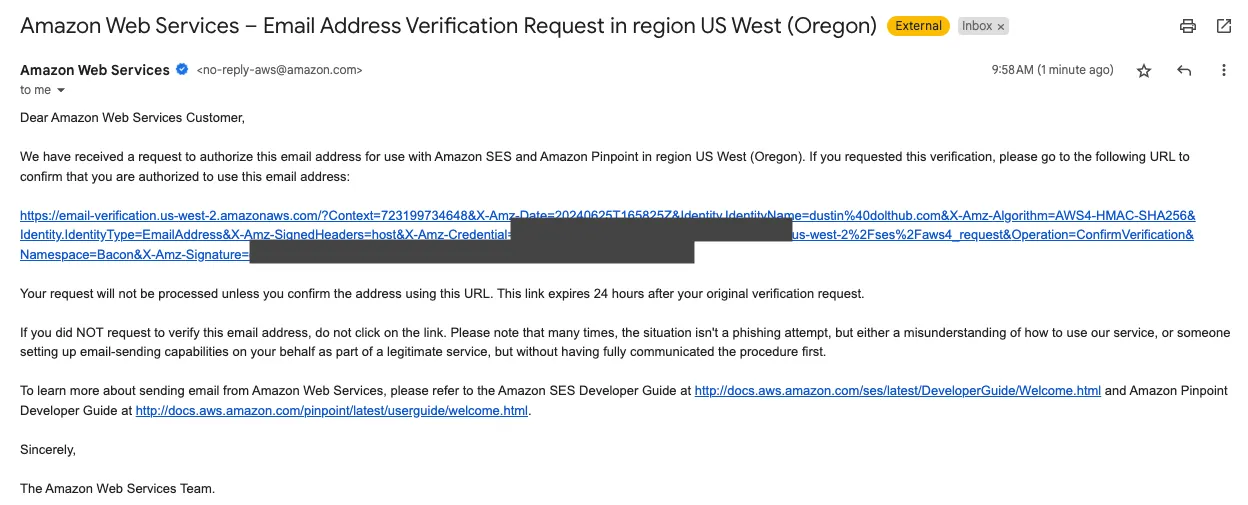
Click “Create identity”. In this example we’ve created the identity dustin@dolthub.com, but as AWS will inform you, the identity you create needs to be verified. To verify this identity, check the inbox of the email you entered for a verification email sent by AWS. It will look like this, and contain a link you need to click for verification.
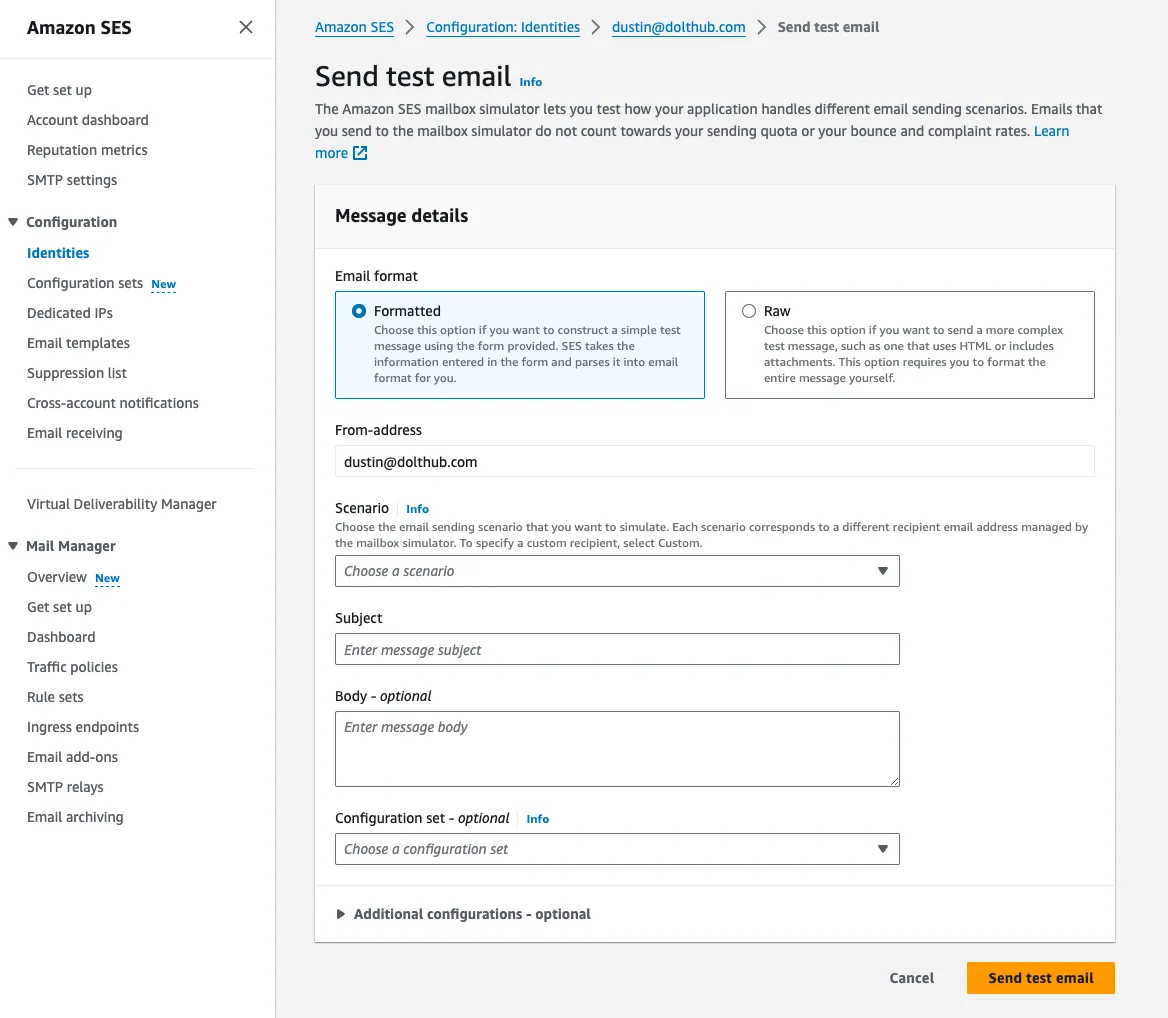
Once your identity is verified, you’re ready for the second card on the Get set up page, “Send test email”. Select that option now.
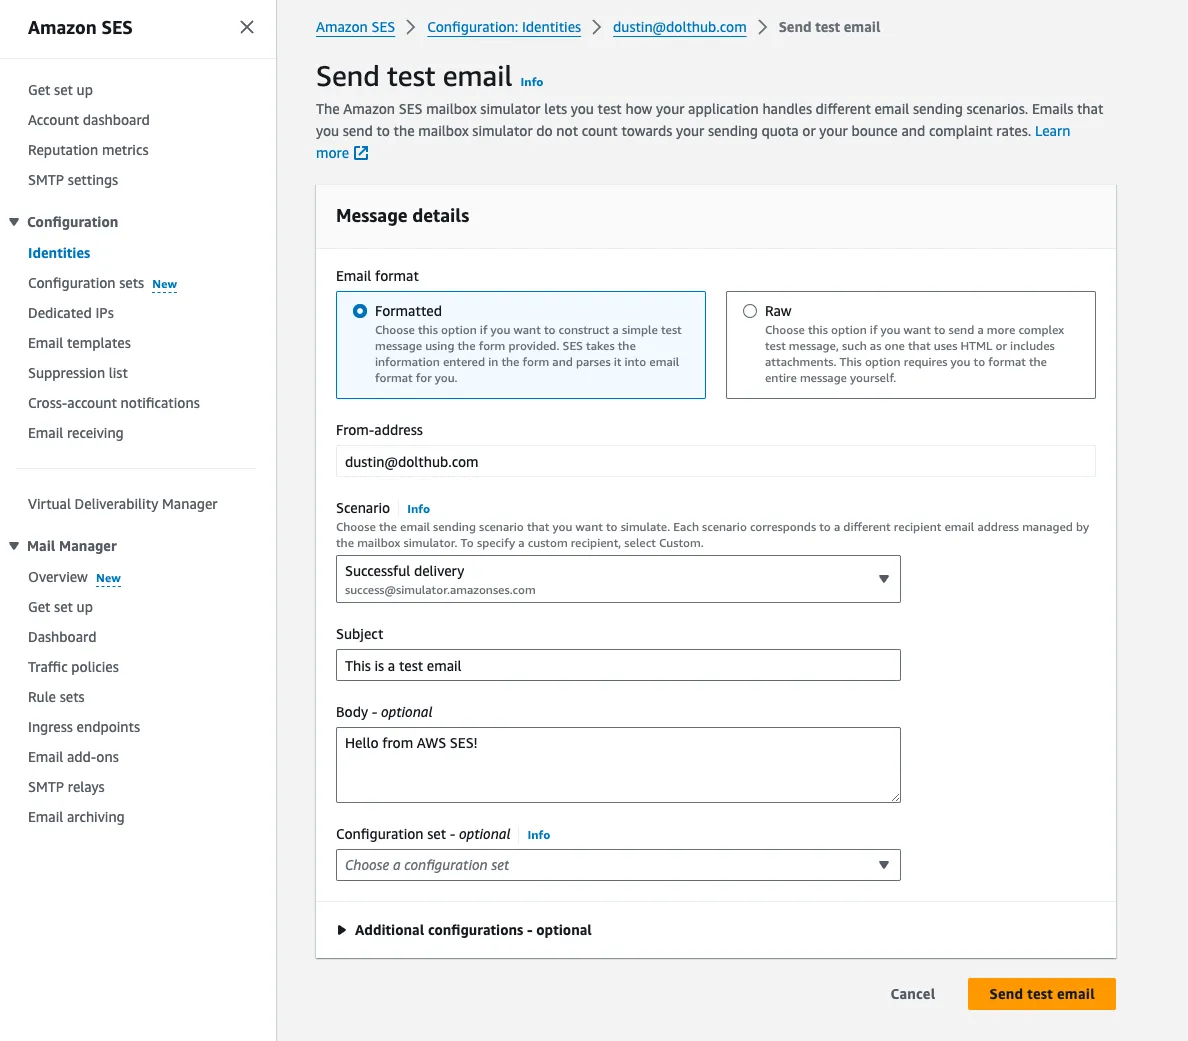
Fill in the Scenario section by choosing the “Successful delivery” option, and adding some content to the test email. When you’ve done that click “Send test email”.
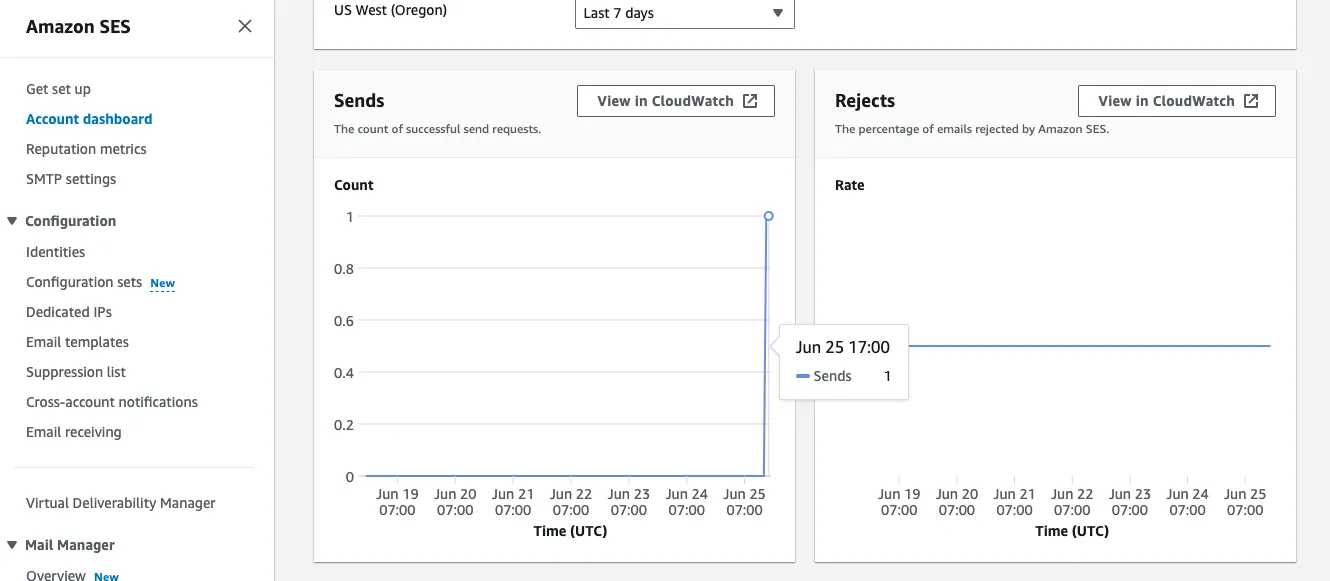
If you’ve followed the steps above, your test email will be successful and you’ll be able to see this in the dashboard metrics.
Great! Our next step is to create SMTP credentials we can use with our DoltLab instance.
Create SMTP Credentials#
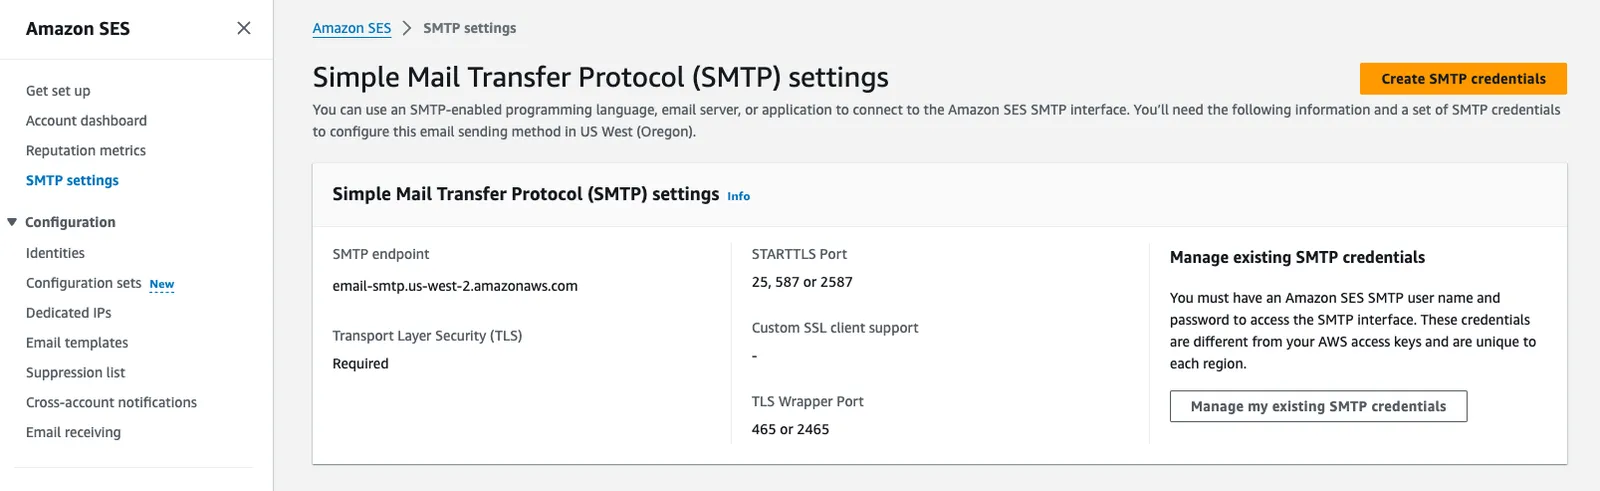
Going back to the navigation panel on the left, select “SMTP settings”. It will bring you to this page.
Click “Create SMTP credentials”. AWS will redirect you to the IAM users page where it will automatically populate an SMTP user with the required permissions for sending emails.
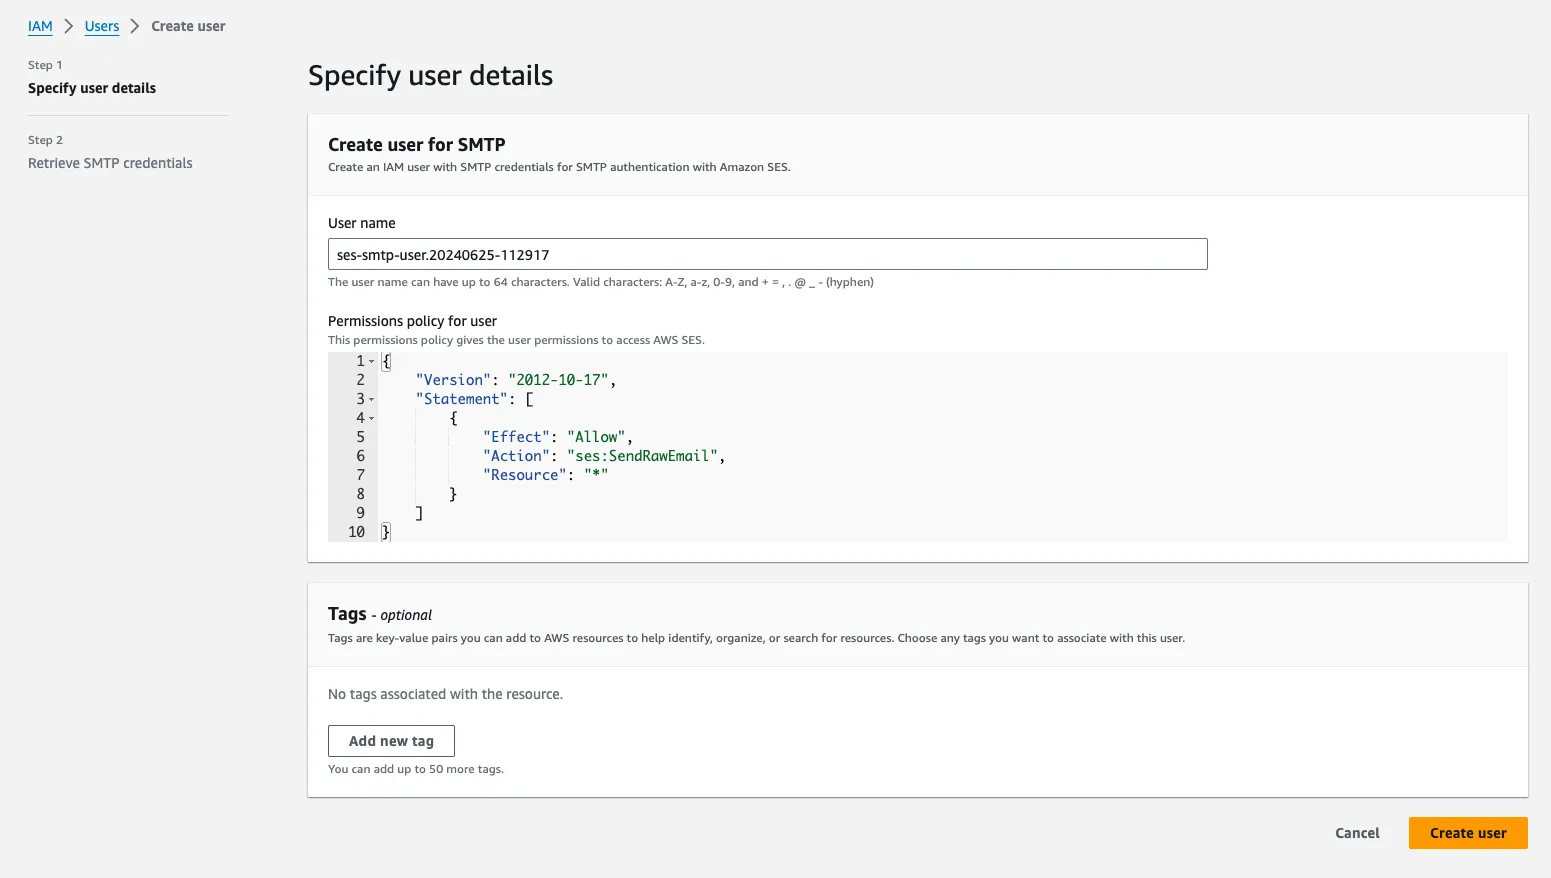
In our example we will leave everything as it is and click “Create user”. Once the user is created, you will see the SMTP user credentials you’ll need for connecting your DoltLab instance.
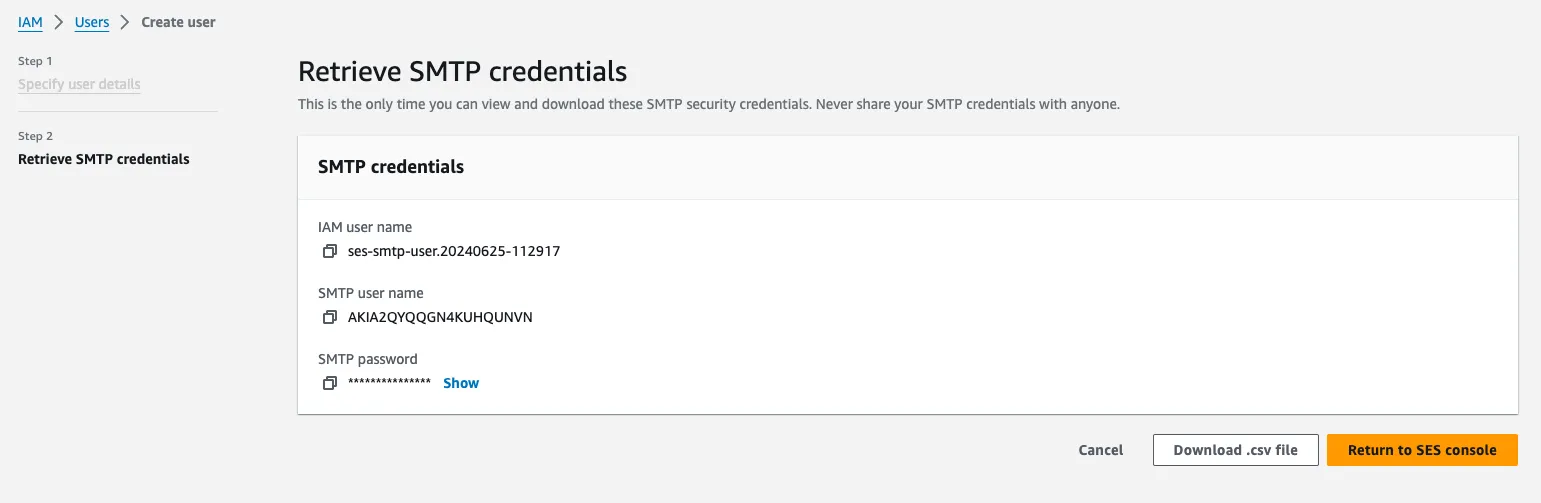
Download the .csv file to easily save your credentials, or make note of the “SMTP user name” (not the “IAM user name”) and the SMTP password. Then click “Return to SES console”.
Finally, click on “SMTP settings” from the menu on the left once more. You’ll need two more pieces of information for DoltLab, the SMTP host name and STARTTLS port.
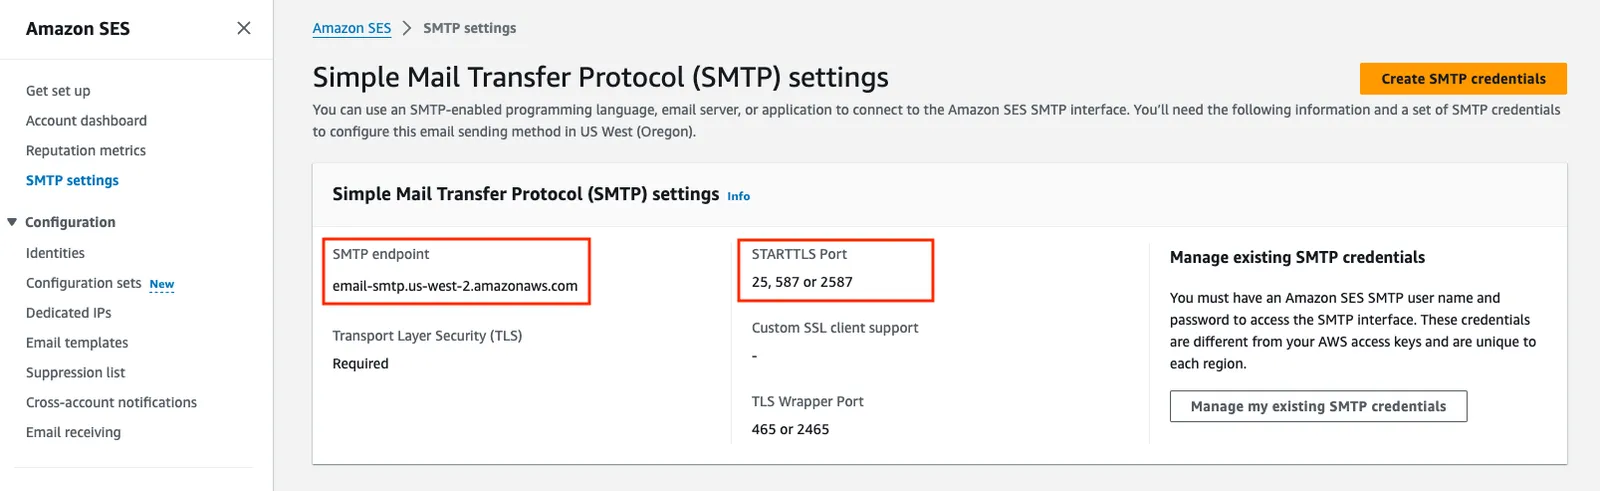
Make note of the host name, in our example that will be email-smtp.us-west-2.amazonaws.com, and also one of the STARTTLS ports. We’ll go with 587.
Connect DoltLab#
Now, return to your DoltLab host and use the ./stop.sh script to stop DoltLab if it’s running. If you don’t have a DoltLab host set up, follow this Getting Started guide to create one.
Once you have downloaded and unzipped the DoltLab zip file, you can use the included ./smtp_connection_helper binary to quickly test your SES SMTP server, before you edit DoltLab’s configuration.
To do so, execute the binary using your SMTP credentials as the username and password. In our example that will be:
ubuntu@ip-10-2-0-139:~/doltlab$ ./smtp_connection_helper --host=email-smtp.us-west-2.amazonaws.com --port=587 --from=dustin@dolthub.com --to=dustin@dolthub.com --auth=plain --username="AKIA2QYQQGN4KUHQUNVN" --password="*********************************"This will send a test email from dustin@dolthub.com to dustin@dolthub.com, and output:
Sending email with auth method: plain
Successfully sent email!
We can now edit the installer_config.yaml to update DoltLab to use these SMTP credentials. Edit the smtp section of the file so that it includes:
# installer_config.yaml

smtp:
  auth_method: "plain"
  host: "email-smtp.us-west-2.amazonaws.com"
  port: 587
  no_reply_email: "dustin@dolthub.com"
  username: "AKIA2QYQQGN4KUHQUNVN"
  password: "*********************************"
Save these changes and rerun the installer.
root@ip-10-2-0-139:/home/ubuntu/doltlab# ./installer
2024-06-26T20:36:28.372Z	INFO	metrics/emitter.go:111	Successfully sent DoltLab usage metrics

2024-06-26T20:36:28.372Z	INFO	cmd/main.go:545	Successfully configured DoltLab	{"version": "v2.1.6"}

2024-06-26T20:36:28.372Z	INFO	cmd/main.go:551	To start DoltLab, use:	{"script": "/home/ubuntu/doltlab/start.sh"}
2024-06-26T20:36:28.372Z	INFO	cmd/main.go:556	To stop DoltLab, use:	{"script": "/home/ubuntu/doltlab/stop.sh"}
You can now start DoltLab up using ./start.sh and it will be connected to your SES email server!
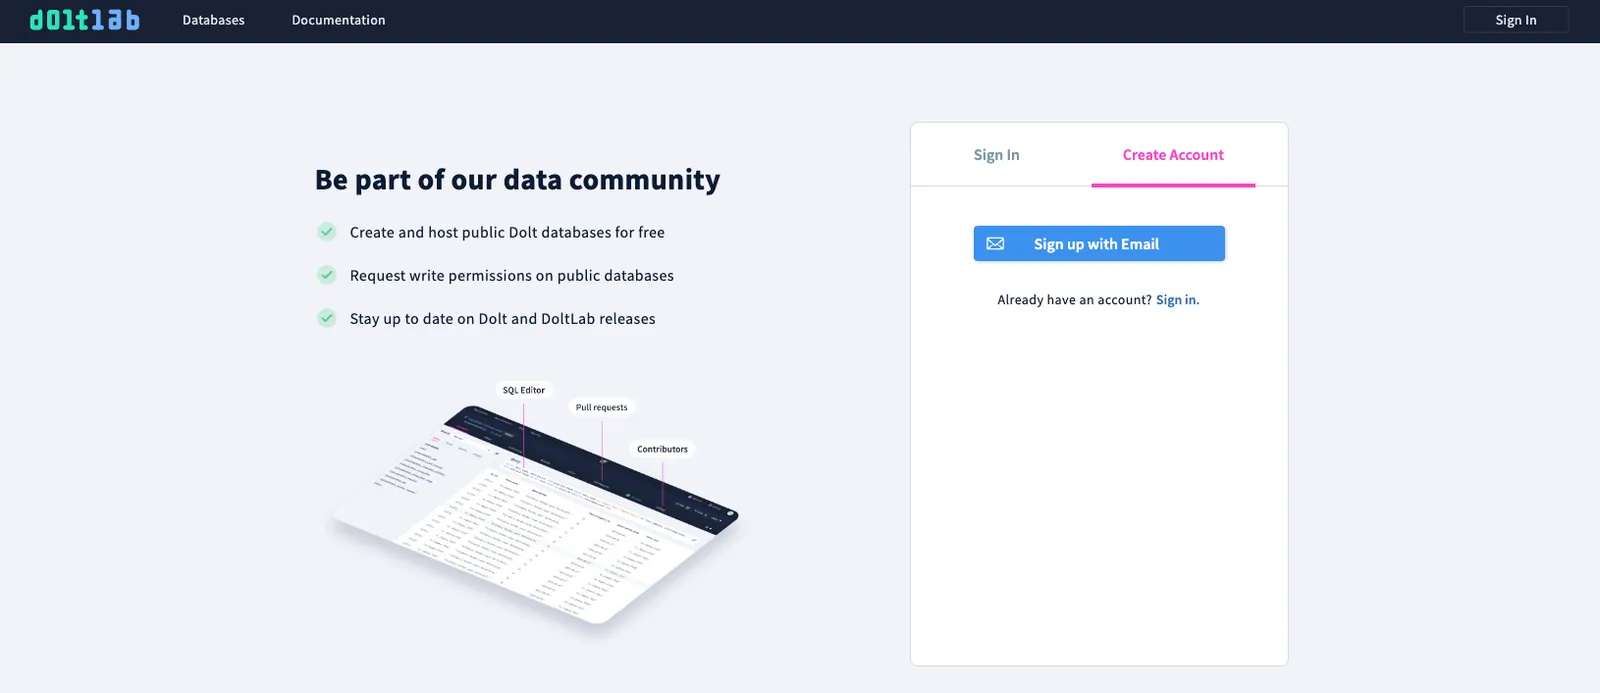
To verify, navigate to your DoltLab’s web page, and click the Sign in button. Let’s create a new user to make sure the DoltLab instance is sending emails successfully. Click “Create Account”, and “Sign up with Email”.
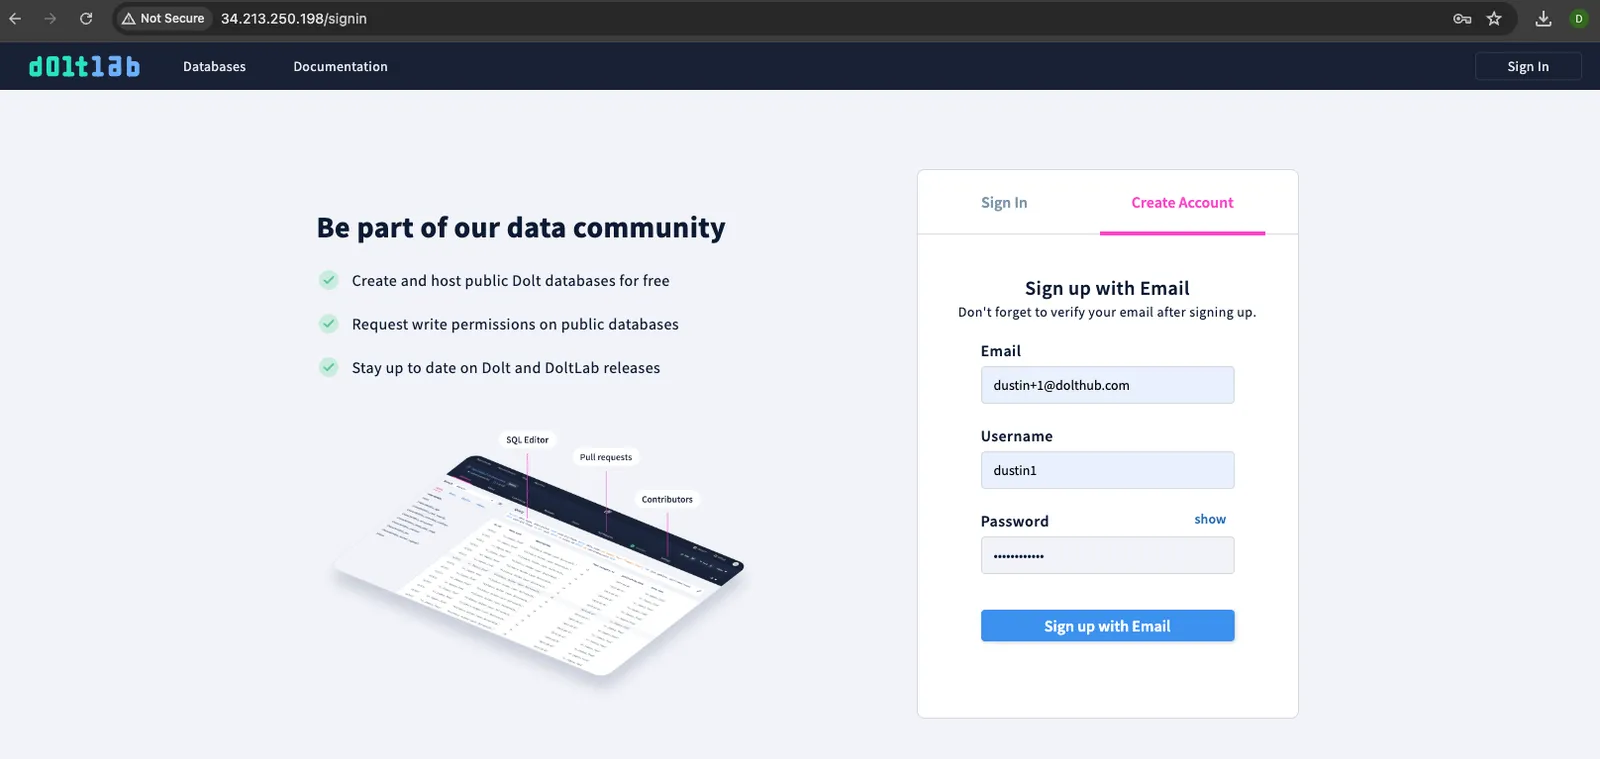
Then, fill in the form and click “Sign up with Email”. I’ll create a user named dustin1.
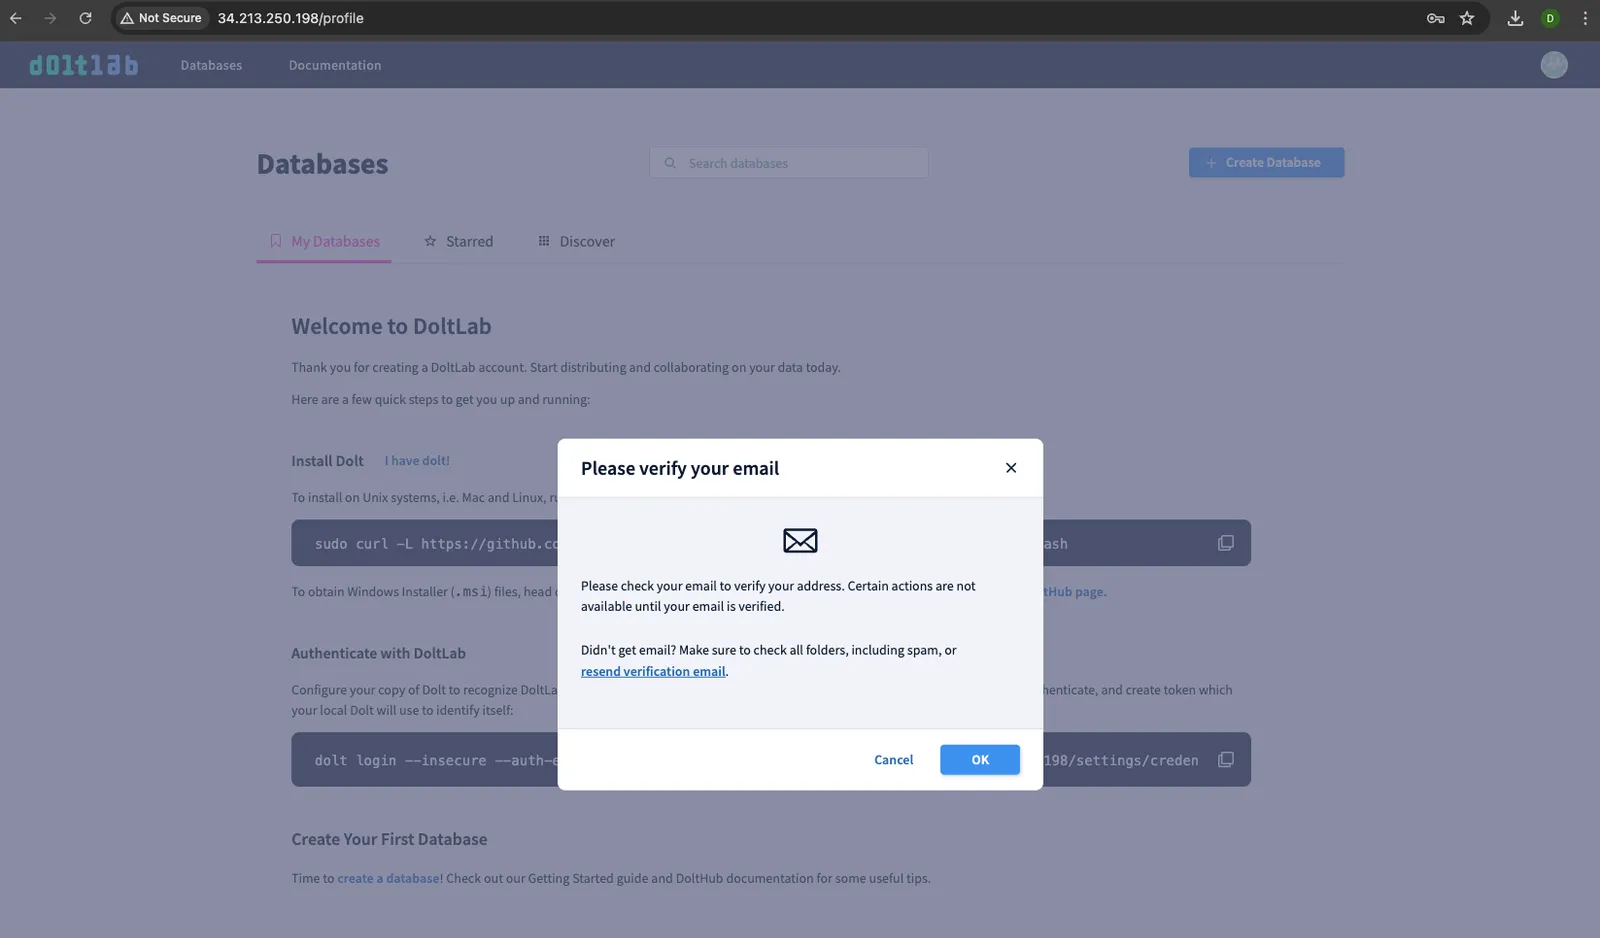
If your DoltLab instance shows you the following page, it is working as expected and will send an account verification email to the address for the newly created user.
Conclusion#
I hope this blog helps you get started with DoltLab and AWS SES quickly. If you want a free trial of DoltLab Enterprise, just ask! As always, we’d love to chat with you, so please come join our Discord server and let us know how you are using DoltLab.
Thanks for reading and don’t forget to check out each of our cool products below:
- Dolt—it’s Git for data.
- DoltHub—it’s GitHub for data.
- DoltLab—it’s GitLab for data.
- Hosted Dolt—it’s RDS for Dolt databases.